
You have unboxed your DJ gear and want to connect everything and start DJing. But basic things first. You need to learn how to mix tracks, and things are going to become technical.
But, it is not rocket science. If you have the right caliber for music, you can learn it as a professional DJ does.
It starts with beatmatching, and you need to understand how two different tracks match perfectly. It will take little time to get the hang of dropping the first beat on the second track. Then you need to learn EQ basics on setting bass, mid, treble, and of course, the volume levels.
We will learn about these basics and some tips and hacks on mixing.
Let’s begin!
Table of Contents
Steps to Powerful Mixing
1. Beatmatching – Manual or digital?

As a beginner, you have to choose two tracks that sound similar. Don’t try to match different genres at the beginning of your learning plan. It’s just a matter to select the BPM, i.e., Beats per Minute.
You may think that mixing digitally is different from mixing with Vinyl or CDs, but the basic principles are the same for mixing for any medium.
Let’s say you chose two tracks with different bpm, and you want to mix them. One track has a bpm of 129 and another one with 135 bpm.
Now take two decks or stand-alone players and play these tracks. Make sure the pitch faders are at zero. If you match both tracks at 135 bpm, they may still not be perfectly matching. Here your potential DJ skills are required.
You need to start beatmatching with your ears manually. That may sound a bit difficult, but let’s see how.
There is a term called headphone cueing. In the master output of your music system, the music track is playing, but the manual mixing is being done in mind manually with the help of ears. In your headphones, you will mix the tracks but not in the music output.
You are preparing your next track to be played. You will be working privately without interfering with the master output. So, if you make any changes, it will not be heard by others, and only you can listen to it.
You need to use the pitch control slider up or down so that two tracks match each other. You have to speed up or slow down the tracks. It may be challenging to find which track is playing slower or faster.
If you have a DJ mixer with a crossfader, you can fade one track a little. This helps you to decide what to do next.
While trying to make both the records play with the same speed, you may use the jog wheel to speed up. If you are using vinyl, you may touch the platter softly to make it play a little slower, or maybe fiddle with the center spindle. All this requires a little practice.
When you hear both the tracks playing with perfect timing, you have done it. With some practice, it will come to you intuitively, and you will be an expert in Beatmatching.
Tip: Nudge in advance
No matter how expert you are, you cannot beat-match perfectly; you need to nudge a little in advance to keep the tracks in sync. So, it is a good idea to nudge a little to slow down or fasten the tracks before they go out of matching.
You need to decide which way to nudge – speed up or slow down. A nudge function also allows you to do the same thing to move a track slightly forward or backward. Visually, you can check the parallel waveforms on the screen.
The quantize option also keeps the beats matched or aligned without you having to adjust the beats.
The digital tools may be handy but sometimes fail in music like drum and bass. So, you must learn manual beatmatching as explained earlier, so that you don’t depend too much on these technologies.
Sometimes, you are in a situation where the cheap or unfamiliar instrument may not match the beats as desired. So, it is always prudent to beat-match by your ears.
2. Counting beats of a track
Dropping 1st beat of the 2nd track at the correct time is very important. This is done by counting the beats. Four beats to the bar are usually represented as 4/4 rhythm.

By counting the beats, you can predict your next step. And you need to identify the break in the track. It usually comes after 16 or 32 beats. After the break, you again listen to the 1st beat.
This is where you need to drop. This way, the breaks of both the tracks come at the same time, and you get a clean and perfect mix.
Dropping is usually done during long instrumental breaks in the track. Otherwise, you may use the loop function, which makes it very easy by converting small rhythms into long ones.
Now you are an expert in beatmatching, but you will need to adjust EQ settings to make the mixing sound just right.
3. EQ function for mixing
After beatmatching, the sounds of two tracks get mixed along with bass lines and kick drums, which may sound awkward. The best way is to remove the bass of the second track entirely by keeping only the mids and highs. It is the most popular method.
Now you can use switching basslines during the breaks in both the tracks. The bass line of the first track is switched from the first track to the second one during the break.
You can gradually increase the low frequency on the 2nd track and decrease the low on the 1st track. This needs a little practice.
Tip: No repetitive EQing
Don’t use the same style of EQing every time. Have a good mixture of different techniques in the entire set e.g., switch bassline, EQ the mids, blend gradually, etc.
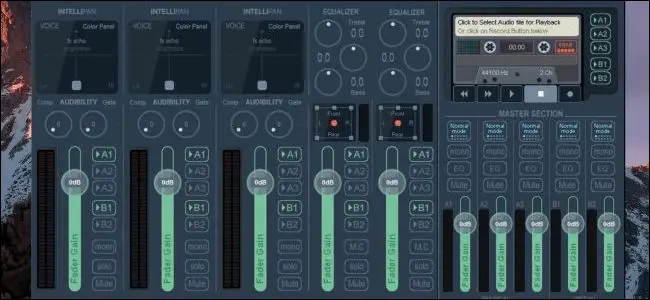
4. Using Gains
In a digital environment, the auto gain function automatically adjusts the volume. In fact, no two tracks may be recorded with the same volume levels.
Mixing such track may sound awkward because one track will dominate the other with lower volume levels. The auto gain function sets the gains for you. But you need to learn to do it manually also.
You can use gain knobs. Some brands use the term as trim or input. You need to adjust the volume of one track manually. But you can’t do it at the master output level. It may sound horrible if you do it live.
You always need to start with a much lower gain in the second track, as compared to the first one. Say about 25%. The moment the crossfader comes in the center, you can increase the gains.
Avoid making the gains too high, as it may damage your mixer. Stop increasing when you see the red lights or decrease the master volume.
The speakers or monitors are very significant here. If the frequency range of your speakers is low, you will not get the desired output. A good set of speakers must have enough bass and frequency range to let the mixed tracks sound perfect.
Tip: Start Low
Start with a much lower gain on the second track, say a quarter of the second track.
5. Crossfader Vs. Channel Faders
As a beginner, we recommend using the crossfader to switch channels. Once you become used to it or get the hang of it, try using up faders, also known as channel faders or volume faders.
When you use crossfader, channel faders are at rest. If you use channel faders, the crossfader will remain open.
You can slide the crossfader to the central position, choose the channel fader of the ongoing track. The channel fader of the second channel is closed until you start mixing.
You can start the fader slowly, which is similar to the crossfader, or you can use channel fader instantly during the break.
In the initial days, using a crossfader is a good option. As you learn the basics, you can start using channel fader to practice mixing with your DJ style.
6. The right kind of Music
There are many genres of music, like Hardstyle, Hip-Hop, House, etc. Hardstyle is more comfortable to mix because the beats are entirely defined.
But, keep in mind that that beatmatching needs to be almost perfect, or you will hear the difference if it is even slightly out of alignment. Mixing of Hip-hop is a bit more difficult because of the full range of BPM and more vocal than the instrumental part.
The speed of the track is going to be more helpful because you can match the beats easily due to higher BPM.
Tip: No mixing here
Don’t mix genre which you don’t like. It is a matter of passion.
Tip: One at a time
Stick to one genre while learning. Having multiple genres is an essential skill that professional DJs have, which you can develop later.
7. Transition – Step by Step
There are three types of transition techniques – Beatmatching, Cutting, and Fading. In general, dance style prefers beatmatching, Hip-hop DJs go for cutting and Radio DJs like fading.
You can use one of them or a mix of transition techniques asper your choice. We have already explained beatmatching earlier. Let us know more about fading.
A new track is required to be played before the end of the first track by using a transition technique. There are extended versions of tracks, which give enough time to DJs to make the transition because they have long intros and outros.
This provides breathing space for DJs. Once the second track blends properly, the first track needs to be faded out.
To understand it step by step, let us see the drill.
- Track A is playing and is going to end
- Put on your headphones.
- Bring Cue Mix or Master Fader to the middle (on your mixer)
- Now you hear Channel A and B on headphones
- Start track B on the first beat of instrumental of track A
- Correct the mistakes if any
- Track A is close to its ending. Remove the headphones.
- On the 1st beat, move Fader B halfway up and notch A up a little.
- Now Fader B up and Fader B down. Maintain the same volume on the Master volume meter
- Bring B to 100% slowly and take out A completely. The transition is completed.
Tip: One ear Cueing
Have one year to the dancefloor and another one to the headphone. A button on the controller’s channels plays the channel to your headphones and not on the master output speakers.
You can make corrections or adjustments in the headphone. This is called cueing.
The cue button on the mixer lets you choose the channel output to your headphone. Cueing means listening before introducing it in the mix. The Cue Points help in beatmatching.
These are marks on the tracks at specific points e.g., first beat, breakdown, vocals. They assist you in finding the location on a song digitally. In the old days, it was done manually on the vinyl by approximation.
Hacks for DJ Beginners
Here are a few hacks to end up with better mixing skills.
1. Recording
With recording, you can find yourself what is wrong, and with several iterations can improve to get that perfect mix. You can give recorded tapes or CDs to your friends and take their valuable feedback.
This can undoubtedly enhance your mixing style, but you need to work upon it. You can also connect your mixer to the computer with an audio interface and record directly or through software.
You can also record with many apps or software freely available in the net, which even lets you edit your mixes.
In order to promote your DJ style, you can upload the mixing or distribute recordings samples to your network friends and acquaintances. Make sure to include the name and contact details of your DJ brand so that people can get back to you if they like you.
But wait before you make haste. It is better to come to a particular experience level before distributing the samples, because, after 1-2 years, you old samples may haunt you if they are markedly different than your new style.
2. Loops
Loops help you increase the length of the instrumental part of a track to enable you to mix another track at the 1st beat. You simply get more time. Some hardware or software programs come with auto loop function.
When you stop looping, the track plays as usual. The auto loop finds the closest beat and adjusts the loop length. It can range from 32 beats to 1/32 of a beat.
3. Learn with friends
Friends make you learn in a special way. Just as you learn a language, you pick up very fast in a setting with your friends around. You can make mistakes, teach one another, share tips, combine styles, etc.
4. A party animal
A party hall has a different ambiance compared to your bedroom. You may not perform well if you simply move from bedroom setup to the loud club DJ.
Parties will help you in getting used to a different setting with a place full of lights and loud sounds.
5. No booze, please
Never mix drinking with Mixing. It can be counterproductive. Alcohol can badly affect your creativity. Wait till your job is over.
You may not like to be in a situation that people throw you out or boo you down, or your instruments get stolen. It is kind of rare, but it may not happen in the first place.
6. Learn from professionals
Try to learn the style of professional DJs by buying and listening to them time and again and studying their unique styles. You can also visit a club and watch live DJs so that you learn in a professional setting.
7. Your motives
Why do you want to learn to mix? For money or girls or the pure love of music. If you don’t have the right reasons, you may not go far ahead in DJing. It is a work of passion, and wrong reasons spoil the efforts.
8. Fun part
You must enjoy what you do. After learning the basics of mixing, you can develop your unique style of mixing. There are no fix rules, and you can create a fresh mixing style, and it will be perfect if it sounds smooth and clean.
Well, it could be a masterpiece. Play with the settings and do your own thing. When you add the fun part to your creations, the audience is going to love it. It is a long process and doesn’t happen overnight.
Don’t worry if things go wrong, and they will. Keep trying, and you will get it right eventually.
Jargons Demystified
A beginner may be horrified to hear strange terms like EQ, BPM, cueing, gains, etc. Let us simplify a few terms, which are the basic terms used in a mixing environment.
- Audio interface – a type of sound card to connect to laptop by USB with audio input or output options
- Amp – Short form of amplifier
- BPM: Beats per Minute. It measures the tempo e.g., 126bpm
- Breakdown: It is the part of any track when the beats stop, usually before the climax
- Bass – Lower frequency of audio, also known as the lows
- Bar – 4 beats in a dance music
- Beatmatching – Mixing two tracks by matching their beats
- Crossfader – In a mixer, a horizontal knob allows fading of one channel in and fading out the other one
- Cueing – Before mixing tracks, when you listen to mixing of tracks in your headphones, it is called cueing
- Cans – Headphones are also known as cans in DJ slang
- Cue Points – They help in tracking specific points on a track e.g., 1st beat, vocal, instrumental, etc. Cue points can be saved.
- Channel – Audio input or output or both. It has volume and EQ control
- Cut – Swap one track to the other instantly. It is also a DJ slang
- Dynamic Range – Difference between the volume of the highest and the smallest point
- Deck – Main player using CDs or vinyl, also called a turntable. It could also be a software deck
- DVS – Digital Vinyl System
- DJ – Disc Jockey
- EQ – EQ stands for the equalizer. It is used to change the sounds and Filter
- Fade – turn the volume up or down
- Filter – a type of FX
- Gain – control to boost or cut a volume level, more powerful than a fader
- Genre – A category of music like Hip-hop,
- Intro – The beginning of a song
- Low, Mid and Highs – 3 types of frequencies on 3 band EQ channels
- Looping – repeating a part of an audio
- Master out – Master output of volume of sounds sent to speakers which the audience listens to and enjoys
- Mixing in key – It is challenging to mix genres. Some songs do not just mix, but some songs are made for each other because they have similar keys like tempo, beats, genre, rhythm, etc. If you mix tracks with the help of keys, it is called ‘Mixing in the Key.’
- Outro – The ending part of a song
- Phrase – part of music that repeats in a song
- Pitch control – It is a slider button on the DJ deck to adjust the tempo
- RJ – Radio Jockey (a type of DJ)
- RPM – Revolutions per minute. It is used to tell the rotation speed of vinyl when it is being played. E.g., 45 rpm
- Sampler – It stores a part of track audio for playback
- Scratching – Same as turntablism – A sound produced by touching a moving vinyl to make it move forward or backward. It is a DJ slang.
- Turntablism – Pls see Scratching. It is also a DJ slang.
- Tempo – speed or pitch of the music, measured in BPM
- Waveform – It displays audio on the screen in a visual form
