I started saving tiny fabric scraps after finishing a throw and before I knew it a basket of odd shapes lived on my sewing table. Making Easy Scrap Fabric Crafts became a quiet habit that turned evenings into little experiments, the kind that feel like chatting with an old friend while stitching.
These ideas for Easy Scrap Fabric Crafts grew from happy accidents and slow discoveries.
I often find that a scrap that looks useless becomes a favorite when stitched into something small and practical, and that feeling keeps me coming back for more.
Best Sellers


As an Amazon Associate, I earn from qualifying purchases.
Patchwork coasters for cozy tea moments

I have a stack of tiny coasters that started as a way to use fabric crumbs, and I reach for them on rainy mornings. Each coaster is a small collage of textures and colors, the seams forming a tiny landscape under a warm mug.
The feel of cotton against the fingertips and the gentle weight of quilting cotton gives every sip a little ritual. Patterns that once felt mismatched now sit together, and the irregular edges add charm rather than bother.
They live in a shallow basket and make tea feel slower and softer.
Steps
- Cut fabric scraps into similar sized squares or irregular patches and arrange them into a pleasing composition on a table.
- Sew the patches together with a quarter inch seam allowance and press seams open for a flat finish.
- Layer the patchwork with batting and backing fabric, then quilt through all layers with straight or freeform lines.
- Trim the edges to a neat shape and finish with a topstitch or binding around the perimeter.
Scrap fabric garland that brightens a room

The garland I made hangs across my kitchen wall and it changes mood with the seasons. Little flags and ribbons of printed cotton and leftover voile sway when a door opens, catching light and making the room feel friendlier.
I like running my fingers along the frayed edges and remembering where each scrap came from. The rhythm of repeating motifs calms me, and the uneven lengths give it a hand-tied, unpolished charm.
It has become a favorite backdrop for casual dinners and an easy way to add color without fuss.
Steps
- Select strips of fabric in a palette that complements the room and cut them into uniform lengths.
- Fold each strip around a length of twine or thin cord and secure by sewing close to the cord to create a looped flag.
- Space the flags evenly along the cord and add knots or beads between sections for extra texture.
- Tie loops at each end of the cord for hanging and adjust spacing as needed once draped.
Soft yo-yo cushion front for old sofas

I once covered a cushion with dozens of fabric yo-yos and the result felt like a quilted bloom. Each puff of gathered fabric sits next to another, forming a textured surface that invites touching.
The contrast between silky scraps and matte cotton adds little surprises under the palm, and the cushion seems to catch light differently through the gathered centers. It’s become a conversation starter when friends sit down, and I like how the uneven profile softens a rigid line of a chair.
The project turned leftover bits into something unexpectedly plush.
Steps
- Trace circles on fabric scraps and cut them into discs slightly larger than the desired final yo-yo size.
- Run a running stitch along the edge of each disc and pull the thread to gather into a small rosette, knotting to secure.
- Arrange the yo-yos on a cushion front, overlapping edges for fullness, and sew them in place by hand or machine through their centers.
- Finish by attaching the cushion backing and closing the seam to enclose the stuffing or cushion insert.
Denim pocket organizer for small tools

An old pair of jeans became a hanging organizer that now lives by my craft table. Those sturdy pockets hold pens, small rulers, and bits of thread, and the worn denim brings a lived-in look that feels practical and a little nostalgic.
The frayed edges and faded indigo tell a story, and the weight of the fabric keeps the organizer hanging straight. I enjoy the little pockets that fit oddly shaped items with ease, and the snap of a button or the curve of a pocket seam adds character to the tool storage.
Steps
- Remove pockets from a pair of jeans by cutting around the pocket openings and preserving a border of fabric.
- Arrange multiple pockets on a backing piece of sturdy cotton or canvas and pin them in place to finalize layout.
- Topstitch around pocket edges to secure to the backing and reinforce stress points with extra stitching.
- Add a fabric loop or rod pocket at the top of the backing for hanging and finish raw edges for durability.
Scrappy key fobs that feel special

Key fobs made from scrap fabric are small pieces of cheer I carry every day. The looped fabric and a tiny metal clasp make reaching for keys a softer moment, and each pattern sparks a memory of another project.
I enjoy the way a strip of bold print contrasts with a quiet linen backing, and the weight of the hardware gives the fob a reassuring feel. They slip into pockets easily and make finding keys quicker because of the little flash of color.
Giving them away has been a pleasant surprise for friends.
Steps
- Trim fabric scraps into long narrow strips and press them lengthwise to create a neat edge.
- Wrap the strip around a key fob hardware base and stitch or glue the ends securely to enclose the metal.
- Reinforce the seam with topstitching and add decorative embroidery or a small patch if desired.
- Attach keys to the hardware ring and trim any excess fabric for a tidy finish.
Corner bookmarks made from pretty scraps
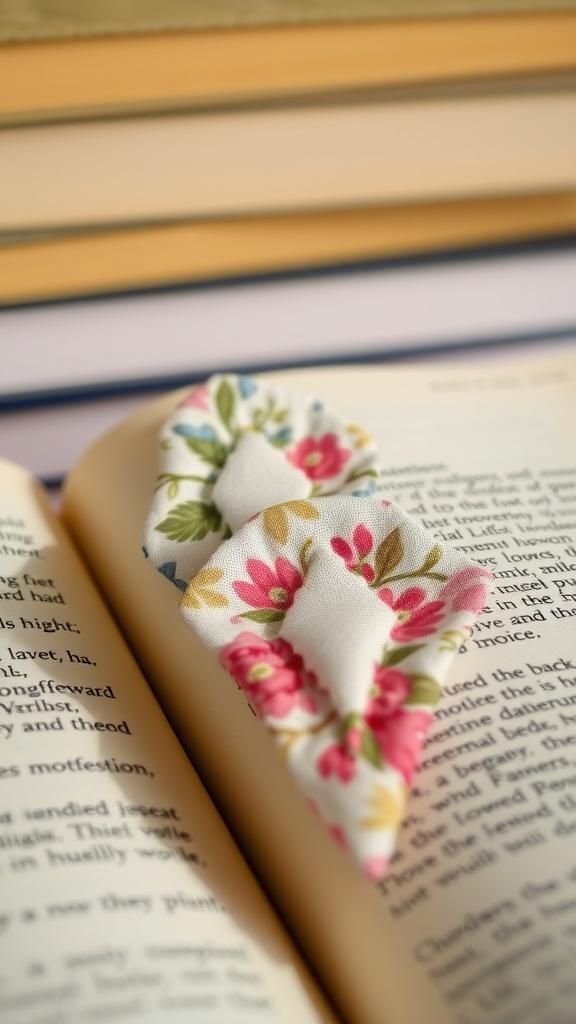
I have a handful of corner bookmarks tucked into current reads, each one a tiny patch of fabric that peeks from the page. The folded triangle slips onto a book corner and the printed motifs make the book feel personal.
I like the tactile contrast between a smooth silk scrap and rough linen, and the little stitched edge makes the bookmark hold its shape. There’s something quietly joyful about finding a familiar scrap inside a novel, an echo of other projects tucked into reading time.
They make thoughtful, simple gifts for fellow readers.
Steps
- Cut two triangular pieces of fabric in matching sizes for each bookmark and place them wrong sides together.
- Sew along the two shorter sides, leaving the long side open, then turn the triangle right side out.
- Topstitch along the edges for strength and slip the long side around a book corner to hold in place.
- Add a small decorative stitch or a tiny patch to the outside for visual interest.
Covered buttons for old sweaters and quilts
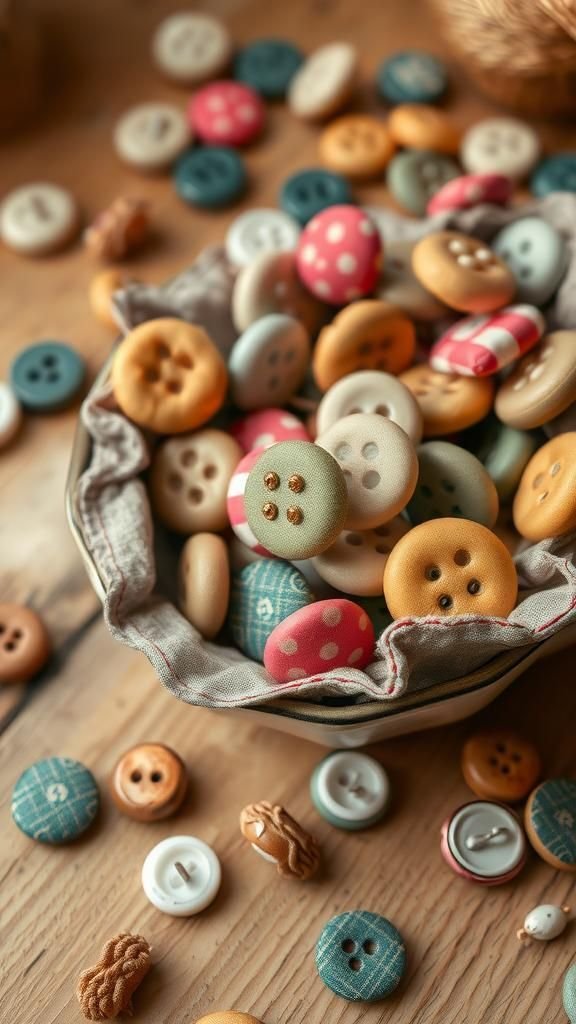
Covered buttons bring a bespoke touch to garments and home projects. I keep a jar of little covered versions that match tiny scraps, and they make a mended sweater feel custom.
The rounded fabric surface adds softness and continuity when a favorite print is echoed elsewhere on a quilt or cushion. They sit in a dish on my table, catching the light and prompting me to imagine different placements.
Sewing one onto a plain item often lifts its mood, and the small scale of buttons makes them a satisfying, low-commitment way to add personality.
Steps
- Select a button covering kit sized to the button and cut a fabric circle slightly larger than the metal base.
- Place the fabric over the button shell and press the inner ring into place to gather the fabric securely.
- Trim any excess fabric close to the shell and attach the button back to lock everything in place.
- Sew the finished button onto garments or cushions, reinforcing with sturdy thread for everyday wear.
Mini rag rug for a cheerful floor patch

A tiny rag rug by my door absorbs drips and greets visitors with a burst of color. Strips of repurposed cotton and linen braided together create a pleasantly uneven surface underfoot.
The rug’s slightly bumpy texture is unexpected against bare feet, and the mix of prints gives it an improvised, lively spirit. It sits where shoes are kicked off and has become a little ceremony of arrival.
Over time the edges soften and the colors mellow, which feels like a small, well-loved transformation that matches the rest of a lived-in home.
Steps
- Cut fabric into long strips and tie three strips together at one end to begin a braid.
- Braid the strips firmly for a length until you have a long rope, adding additional strips as needed to maintain thickness.
- Coil the braided rope into a spiral on a flat surface and stitch along the inner and outer edges to hold the shape.
- Continue coiling and stitching until the rug reaches the desired size, then finish the outer edge neatly.
Braided fabric trivet with warm tones

The trivet on my kitchen counter is a comforting patch made from braided strips that takes the heat of pans without drama. The thickness gives a reassuring heft when a dish is set down, and the overlapping braids form an interesting topography of fabric.
I like how the saturated colors hide tiny spills and how an accidental clash of prints adds personality. It lives near the stove and has a faint patina from frequent handling.
Small frayed threads peek out at the edges and somehow that roughness makes it feel honest and used.
Steps
- Slice long strips of cotton or other heat-tolerant fabric and braid them together tightly to form a long rope.
- Form the braided rope into a circular shape and stitch through the layers at intervals to secure the spiral.
- Continue coiling and stitching until the trivet reaches the desired diameter for pots and pans.
- Finish by tucking and stitching the rope end under the outer coil for a neat closure.
Woven fabric coaster with rustic charm

This coaster began as an experiment with short fabric strips woven together and turned into a reliable table mate. The alternating patterns create a subtle checkerboard that pleases the eye, and the slightly bumpy surface adds a tactile note during morning coffee.
I like the way frayed edges peek out along the sides and how the woven structure holds up to daily use. The mix of cotton and old shirts makes the coaster comfortable to handle and forgiving of spills.
It sits under a mug and quietly brightens small moments.
Steps
- Cut fabric into uniform narrow strips and lay out warp strips parallel on a flat surface.
- Weave weft strips over and under the warp strips, alternating with each row to build a woven square.
- Secure the edges by folding and stitching the ends or by binding with a narrow fabric strip.
- Add a layer of batting and a backing fabric if desired, and stitch through all layers for stability.
Braided denim belt that tells a story

An old waistband was transformed into a braided belt that now sits in my accessory drawer, carrying visible wear like badges of life. The heavy denim braid feels substantial and breaks in with use, then fits more comfortably than when it was brand new.
The mix of different indigo shades creates a subtle ombre along the length, and the tin buckle gives it a utilitarian finish. It pairs well with jeans and dresses alike, adding a handmade accent that makes an outfit feel curated rather than contrived.
I enjoy the quiet texture it brings to simple outfits.
Steps
- Cut denim from old jeans into long uniform strips and braid three or more strips tightly to create a thick rope.
- Finish the ends by folding and sewing them securely, inserting a buckle on one end and creating a loop on the other.
- Stitch along the length of the braid at intervals to maintain shape and prevent shifting.
- Trim any excess threads and wear the belt to allow the denim to soften with use.
Fabric flower brooches for every jacket

I made a handful of floral brooches that pop on neutral coats and brighten collars. Each bloom is layered from circular scraps, the little folds catching light and shadow.
Pinning one to a bag or scarf has become an easy way to change mood without overthinking an outfit. The petals crinkle softly with handling, and the center button or bead gives it a tiny focal point.
I often match colors to the season: warm russets in autumn and cool blues in spring. They live in a small box and feel like wearable treasures.
Steps
- Layer fabric circles from largest to smallest and gather each layer toward the center to create petal volume.
- Stack the gathered layers and stitch through the center to secure the bloom shape.
- Sew a decorative button or bead into the center for a finished look and attach a brooch pin to the back.
- Fluff the petals gently to achieve the desired silhouette before pinning onto garments.
Seasonal scrap wreath for a cheerful door

A mini wreath made from tied fabric strips has hung on my door through multiple seasons, picking up different ribbons as mood shifted. The tied knots create a dense, tactile surface and a halo of color that greets anyone who arrives.
I like that the scraps can be rearranged and refreshed, and the worn hems tuck into one another to form a voluminous ring. The wreath feels informal and welcoming, and it reflects the casual, ever-changing pace of everyday life.
Guests often comment on the texture before they notice the pattern choices.
Steps
- Wrap a foam or wire wreath form with a base fabric and tie short strips of scrap fabric evenly around the form.
- Continue tying many strips close together until the form is densely covered and no base shows through.
- Fluff and trim the strip ends to shape the wreath into a full, even circle.
- Add a small embellishment like a bow or dried foliage if desired and attach a hanging loop.
Patchwork tote bag: small but very useful
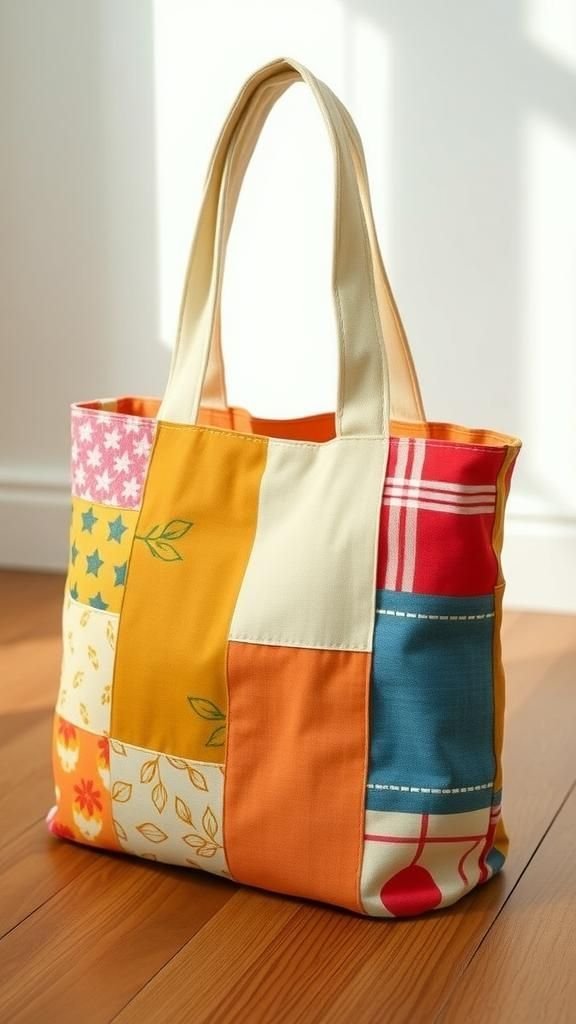
A little patchwork tote from odd scraps sits by my door for quick errands and library runs. The patchwork front feels like a tiny gallery of leftover prints, and the sturdy cotton handles balance the bag comfortably on the shoulder.
I appreciate the way different weights of fabric come together and how a mismatched panel can become the focal point. The interior is forgiving of collapsing groceries and folded papers, and that makes the bag both workmanlike and charming.
It folds flat when not in use and always seems to catch a stray compliment.
Steps
- Sew patches together to form the front and back panels of the tote, aligning seams neatly for a smooth surface.
- Cut lining fabric and assemble the outer panels with interfacing if additional structure is desired.
- Sew side and bottom seams of outer panels and lining separately, then attach handles to the outer bag.
- Insert the lining into the outer bag, stitch the top edge together, and topstitch for a finished look.
Fabric lampshade cover for softer light

Covering an old lampshade with a favorite scrap changed how light falls in my living room. The printed fabric filters the bulb into warmer hues and the subtle weave adds a soft visual texture to the glow.
The seam running down one side reads like a spine, and I enjoy watching the pattern wrap around when the lamp is on. The shade now feels more like a crafted object than a factory item, and the gentle light it produces makes evenings feel like a slow, intentional ritual.
It pairs well with a warm bulb and a quiet corner.
Steps
- Measure the lampshade circumference and height, then cut a scrap of fabric to fit with overlap for seams.
- Hem one long edge of the fabric for a clean top or bottom finish and apply adhesive or sew along the overlap to secure.
- Wrap the fabric around the shade and fasten along the seam, smoothing fabric as you go to avoid bubbles.
- Trim excess fabric at the ends and add ribbon or piping to conceal seams for a refined edge.
Scrappy bunting to lift party corners

I keep a folded bunting in a drawer for quick celebrations and impromptu cheer. Tiny triangular flags sewn from scraps add movement and color when draped across a window or mantel.
The play of patterns against a plain wall makes any corner feel more festive, and the lightness of the flags means they flutter with the faintest breeze. I enjoy how the edges soften after a few uses and how mismatched prints somehow read cohesive at a distance.
Tucking it away and bringing it out later has turned into a small, joyful ritual.
Steps
- Cut triangular flag shapes from fabric scraps and back them with a lightweight interfacing for stability if desired.
- Sew two identical flag pieces right sides together along the edges, leaving the top open, then turn right side out.
- Topstitch across the top edge of each flag and slide them onto a length of cord or ribbon, spacing evenly.
- Hang the bunting in place and adjust flag spacing for a balanced look.
Coin purse with zipper from leftover bits
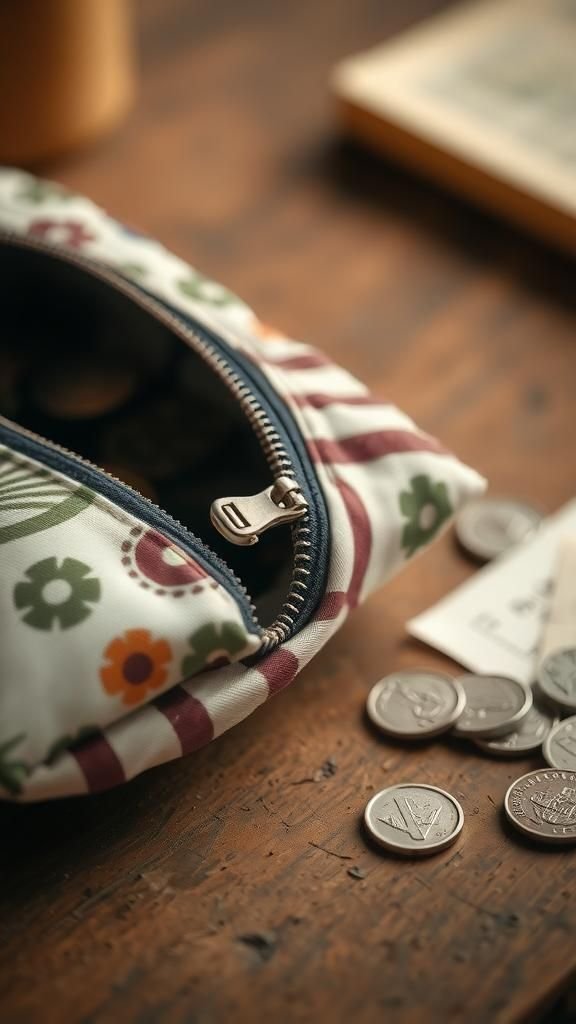
A tiny zippered coin purse lives in my handbag holding loose change and small receipts. It started as a way to use narrow scraps and now feels essential for quick outings.
The zipper gives a satisfying click and the compact shape fits perfectly in a palm. Inside, a bright lining fabric contrasts with the outer print, so opening it becomes a small reveal.
I enjoy finding the right scrap to become the front panel and how the little purse can be tucked into a pocket without bulking up the bag.
Steps
- Cut matching outer and lining fabric pieces to the desired purse dimensions and place right sides together with a zipper along the top edge.
- Sew the zipper in place, then stitch side seams for both outer and lining pieces, leaving a small opening in the lining for turning.
- Turn the purse right side out through the opening, sew the lining opening closed, and push the lining into the outer shell.
- Topstitch around the zipper and edges for a neat finish and press gently.
Hair scrunchies that feel nostalgic and fun
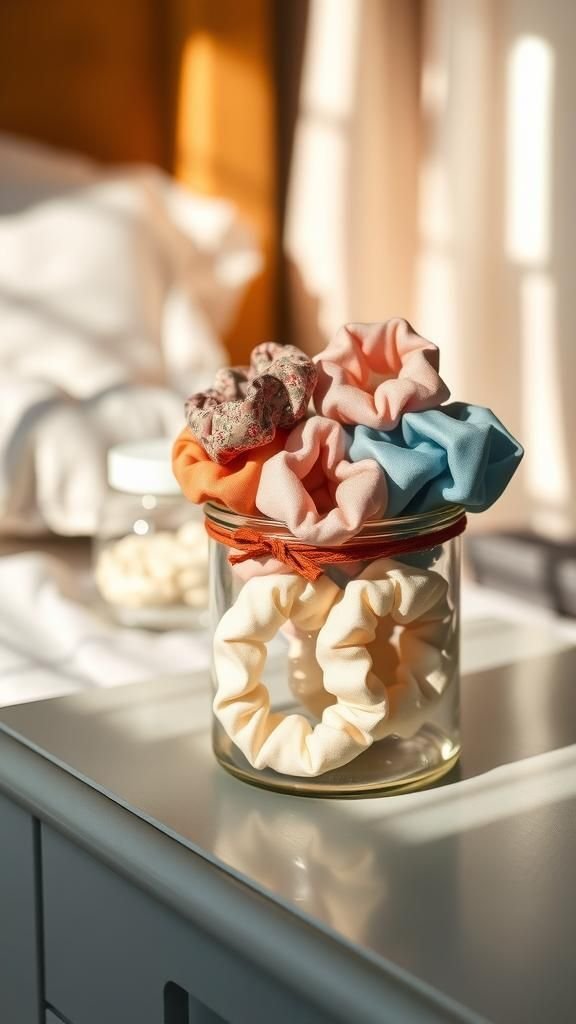
I have a jar of fabric scrunchies made from leftover jersey and silk that brighten up ordinary days. They are soft around the wrist and slide into hair without catching, and the gathered fabric adds a carefree silhouette to a ponytail.
Each scrunchie carries a print that reminds me of another project or a thrifted find. Wearing one feels like a tiny, wearable collage of memories, and swapping colors changes the mood of an outfit without fuss.
They are quick to grab and easy to slip on before heading out the door.
Steps
- Cut fabric strips long enough to wrap around elastic and sew the long edge right sides together to form a tube.
- Turn the tube right side out, insert a length of elastic, and stitch the elastic ends together securely.
- Tuck one fabric end into the other and stitch the opening closed by hand or machine for a seamless look.
- Distribute the fabric evenly around the elastic so the scrunchie appears full and gathered.
Coiled fabric bowl that holds small treasures

A coiled fabric bowl sits on my dresser holding rings and hairpins. The concentric spirals create a contained nest that is soft yet surprisingly sturdy.
Layers of fabric wrapped tightly around one another form visible ridges that catch light, and the color shifts ring by ring tell a little story of the scraps chosen. I enjoy sliding tiny objects into the bowl and watching how the form keeps them corralled.
It feels like a small, personal vessel that somehow honors leftover cloth and the rituals of getting ready each morning.
Steps
- Wrap fabric strips tightly around a rope core or strip of fabric to form a continuous coil.
- Stitch the coils together as you wind them, placing the stitches through the inner layers to secure the shape.
- Continue coiling and stitching until the bowl reaches the desired diameter and depth.
- Finish by tucking the end of the fabric under the outer coil and stitching to lock the bowl closed.
Lavender sachets tucked into drawers

Tiny sachets filled with fragrant lavender live between folded clothes and drawer bottoms, giving every drawer a subtle, calming scent. The small squares of printed fabric are pleasant to touch and make opening a drawer feel like uncovering a simple treat.
I love the quiet ritual of squeezing a sachet between hands to refresh the aroma and the way the scent lingers without overwhelming. The sachets breathe with the linen and cotton around them and seem to make even ordinary mornings a little gentler, especially when pulling out a sweater on cool days.
Steps
- Cut small fabric squares and sew two pieces right sides together, leaving a small opening for filling.
- Turn the sachet right side out, fill with dried lavender buds, and sew the opening closed with a neat seam.
- Optionally add a ribbon loop or small label stitched onto the sachet for a decorative touch.
- Place the sachets in drawers, closets, or linen cabinets to impart a gentle fragrance.
Textile wall mosaic for quiet color play
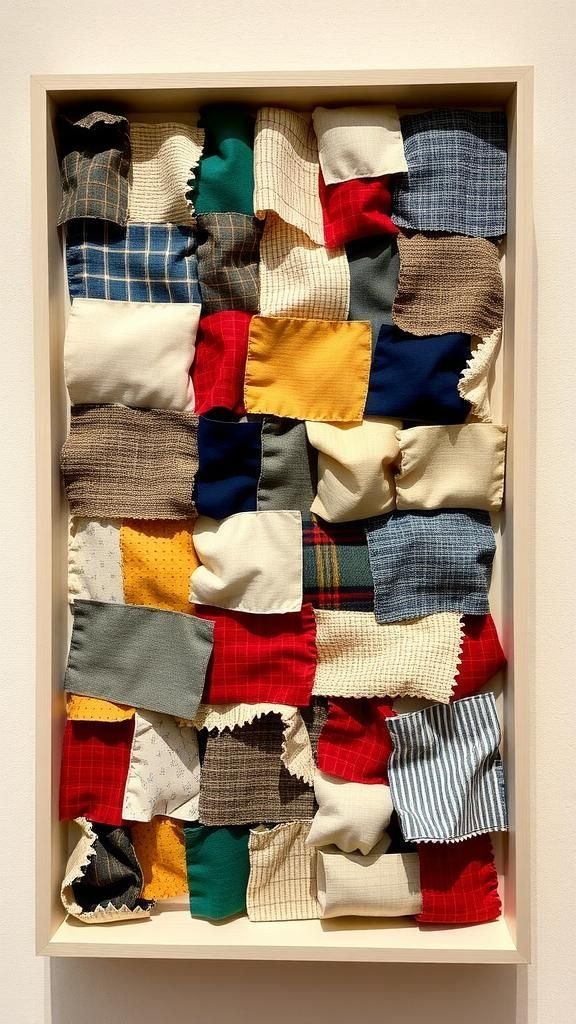
A small wall mosaic of fabric fragments transformed an empty corner into a tactile study of color. Squares and strips are layered into a shallow frame and the surface reads like a painted collage.
Up close, seams and tiny stitches are visible and from a distance the piece resolves into a harmonious patchwork. I enjoy the way light moves across different fabrics, creating a subtle interplay of sheen and matte finishes.
The piece feels like a snapshot of my scrap collection and is one of those objects that prompts someone to lean in and take a closer look.
Steps
- Plan a layout of fabric pieces on a backing board, experimenting with color and texture until the composition feels balanced.
- Adhere or stitch the fabric pieces to the backing, layering edges and overlapping slightly for depth.
- Finish the edges of the backing with a simple frame or wrapped fabric border to create a clean presentation.
- Mount the finished mosaic in a small frame or display it unframed as a textile study on the wall.