Disclosure: This post contains affiliate links, which means we may earn a commission if you purchase through our links at no extra cost to you.
Spring always feels like an invitation to tinker with textures and color, and I find wreath-making a quietly satisfying way to welcome the season. I still remember the first time I pulled a handful of blossoms from the garden and looped them into a scraggly circle; the scent of damp earth and fresh cut greenery felt like a small celebration.
DIY Spring Wreath Crafts have a way of turning spare mornings into cozy projects.
Whether chasing bright buds or soft pastels, these wreath ideas offer plenty of gentle inspiration to brighten a door or wall without fussing over perfection.
Table of Contents
Forsythia and grapevine: sunny spring wreath

A grapevine base threaded with forsythia brings a sunny, informal energy to an entryway. I liked how the twiggy texture of the vine contrasted with the slender, bright yellow blooms; the scent nearby hinted of sharp green stems and early warmth.
The wreath felt lively without being fussy, and a soft ribbon draped nearby added a friendly, homespun note. Sunlight through the petals made tiny shadows on the porch, and running a hand along the tangled vine reminded me of childhood afternoons spent gathering wild stems.
Steps
- Select a grapevine wreath base and gather fresh or faux forsythia stems along with floral wire and a soft ribbon.
- Position forsythia stems around the wreath in overlapping clusters and secure stems by wrapping floral wire discreetly around the vine.
- Continue adding clusters until the circumference feels balanced, tucking ends into the grapevine to hide wire.
- Finish with a ribbon bow tied at the top or side and fluff petals lightly for an even appearance.
Silk tulip bunches on a simple foam ring

Silk tulips bring a reliable pop of spring without the fuss of daily care, and arranging them makes the whole kitchen feel gentler. The smooth, satiny petals contrasted with the matte foam ring and created a layered visual rhythm.
A quiet breeze through an open window nudged the petals and made the colors feel alive against pale paint. I enjoyed how the arrangement suggested a freshly cut bouquet, with soft shadowing and a hint of floral scent from nearby sachets, turning a plain circle into a welcoming halo.
Steps
- Gather a foam wreath ring, silk tulip stems in a palette you like, floral pins, and optional greenery sprigs.
- Slice stems to a comfortable length and insert them into the foam at a slight angle, spacing them evenly around the ring.
- Add small greenery sprigs to fill gaps and secure everything with floral pins placed discreetly.
- Adjust petals and stems for a natural, full look and hang when satisfied with the balance.
Dried orange slice and eucalyptus charm wreath

The warm citrus notes and muted eucalyptus tones made this wreath feel like a quiet afternoon at a farmer’s market. Dried orange slices carried faint caramelized scents and a translucent glow when held to the light, while silvery eucalyptus leaves added a cool counterpoint.
The overall palette felt earthy and warm at once, and every time I passed the door there was a little reminder of kitchen baking and tea. The textures ranged from papery orange to supple leaves, creating a pleasing contrast under hand inspection.
Steps
- Collect a grapevine base, dried orange slices, eucalyptus sprigs, thin floral wire, and twine.
- Place eucalyptus sprigs in small groupings around the base and secure them with floral wire wrapped tightly.
- Thread dried orange slices onto thin wire or skewer them into the grapevine so they sit evenly among the leaves.
- Tie a rustic twine loop for hanging and tweak positions until the composition feels balanced.
Mini succulent wreath with moss and pebbles

A tiny world of succulents and damp moss felt unexpectedly tranquil when I hung it in a sunlit corner. The little fleshy leaves offered cool, smooth textures and a range of green tones from mint to slate, accented by pale pebbles that caught the light.
The dampness of the moss smelled earthy and slightly sweet, reminding me of greenhouse afternoons. Every glance felt soothing, like peering into a miniature garden.
The arrangement seemed to invite slower moments, as if asking for quiet appreciation rather than fuss.
Steps
- Choose a small wire or foam wreath frame, select hardy succulent cuttings, sheet moss, potting soil, and hot glue or floral adhesive.
- Cover the frame with moss and press in small pockets of soil, creating snug spots for succulent cuttings.
- Nestle succulents into the mossed pockets and secure them so roots contact the soil.
- Decorate with tiny pebbles for contrast and place the wreath in bright indirect light.
Paper flower medley on a recycled book page base

Paper flowers cut from old book pages felt delightfully nostalgic, like a secret found in a library box. The soft crunch of paper under fingertips and the faint smell of ink gave the wreath an old-fashioned charm.
Layers of curled petals created shadows and a sculptural quality that suggested movement even when still. Colors were muted and literary, and I liked how the thin pages caught light along their edges.
It ended up as a quiet conversation piece hanging near a reading nook, where the pages echoed the books on the shelf.
Steps
- Gather recycled book pages, floral wire, a cardboard or foam wreath base, scissors, and a hot glue gun.
- Cut flower shapes from pages and form petals by curling edges slightly, layering pieces to build blooms.
- Affix paper flowers to the wreath base with hot glue, arranging them in clusters for depth.
- Add a small loop of ribbon or twine for hanging and fluff petals to create dimension.
Burlap ruffle wreath with pastel ribbon accents

The coarse weave of burlap combined with soft pastel ribbons made the whole piece feel rustic and gently dressed up. Running my hand along the ruffles revealed a pleasing contrast between rough fibers and silk-like ribbon.
The palette nodded to spring without being flashy, and the soft echo of ribbon tails moving in a light breeze added a pleasing liveliness. It sat well on a matte door finish and felt like something crafted during a quiet weekend, with the smell of fiber and a faint dust of the work surface lingering in the air.
Steps
- Acquire a wire wreath frame, burlap strips, pastel ribbons, and floral wire or pipe cleaners.
- Gather burlap strips and loop or tie them around the frame to create consistent ruffles, leaving small gaps for ribbon accents.
- Thread pastel ribbons intermittently through the burlap ruffles and secure with wire or tucked knots.
- Create a ribbon hanger and trim ends for an even, tidy appearance.
Felt bird nest wreath with tiny clay eggs

A felt-covered wreath edged with linen and dotted by tiny clay eggs felt like a playful nod to garden life. The felt’s plush surface invited touch and the little eggs sat quietly in soft nests, their matte glaze catching small highlights.
The contrast between textile warmth and ceramic coolness made the piece feel thoughtfully layered. Placing it near a sunny window emphasized the sculptural shapes and tiny shadows within the nests.
It brought to mind slow mornings on a porch and the patient rhythm of birds building homes nearby.
Steps
- Collect a foam or wire wreath base, sheets of wool felt in complementary hues, natural raffia, and small clay eggs.
- Wrap the base with felt strips for a plush foundation and secure with pins or hot glue.
- Form tiny nests from raffia and position clay eggs inside, anchoring each nest to the wreath.
- Adjust placement until the visual balance feels cozy and hang in a sunlit spot.
Vintage lace and doily spring wreath charm
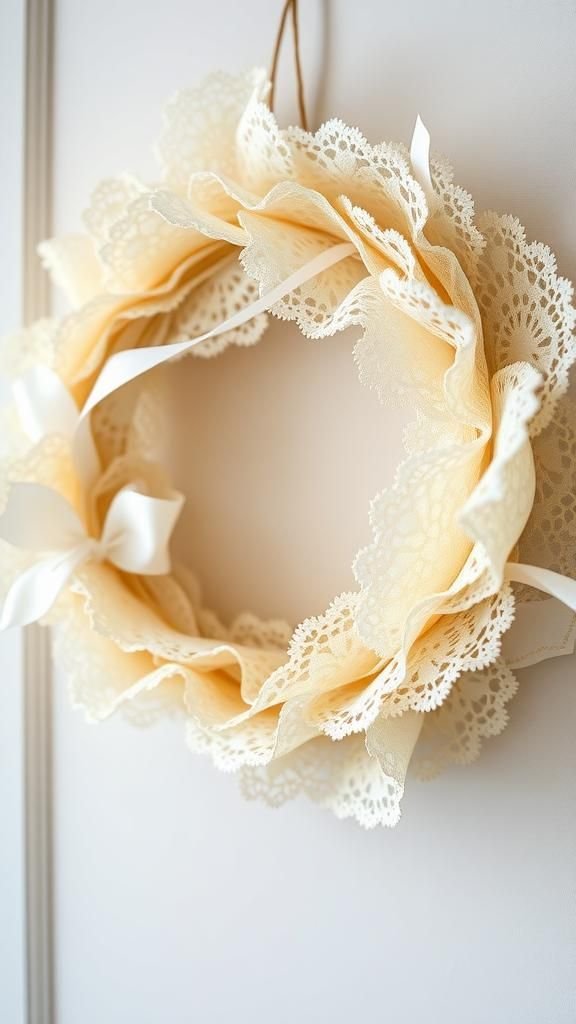
Layers of vintage lace and doilies created an airy, romantic wreath that read like family heirlooms repurposed. The fine threads and floral motifs felt delicate under fingertips, and the pale cream tones softened the doorway with gentle light.
There was a faint linen scent that brought to mind attic trunks and afternoon tea. The look seemed at once elegant and unassuming, as though it had slowly settled into place over years.
When breezes moved nearby, the lacy edges fluttered softly, adding a light, almost whispering presence.
Steps
- Source an assortment of vintage lace doilies, a wire wreath frame, and small safety pins or fabric glue.
- Layer doilies over the frame, placing larger pieces first and tucking smaller ones to create depth.
- Secure edges discreetly with pins or fabric adhesive and adjust layers for soft ruffles.
- Add a thin ribbon hanger and hang where gentle drafts will make the lace flutter.
Pom-pom yarn wreath in candy pastel shades

This yarn wreath felt tactile and cheerful, like a pocketful of springtime confetti. Pom-poms offered a cushiony texture and a playful bounce when touched, and the pastel colors sat together like a cluster of sugared confections.
It looked especially cozy against a painted door, and the soft fuzz caught light in a way that made the whole piece glow. Working on it felt forgiving; imperfections added character, and walking past it brought a small smile each time the yarn shifted in the breeze.
Steps
- Gather a foam wreath ring, yarn in assorted pastel colors, scissors, and a pom-pom maker or template.
- Form multiple pom-poms from yarn and trim them for round, even shapes.
- Press pom-poms onto the foam ring, layering densely until the wreath looks full and plush.
- Fluff the pom-poms and add a yarn loop for hanging.
Herb-scented rosemary and lavender door wreath

A wreath woven from rosemary sprigs and lavender felt herbal and calming, filling the air with a clear, green aroma. The needle-like rosemary added a cool, resilient texture while lavender spikes brought soft purple points and a dry floral note.
It felt like bringing a little garden calm to the threshold, and each passerby seemed to lean in for a quiet inhale. The color combination read fresh and restrained, and the contrast between the sharp rosemary and the lacy lavender created a pleasing rhythmic pattern around the circle.
Steps
- Collect fresh rosemary sprigs, dried lavender bundles, a small wire wreath form, and floral twine.
- Group sprigs into small bunches and lay them along the frame, overlapping clusters for fullness.
- Secure each cluster with twine, wrapping tightly so pieces stay in place.
- Finish by tucking ends neatly and creating a loop for hanging.
Eggshell mosaic wreath with pastel highlights

Broken eggshells arranged like mosaic tiles gave this wreath an intriguing tactile quality. The cracked edges caught light and created tiny shadows, and delicate pastel paints washed over the shells keeping a gentle palette.
Bringing kitchen remnants into a decorative object felt resourceful and a little poetic, with a faint brittle sound if handled. From a distance the surface read as textured ceramic, while up close the irregular pattern rewarded inspection.
It had a fragile, handmade presence that paired well with simple, understated decor.
Steps
- Gather cleaned eggshells, a foam or cardboard wreath base, acrylic paints in soft pastels, a paintbrush, and craft glue.
- Paint eggshell pieces in pastel hues and let them dry thoroughly.
- Arrange the painted shells on the wreath base in a mosaic pattern and adhere them with craft glue.
- Allow full drying time before hanging and handle gently to preserve the shells.
Button and ribbon collage wreath with vintage flair

Collecting mismatched buttons and pairing them with soft ribbons created a cheerful, nostalgic wreath that felt like a seamstress’s keepsake. Buttons of mother-of-pearl and faded plastic added tiny gleams, and ribbon tails brought color movement.
The tactile mix of smooth buttons and silky ribbons had a comforting, domestic charm, and it looked particularly at home near a vintage mirror. When sunlight brushed the buttons they tossed little highlights, and running a finger along the surface revealed the playful randomness of the arrangement.
Steps
- Select a foam wreath base, a collection of buttons in assorted sizes and colors, ribbons, and strong craft glue or a hot glue gun.
- Press buttons into the foam or adhere them with glue, working in clusters for visual interest.
- Intertwine ribbon loops and bows among button groupings and secure them.
- Trim ribbon ends neatly and inspect for balanced coverage before hanging.
Mini embroidery hoop wreaths grouped on a wall

A cluster of tiny embroidery hoop wreaths arranged together felt like a curated gallery of small, handmade moments. Each hoop held a little vignette of fabric flowers, lace, or painted fabric, and the round frames echoed and enhanced those tiny scenes.
The tactile relationship between cotton threads and hoop wood made the wall feel cozy and intimate. Passing by, I found myself pausing to study each miniature composition, enjoying the quiet variety and how the group told a gentle story across the wall surface.
Steps
- Choose several small embroidery hoops, scraps of fabric, embroidery thread, and tiny decorative elements like beads or felt flowers.
- Stretch fabric in each hoop and fasten securely, trimming excess from the back.
- Embellish the fabric with stitched motifs, glued accents, or tiny appliqués to create mini scenes.
- Arrange hoops on the wall in a pleasing composition and hang using small nails or adhesive hooks.
Denim scrap wreath with frayed edge highlights

Old denim strips transformed into a textured wreath with an upbeat, casual character. Frayed edges and varied indigo shades created a layered effect reminiscent of worn-in jeans and summer barbecues.
The denim felt substantial and pleasantly rough, and its weight gave the wreath a comforting heft on the door. The palette was humble and familiar, and when light caught the weave there was a subtle sheen that suggested movement.
It introduced a relaxed, handmade mood that felt right at home in an entry that sees lots of coming and going.
Steps
- Gather a wire wreath frame and denim scraps from old jeans, scissors, and strong thread or thin wire.
- Tie or loop denim strips around the frame densely so the frayed edges face outward for texture.
- Continue until the frame is fully covered and the wreath appears voluminous.
- Trim stray threads for a tidy silhouette and add a hanger loop.
Dried wildflower halo with soft prairie hues

A halo of dried wildflowers felt wistful and calm, like a pressed bouquet left to rest with care. The stems offered papery textures while seed heads added interesting silhouettes against the sky.
Colors leaned toward sunbaked tans, mauves, and faded pinks, giving the wreath an understated, pastoral look. When the afternoon light hit, tiny shadows and highlights emphasized the fragile structure.
It suggested long walks through meadows and quiet afternoons arranging gathered stems, and each tiny seed head seemed to hold a small, patient story.
Steps
- Collect a grapevine or wire base and a mix of dried wildflowers such as strawflowers, statice, and baby’s breath.
- Create small bundles of stems and position them around the base, overlapping each bundle slightly.
- Secure bundles with floral wire or twine, ensuring stems are snug against the frame.
- Trim uneven stem ends and fan out blooms for a balanced, airy look.
Lemon and bay leaf kitchen wreath for spring

Fresh lemon slices paired with glossy bay leaves offered a kitchen-friendly wreath that felt bright and aromatic. The citrus brought a sunny color contrast and a faint zestiness while bay leaves added a smooth, leathery green that caught the eye.
The combination read both culinary and decorative, making the doorway feel lively and appetizing. Textures were crisp and aromatic, and moving past the wreath seemed to release small bursts of scent.
It looked particularly inviting near a pantry or breakfast nook where the kitchen and home rhythms overlap.
Steps
- Obtain a wreath base, dried or faux lemon slices, fresh or faux bay leaves, and floral wire or hot glue.
- Lay bay leaves in overlapping layers around the frame and secure them with wire.
- Position lemon slices evenly among the leaves and anchor them with thin wire or adhesive.
- Inspect for visual balance and create a small loop for hanging.
Twig and moss minimalist spring wreath idea
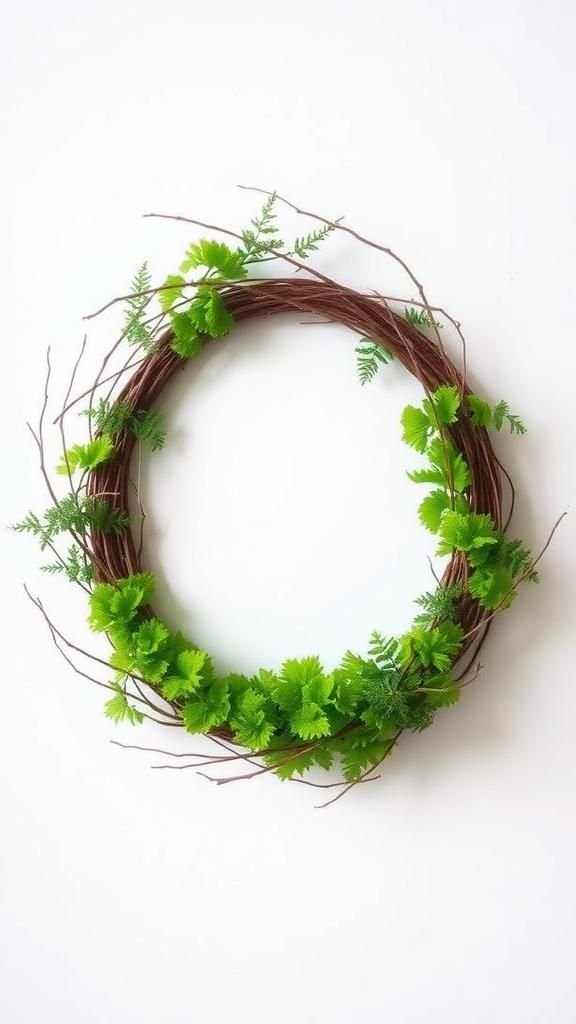
A minimalist wreath made from thin twigs and soft moss felt quietly modern and organic. The linear twigs offered a skeletal frame while the plush moss provided lush contrast, creating a pleasing tension between structure and softness.
The color contrast between dark twig bark and vivid green moss felt fresh, and the tactile mix invited touch. It fit well in a low-key, contemporary entry and seemed to bring a breath of woodland calm indoors.
Running a hand along the moss revealed its springy give and subtle earthy scent.
Steps
- Collect flexible twigs, sheet moss, a small wire frame or ring, floral wire, and optional small accents like buds.
- Form a twig ring by weaving twigs around the frame and secure intersections with wire.
- Press moss into sections and fasten it so it appears as lush cushions along the twig frame.
- Add small accents if desired and create a simple hanging loop.
Tea-stained doily and pressed flower wreath

Tea-stained doilies and pressed flowers created a soft, antiqued wreath that felt like a keepsake. The warm, mottled tones of the tea gave the lace a gentle patina, and the flat pressed blossoms lay like tiny artworks on the surface.
Touching it revealed delicate paper textures and crisp petals, and the whole piece carried a faint, comforting scent of tea. It seemed to bridge eras, bringing an heirloom sensibility to a springtime door and asking for a gentle, appreciative glance rather than loud notice.
Steps
- Prepare lace doilies stained with tea and fully dried pressed flowers, along with a lightweight wreath base and archival adhesive.
- Layer tea-stained doilies on the wreath base, smoothing them into place.
- Arrange pressed flowers over the doilies and secure with archival adhesive to preserve them.
- Allow adhesive to dry completely and add a subtle ribbon for hanging.
Seed packet wreath for gardener-friendly charm
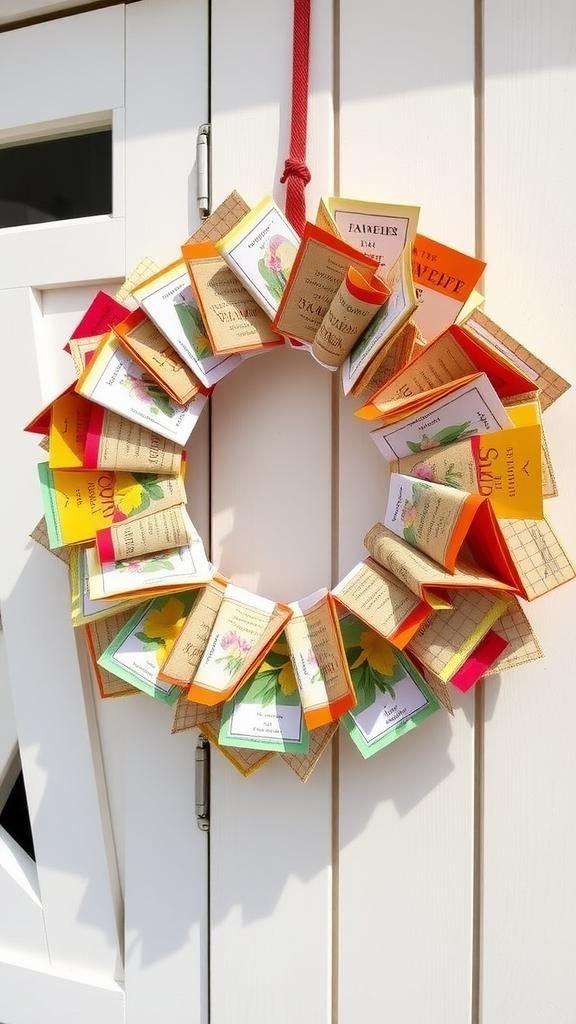
Tiny seed packets folded into a repetitive pattern produced a playful wreath that felt like a gardener’s calling card. The glossy papers and printed botanical illustrations added a burst of color and anticipation, with names and drawings that brought to mind future blooms.
The texture of overlapping packets offered a slight sheen and a crinkled feel when handled. Hanging it near a potting bench made the space feel purposeful and hopeful, and each packet seemed to promise another small adventure in the coming weeks.
Steps
- Gather empty seed packets or printed seed images, a cardboard wreath base, clear adhesive, and optional twine for hanging.
- Fold or shape packets into consistent units and glue them onto the base in concentric rings.
- Continue layering until the base is covered and the packet illustrations create a colorful mosaic.
- Add a twine loop for hanging and press gently to ensure all packets are secure.
Vintage button bouquet wreath with linen backing

A linen-backed wreath sprinkled with antique buttons felt quietly domestic and cozy, like an heirloom gathered from a sewing box. The fabric provided a soft, neutral field while buttons added tiny focal points of mother-of-pearl and brass.
The surface invited touch, and the contrast between smooth buttons and woven linen made each button feel intentional. It sat well in a hallway with soft light, where small gleams from the buttons would catch the eye.
Each button seemed to carry a hint of someone else’s story, giving the wreath a warm, lived-in personality.
Steps
- Prepare a round base covered in natural linen fabric, collect assorted vintage buttons, and have a strong needle and thread ready.
- Sew buttons onto the linen surface in clusters or scattered patterns, knotting securely on the reverse.
- Continue until the visual distribution feels pleasing and balanced.
- Finish by creating a neat fabric edge and adding a hanging loop.
Balsa wood bird silhouettes on a twig frame

Thin balsa wood bird silhouettes perched on a twig frame gave the wreath a playful, airy look like paper toys come to life. The lightweight wood carried subtle grain lines and a warm, matte finish, while the twig frame kept the silhouette organic.
The overall effect was whimsical but restrained, offering a sense of motion even when still. It felt at home near a sunlit window where birdsong could mingle with the visual motif.
Touching the birds revealed smooth edges and a satisfying tactile contrast with the rough twigs.
Steps
- Cut or source small balsa wood bird silhouettes, assemble a twig wreath base, and prepare a strong craft adhesive or small nails.
- Position birds evenly around the twig frame and affix them securely so they appear to perch naturally.
- Fill any sparse areas with small sprigs or leaf accents to integrate the birds visually.
- Allow adhesive to set fully before hanging on a bright wall or door.