Disclosure: This post contains affiliate links, which means we may earn a commission if you purchase through our links at no extra cost to you.
Rainy afternoons used to mean restlessness until a stash of colored paper and a box of crayons turned our living room into a tiny rainbow studio. I remember the quiet focus of small hands matching hues, the crackle of tissue paper, and how a strip of color could make a dull wall feel sunny.
These Colorful Rainbow Kids Crafts brought a kind of slow, tactile joy to ordinary days.
I gathered ideas that felt playful and doable, from shimmering suncatchers to cozy yarn projects, and watched simple materials become keepsakes. The list of Colorful Rainbow Kids Crafts that follows grew from those noisy, bright sessions and the little proud grins after each finished piece.
Table of Contents
Sunny paper rainbow garland for cheerful rooms

There was a moment when a string of paper arcs transformed our kitchen into a small festival. The thin sheets made a whispery sound when fingers brushed past, and the edges caught light differently as the afternoon shifted.
Bright reds and cool violets sat side by side, creating a playful rhythm along the window. A child’s laughter echoed with each gentle sway, and the garland seemed to hold tiny echoes of that afternoon.
It settled into the room like a warm note, friendly and unassuming, brightening the corner without fuss.
Steps
- Gather colorful construction paper, scissors, a pencil, hole punch, and a length of yarn or string.
- Trace semi-circular arcs on each paper color and cut along the lines to create matching rainbow segments.
- Punch holes at the top of each arc and slide the segments onto the yarn in rainbow order.
- Space the arcs evenly along the string and knot or tape the ends for hanging.
- Hang the garland across a window or along a shelf so the colors can catch light.
Popsicle stick rainbow puzzles for little hands

These small, tactile puzzles became a favorite during quiet afternoons. The wooden sticks have that faint woodsy smell and a smoothness under little fingertips that invites turning and lining up.
Each stick carries a band of color, and when the bands match across the set, there’s a tiny moment of discovery that makes heads tilt with accomplishment. I liked watching the concentration deepen, the tongue peeking out slightly as a match is found.
Pieces clicked together visually, and the finished stripe felt like a tiny triumph to hold.
Steps
- Gather plain wooden craft sticks, non-toxic markers or paints, and a flat surface for drying.
- Color bands across groups of sticks so that when placed side by side they form a continuous rainbow pattern.
- Allow colors to dry fully before mixing the sticks into puzzle sets.
- Shuffle the sticks and challenge kids to reassemble each rainbow by matching the colored bands.
- Store finished puzzles in small boxes or wrap with a ribbon to keep sets intact.
Tissue paper suncatchers that glow in sunlight

The suncatchers had an almost glasslike shimmer when sunlight hit them, though they felt soft and papery to the touch. Layers of translucent tissue produced a patchwork of colors that shifted with the angle of light, creating jewel-like reflections on nearby walls.
There was a quiet rhythm to placing each fragment, a slow-building mosaic that made small hands proud. I noticed how the colors blended at the edges, creating unexpected new tones.
Hanging by the window, they made the room feel luminous and gentle, like a tiny stained-glass corner.
Steps
- Gather sheets of translucent tissue paper in a range of rainbow hues, clear contact paper, a pencil, and scissors.
- Cut or tear tissue into varied shapes and arrange them onto the sticky side of one contact paper sheet.
- Cover with a second contact paper sheet to seal the pieces between two clear layers.
- Trim the edges into a desired shape and punch a hole for a string or ribbon.
- Hang the finished suncatcher in a window where light can filter through and shift the colors.
Salt painting rainbows with sparkly textures
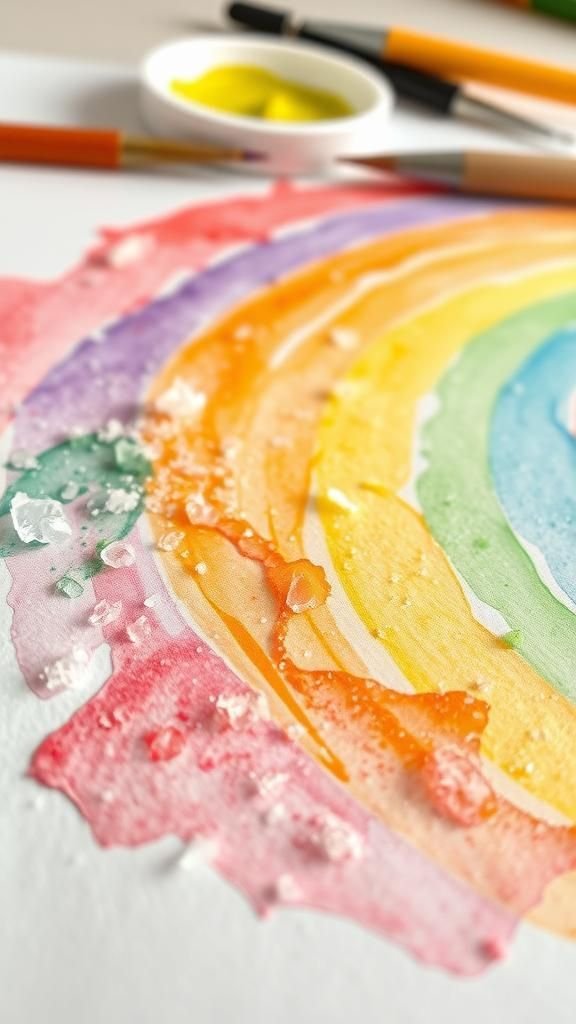
The grainy ridge of salted paint had a satisfying crunchy look that invited curiosity. Bright watercolor pigments pooled along the salty channels and then shimmered as light hit the crystalline grains.
Small hands watched pigments travel and settle, with tiny gasps when a color bled into its neighbor and formed a soft new shade. There was a tactile contrast between wet paint and dry paper, and the finished piece had a textured relief that begged to be tilted in light.
Displaying these paintings felt like keeping a small meteorological map of a happy afternoon.
Steps
- Gather heavy paper, white glue, table salt, and liquid watercolors or diluted paints.
- Squeeze glue into arc shapes on the paper to form a rainbow outline and sprinkle salt over the glue while it is wet.
- Tap off excess salt and drip watercolor gently onto the salted glue so colors spread along the grains.
- Allow the piece to dry fully until the salt and paint are set.
- Gently brush off any loose salt and set the painting upright to admire the textured rainbow surface.
Rainbow bead bracelets for tiny wrists and smiles

Stringing tiny beads created a rhythm that felt almost meditative. The beads clicked with a soft plastic sound and slid together in a satisfying chain of color.
Looking down at a completed bracelet brought a small, contained excitement; the spectrum wrapped the wrist like a little promise. Some beads caught light and shimmered, others were matte and cool, creating a pleasant contrast.
I remember a child matching bead hues to their crayons, arranging red beside orange, pleased when the sequence felt just right. The bracelets lasted as playful reminders of that quiet crafting time.
Steps
- Gather elastic cord, a variety of colorful beads including round and faceted shapes, and scissors.
- Measure a comfortable length of elastic against the wrist and thread beads in a rainbow sequence or playful pattern.
- When the strand reaches the desired length, carefully tie a secure knot and pull ends snug.
- Trim any excess elastic and hide the knot inside a bead if possible for a neat finish.
- Slide the bracelet onto the wrist and enjoy the colorful reminder of the crafting moment.
Crayon resist rainbow drawings with hidden surprises

The waxy lines made faint impressions that felt almost secretive until a wash of paint revealed them. There was a small thrill as bright watercolors pooled around the resist, and the crayon strokes stood out like whispered outlines.
Children leaned close, watching colors saturate the paper and highlight the hidden sketches beneath. The mix of bold wax and translucent paint created layered depth, and the resulting artwork had a playful, slightly magical quality.
It sat on the fridge like a little reveal, tempting visitors to peer and smile at the hidden patterns.
Steps
- Gather white paper, a set of crayons including white, and watercolor paints with brushes.
- Draw shapes and arcs in crayon on the paper, pressing firmly so wax lays down a clear resist.
- Wet a brush with watercolor and sweep washes over the drawing so painted color highlights the crayon marks.
- Allow the painting to dry and observe the contrast between waxy resist lines and painted background.
- Display the finished piece where the layered textures can be admired.
Yarn-wrapped rainbows with cozy, soft textures

The strands of yarn felt warm and fuzzy between fingers, and the slow wrapping created a comforting rhythm. Colors sat snugly side by side, the fibers catching light in tiny, tactile flashes.
Some sections were plush and thick, others wrapped thinly to reveal a base shape underneath. I recall the gentle focus as each hue found its place along the curve, and the finished piece had a charming, handmade softness that begged to be touched.
It looked like a small textile hug, perfect for leaning against a lamp or perching on a shelf.
Steps
- Gather a semicircular base such as cardboard or wire, a selection of yarn in rainbow colors, and scissors.
- Secure one yarn end and wrap each color tightly around its segment of the base to create contiguous colored arcs.
- Tuck or secure yarn ends neatly on the underside to prevent unraveling.
- Trim any stray fibers for a tidy look and shape the rainbow as desired.
- Place the yarn-wrapped rainbow on a shelf or hang it with a small loop.
Rainbow wind chimes with bright dangling ribbons

Ribbon tails fluttered and whispered against each other in a breeze, producing a delicate, breathy sound. Each ribbon held a band of color that sang as it moved, and beads threaded along the strings added tiny clinks.
The sun turned the ribbons into strips of light, and shadows flickered across the porch floor. I liked how the chime turned ordinary air into a moving painting, with each gust rearranging the composition.
There was a gentle liveliness to it, a sense of small weather captured in color and sound.
Steps
- Gather a circular base such as an embroidery hoop, assorted colorful ribbons, small bells or beads, and string.
- Cut ribbon lengths and tie or loop them at intervals around the hoop to create dangling strands.
- Add beads or small bells to some strands for subtle sound when the ribbons move.
- Secure all knots and trim ribbon ends for even lengths and neatness.
- Hang the wind chime outdoors where light and breeze can animate the ribbons.
Rainbow sensory bottles for calm and focus

Watching beads and glitter drift in clear liquid had an oddly soothing effect, like tiny slow-motion weather. Layers of color settled into bands that moved when the bottle was tilted, creating a small, contained spectacle.
The clink of beads was muffled and gentle, and the shimmer of loose glitter made the mixture glow. I remember handing a bottle over during a restless moment and seeing shoulders ease as attention tracked the slow swirl.
It felt like a portable little world where colors had their own slow pace.
Steps
- Gather clear plastic bottles, water, a little clear oil or glycerin for slower motion, colorful beads or sequins, and adhesive for sealing lids.
- Layer beads and sequins inside each bottle by color or mix for a blended rainbow effect.
- Fill bottles with the water and oil mixture, leaving a small air gap to allow movement.
- Seal the lid securely with strong adhesive to prevent leaks and shake gently to mix the layers.
- Observe the slow drifting colors and place bottles on a shelf for calm moments.
Painted rainbow rocks for garden peeks

Smooth river stones felt cool and grounding in the palm before a stripe of color brightened them. The paint sat like a tiny coat, glossy on some stones and matte on others, responding to different textures.
Placing them along a garden path made small discoveries for wandering feet, and a peek between leaves revealed unexpected color pops. I recall a child crouched in the dirt, triumphant at hiding one under a fern so later footsteps would find it again.
The rocks carried the memory of sun and soil alongside their cheerful hues.
Steps
- Gather smooth rocks, acrylic paints in rainbow shades, small brushes, and a clear sealer for outdoor protection.
- Clean and dry each rock before applying painted bands or patterns in rainbow order.
- Allow the paint to dry fully, adding a second coat for bolder color if desired.
- Seal the painted rocks with a clear protective coat to withstand weather.
- Place the rocks among plants or along paths where they create tiny cheerful surprises.
Rainbow paper fans with playful folding pops

The accordion folds had a crispness that felt satisfying under fingertips, and unfolding a fan released a small whoosh of air. Each pleat held a strip of color that lined up to form a dramatic arc when opened.
The paper gained slight creases that caught light differently across angles, adding subtle shadow play. Children enjoyed the theatrical flourish of opening and closing, and the fans doubled as props for imagined performances.
Left on a table, they looked like miniature stage pieces, folded and waiting for the next curtain.
Steps
- Gather rectangular sheets of colored paper in rainbow hues, scissors, and staples or tape for securing.
- Fold each sheet back and forth in an accordion pattern to create a pleated fan segment.
- Combine pleated segments from each color by aligning edges and securing them together to form a full rainbow arc.
- Trim the ends for a smooth curve and secure the base so the fan can be opened and closed.
- Open the fan to reveal the rainbow and let it rest as a decorative piece when not in play.
Rainbow pom-pom caterpillars with soft charm

Fuzzy pom-poms felt playful and springy when nestled in a row, each a little puff of color. The overall creature had a jovial wobble that made small hands smile, and the tactile contrast between fluffy body and tiny bead eyes added personality.
Sitting on a windowsill, the caterpillar looked like it might inch toward a sunny leaf, and a child’s imagination filled in the rest with stories of miniature journeys. The softness invited touch, and little heads leaned close to inspect the blended hues where one pom-pom met the next.
Steps
- Gather a selection of colorful pom-poms, pipe cleaners or a craft wire base, small beads for eyes, and glue.
- Thread or adhere the pom-poms in a row along the pipe cleaner to create the caterpillar body.
- Attach tiny beads at the front for eyes and bend a small antenna shape from leftover wire if desired.
- Secure any loose pieces and trim excess wire for safety.
- Place the finished caterpillar on a shelf or let it join teddy bear adventures.
Rainbow button collage with delightful textures

Buttons brought a nostalgic clink and a tactile patchwork when clustered into arcs of color. Each button carried its own personality — mother-of-pearl sheen, transparent centers, tiny ridged edges — and together they formed a playful mosaic.
Little fingers loved sorting by hue and matching sizes, then marveling as disparate pieces united into a coherent curve. The collage caught light in unpredictable ways, and shadows between buttons gave depth to the piece.
It felt like a small cabinet of curiosities, domestic and colorful, that rewarded close inspection.
Steps
- Gather a variety of colorful buttons, a sturdy backing such as cardboard or canvas, and a strong adhesive.
- Arrange buttons in rainbow bands on the backing to create arcs or abstract patterns.
- Press buttons into the adhesive to secure them, ensuring a tight bond for durability.
- Allow the piece to dry fully before moving or displaying.
- Frame or prop the collage as a tactile wall piece or tabletop accent.
Rainbow paper chain strings for playful counting

The looped chain made a gentle clatter when nudged, each paper ring a link in a growing sequence. There was a cozy rhythm to slipping one ring through another, and the colors created a tidy procession that stretched across doorways and mantels.
Watching the chain lengthen felt like watching time in bright increments, and the repeated pattern had a calming regularity. Someone always reached to rearrange the bands by shade, seeking a smoother transition.
Hung across a room, the paper chain turned an ordinary wall into a lighthearted parade of color.
Steps
- Gather strips of colored paper in rainbow hues, a glue stick or tape, and a workspace for assembly.
- Loop one strip into a ring and secure its ends, then thread the next strip through that ring before securing to form a chain.
- Continue linking rings in rainbow order until the chain reaches a preferred length.
- Trim any uneven ends and ensure all rings are securely fastened.
- Drape the paper chain along doorways, shelves, or across a room for cheerful decoration.
Rainbow foam stamps that leave bright imprints

The squishy foam pads left crisp, slightly textured prints that delighted with their imperfect edges. Pressing the stamp produced a gentle pop sound and a burst of color that felt immediate and rewarding.
Children enjoyed experimenting with overlapping hues to see where new shades emerged, and the results had a delightful handmade charm. Some prints showed brush streaks, others held solid pigment, creating a lively gallery across paper.
The tactile feel of foam under fingertip and the visual rhythm of repeated shapes made the activity both sensory and creative.
Steps
- Gather craft foam sheets, cardboard or eraser blocks for bases, acrylic paints, and small rollers or brushes.
- Cut foam into simple shapes and adhere them to the bases to create stamps.
- Apply paint evenly onto the foam surface and press firmly onto paper to transfer the image.
- Clean foam stamps between colors to keep prints vibrant, and allow artwork to dry.
- Arrange finished prints into collages or display sheets to celebrate the colorful patterns.
Rainbow felt bookmarks with soft, cozy edges

Felt offered a plush surface that felt warm between pages, and stitched seams added a handcrafted sincerity. Each bookmark carried a neat band of color that peeked out of a book like a tiny ribbon of cheer.
Needles and thread produced a quiet, focused atmosphere, and the little running stitches created a rhythmic texture along the edges. A bookmark slipped into a well-loved story lent a domestic comfort to reading time, and seeing the arc of color between pages made book returns a small, bright ritual.
Steps
- Gather felt sheets in rainbow colors, embroidery thread, a needle, scissors, and template shapes for bookmarks.
- Cut felt into rectangular bases and small arcs or stripes to form the rainbow motif.
- Sew the colored felt pieces onto the base with simple stitches, securing edges neatly.
- Add decorative stitching or a tassel if desired, and trim any loose threads.
- Slide the finished bookmark into a favorite book for colorful page marking.
Rainbow moons from painted paper mache dreams

The paper mache surface carried subtle ridges and a fragile, tactile quality that felt pleasingly handmade. Once painted, each crescent gleamed with layered hues, and the curved forms hinted at tiny moons caught in a child’s orbit.
Drying paint gave off a faint scent of craft that mingled with the papery base, evoking afternoons spent shaping and waiting. Hung from a ceiling, the moons drifted gently and created a miniature sky of color.
They had a quiet, whimsical presence, like a personal constellation made of careful, colorful work.
Steps
- Gather balloon halves or cardboard crescent bases, paper strips, paste or diluted glue, acrylic paints in rainbow shades, and string for hanging.
- Layer the paper strips with paste over the base to build a smooth crescent surface and let it dry fully.
- Paint the dried paper mache in graduated rainbow bands, allowing each color to dry between layers if needed.
- Seal the painted surface for durability and attach a string loop for hanging.
- Suspend the rainbow moons from a ceiling or a mobile frame for a whimsical display.
Rainbow mosaic hearts with torn paper charm

The torn paper edges created a soft, feathered look that felt more organic than neat shapes. Each little tear held its own shadow and texture, and when layered they created a vibrant patchwork that shimmered with depth.
Children enjoyed the tactile process of fitting rough pieces together and watching the heart take shape. The collage surface caught light at different angles, turning some patches luminous and others cozy and muted.
The finished hearts had a handcrafted honesty, like love notes made visible through bright scraps of paper.
Steps
- Gather colored paper scraps across the rainbow spectrum, a heart-shaped base, glue, and a brush for smoothing.
- Tear the paper into small irregular pieces and arrange them onto the base to form mosaic bands of color.
- Press pieces gently into the glue to ensure they adhere and overlap attractively.
- Trim excess paper around the heart shape and allow the collage to dry fully.
- Frame or gift the mosaic heart as a tactile bit of colorful affection.
Rainbow chalk murals on smooth driveway expanses

Chalk left a pastel dust on fingers that carried the memory of sun and pavement, and sweeping arcs of color transformed a patch of driveway into a temporary panorama. Dusty color smudged slightly under energetic feet and created blended edges that looked like clouds of pigment.
Kids delighted in running across the bands, leaving faint footprints that told of movement and play. A chalk mural invites weather and time to alter its surface, which made each viewing feel fleeting and a little precious.
There was satisfaction in the bold, ephemeral sweep of hues across concrete.
Steps
- Gather sidewalk chalk sticks in a range of rainbow colors and choose a smooth, clean area of pavement.
- Draw broad arcs or freeform bands of color to compose the rainbow mural.
- Blend edges gently with fingers or soft cloth for softer transitions if desired.
- Add playful details like clouds or stars around the rainbow to complete the scene.
- Photograph the mural before weather or play alters its surface for memory keeping.
Rainbow mobile from recycled bottle caps

The caps made small metallic circles that clicked gently as they turned, each carrying a dab of color that caught light with a casual glint. Grouping them into a mobile created a playful constellation that moved with the slightest draft.
There was a satisfying contrast between the cool weight of caps and the bright warmth of painted hues, and the assembly had a thrifted charm. A child loved spinning the mobile and listening to the tiny taps, imagining tiny planets orbiting one another.
It hung like a recycled galaxy, familiar and bright.
Steps
- Gather clean bottle caps, strong string or thin wire, a circular base like an embroidery hoop, paint in rainbow colors, and adhesive.
- Paint the inside of each cap in the rainbow sequence and allow them to dry.
- Tie or wire each painted cap to lengths of string and attach them at intervals to the hoop base.
- Balance the mobile by adjusting string lengths and secure knots firmly.
- Hang the finished mobile where gentle air currents can set it softly in motion.
Rainbow countdown calendar for happy anticipation

A row of numbered pockets with colored fronts felt like a little ritual each morning, and sliding a paper note or token from a pocket created a tiny moment of ceremony. Each color carried its own mood and children loved choosing which pocket to peek into first when the light hit it just so.
The tactile pull of paper or a small prize from a pocket produced a satisfying little reward that made an ordinary day feel special. The whole display looked festive across a wall, a small daily parade of color and tiny surprises.
Steps
- Gather cardstock or envelopes in rainbow colors, small tokens or notes for each pocket, and a mounting board or string for display.
- Create pockets by folding and securing cardstock or gluing envelopes onto the backing in color order.
- Insert a token, note, or activity prompt into each pocket and close securely.
- Mount the calendar on a wall at child-friendly height and reveal one pocket per day.
- Rotate or refill the pockets to keep the calendar fresh and engaging.