I have a soft spot for paper snowflakes because they turn a quiet kitchen table into a tiny workshop of surprises. When light finds the thin paper edges, those little cutouts catch shadows and make the whole room feel cozier.
Snowflake Paper Cutting Crafts have a way of shifting a dreary afternoon into something playful, the sort of hobby that invites laughter when a design doesn’t go as planned.
Best Sellers

As an Amazon Associate, I earn from qualifying purchases.
Over the years I’ve kept scraps, tested unusual patterns, and learned how different papers behave under bright lamps or candlelight. Snowflake Paper Cutting Crafts reveal small rewards: crisp silhouettes, playful symmetry, and the simple joy of seeing a flat sheet become something delicate and airy.
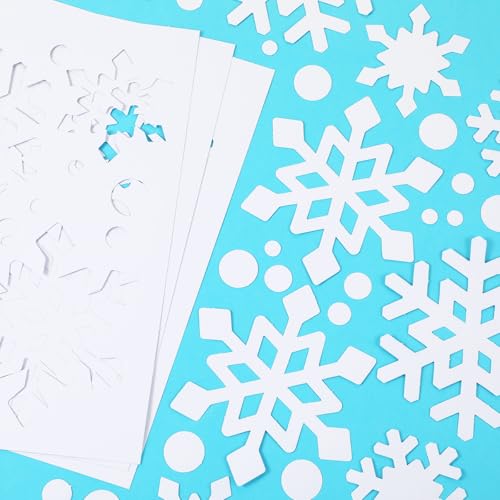
Classic six-point paper snowflake, simple and elegant
I still remember the first time a single sheet transformed into a star-like pattern that looked like it belonged in a frosted window. The edges have a crisp bite, and when sunlight slips through the tiny arms, the shadows scatter across the table like lace.
The rhythm of creating repeating motifs felt almost meditative, and the paper’s thinness made each detail sing. Holding one up to the light brings a hush and a small smile, as if the room itself just learned a new secret.
Steps
- Fold a square sheet into a triangle and then halve it to make a narrower triangle.
- Trim off the pointed excess to form a neat cone shape and align the edges evenly.
- Draw simple shapes along the outer edges of the cone, leaving the center intact for stability.
- Cut along the drawn lines to remove small sections, creating symmetrical arms.
- Gently open the paper to reveal a six-pointed snowflake and flatten it under a heavy book.
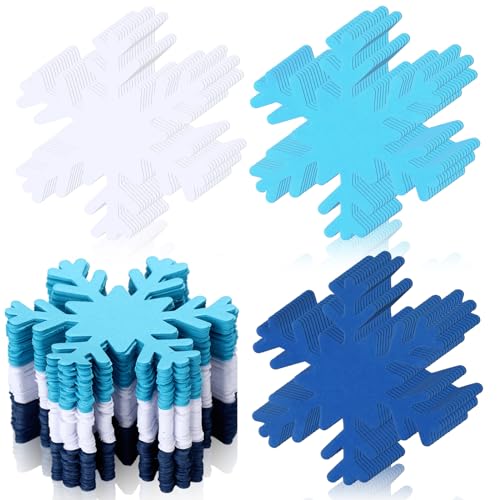
Layered paper snowflakes with depth and shadow play
There’s a tiny thrill in stacking thin cutouts so their arms interlock and cast layered shadows. Different papers create contrasts; vellum gives a soft glow while cardstock offers more defined silhouettes.
The feel of the layered stack in my hands is pleasantly substantial, like holding a miniature medallion. When suspended near a lamp, the overlapping patterns produce complex silhouettes that change with every tilt.
It’s a neat way to move from flat ornament to something that reads like miniature architecture.
Steps
- Prepare several snowflake cutouts in varying sizes and textures, such as vellum and light cardstock.
- Center smaller cutouts atop larger ones, creating a pleasing overlap of arms and openings.
- Pierce the center gently and thread a thin cord through the stack to hold the layers together.
- Adjust the layers so the edges sit at different angles, creating depth.
- Hang the finished layered snowflake near a light source to enjoy shifting shadows.
Kirigami snowflakes with pop-up dimensionality
I love the moment a flat sheet becomes a tiny sculpture and starts to pop outward. The precise slices create pockets and arches that catch light in surprising ways.
The tactile sensation when fingers explore the raised pockets is oddly satisfying, like discovering tiny caves. Patterns that include arches and internal cuts give a sense of motion, as if the snowflake is unfolding toward the ceiling.
It’s a playful take on paper cutting that reads architectural and whimsical at the same time.
Steps
- Fold a paper into a compact triangle or cone following classic folding for radial symmetry.
- Mark symmetrical internal shapes and small tabs where inward cuts will create pop-up sections.
- Make careful interior cuts leaving connecting tabs intact to allow sections to lift.
- Gently push selected areas outward so the snowflake takes on a three-dimensional form.
- Smooth the shape and suspend it for display so light emphasizes the raised pockets.
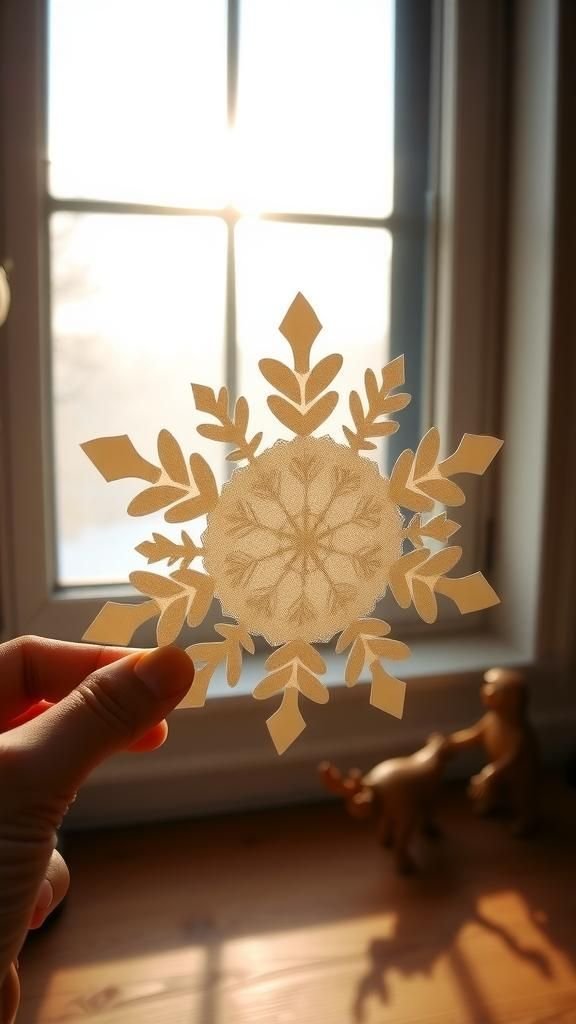
Delicate doily snowflakes for vintage charm

Paper doilies bring a sense of nostalgia, their lace-like patterns whispering of tea and quiet afternoons. When trimmed and reshaped into snowflakes, they keep a filigree that looks almost textile.
The surface has that papery softness that makes edges feel fragile under fingertips. Hung in clusters, doily snowflakes feel antique and cozy; the air seems quieter, as though everyone paused to admire the pattern.
They’re delightful for adding an old-fashioned, romantic layer to a modern room.
Steps
- Select paper doilies in different diameters and lay them flat on a clean surface.
- Trim edges and remove a few inner sections to suggest radial snowflake arms.
- Layer doilies of varying sizes and align centers for a balanced composition.
- Secure centers by threading a slender string through small punctures and knotting gently.
- Suspend a cluster of doily snowflakes from a ceiling or window to enjoy their lace shadows.
Translucent vellum snowflakes that glow softly
Vellum has a soft, almost glowing character that makes snowflake edges appear luminous. When light passes through, the pattern becomes ethereal and soft-focused, like a memory of frost on glass.
The surface holds ink and pencil marks subtly, so each motif reads with a gentle halo. I’ve enjoyed arranging these near candles where the translucency creates a warm, muted glow.
They feel less brittle and more like tiny light filters, lending a soft atmosphere to a dim corner of the room.
Steps
- Cut vellum into squares and fold for radial symmetry as you would with regular paper.
- Sketch a delicate pattern concentrating on open spaces for light transmission.
- Make clean cuts along the sketch, taking care to preserve connecting bridges for strength.
- Unfold the vellum gently and press between heavy books to flatten subtle curls.
- Hang the vellum snowflakes near soft light sources to appreciate their glow.
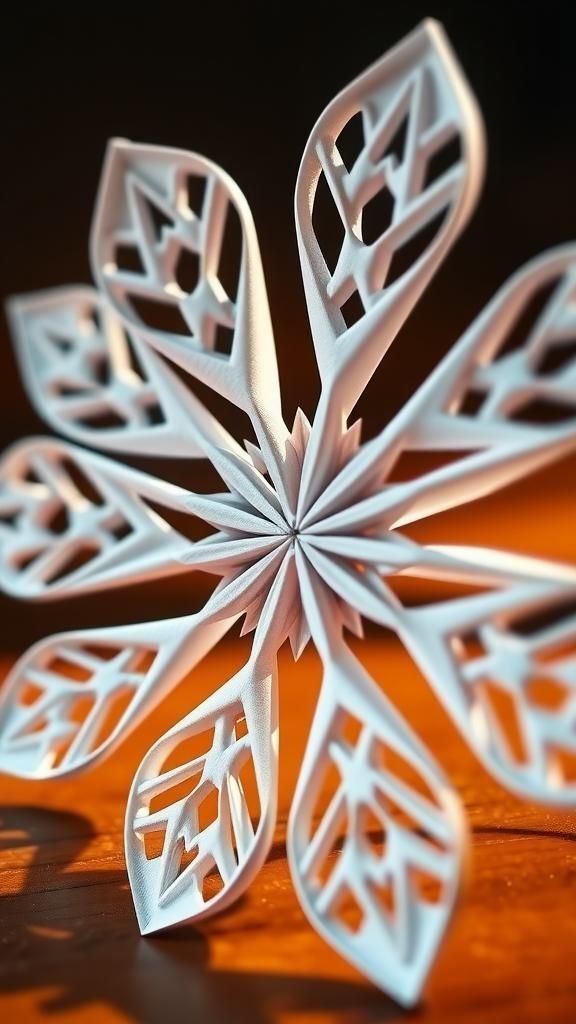
3D geometric snowflakes that resemble tiny sculptures

Crafting snowflakes that stand out in three dimensions always feels like making a miniature monument. The crisp planes and repeating geometric arms create a sense of engineered beauty, almost like origami turned crystalline.
Running fingers along the clean edges gives a satisfying tactile feedback, and the way they sit on a mantel invites closer inspection. They work well as centerpiece elements because their shadow patterns change dramatically with slight shifts of perspective.
There’s a little architectural joy in watching them hold their own in a room.
Steps
- Prepare multiple identical snowflake shapes and score fold lines lightly where ridges will be.
- Fold along the scored lines to form angular planes and create volume in each arm.
- Interlock or slot the planes together at central hubs to build outward geometry.
- Ensure connections are snug so the structure holds upright and retains its form.
- Arrange several 3D snowflakes on a table for a sculptural display.
Window cling snowflakes that catch winter light

There’s a charming effect when paper cutouts hug a window and the world beyond becomes a soft backdrop. These snowflakes seem to belong to the glass, their tiny perforations catching frost-like patterns from streetlights and passing cars.
The contrast between the clear exterior and the cozy interior makes each snowflake feel like a miniature scene. When I place them at different heights on a pane, the composite view looks like a delicate snowfall caught mid-fall, and the room gains a quiet festival of shapes.
Steps
- Cut snowflake designs from lightweight paper or vellum with enough open space to let light through.
- Moisten the window slightly and position the snowflake with the damp surface so it clings temporarily.
- Arrange multiple snowflakes at different heights and orientations for visual variation.
- Pat any air bubbles gently so the pieces sit flush against the glass.
- Replace or rearrange the clings as the light changes to refresh the display.
Snowflake garland strung across a cozy mantel
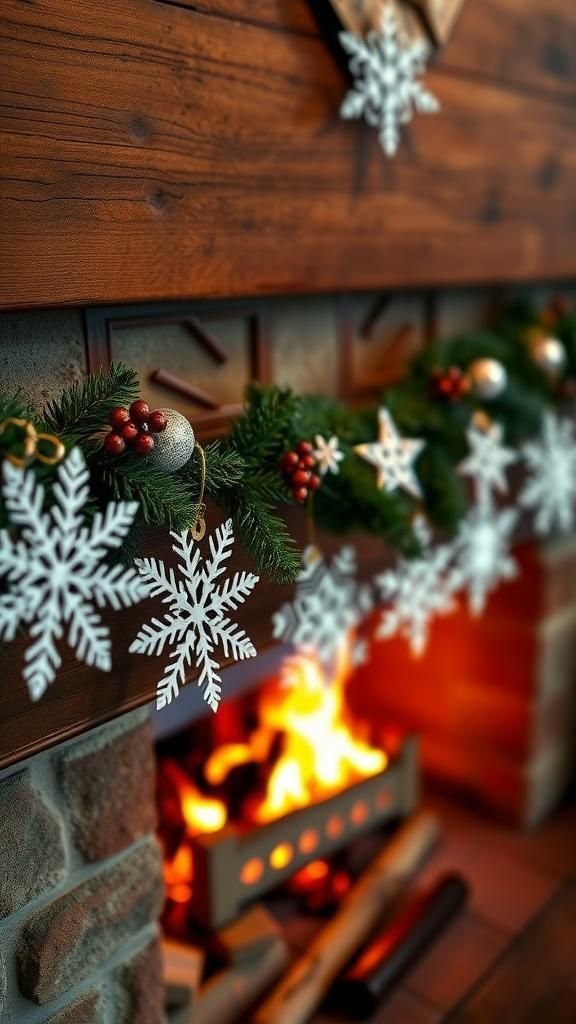
Stringing small snowflakes together has always felt like throwing a tiny party for the mantel. Each cutout speaks with its own personality; some are airy and open while others carry dense lace.
When a breeze lifts the garland slightly, the movement is playful and gentle, and the soft rustle of paper adds an oddly comforting sound. Seeing the layered shadows on the wall behind creates a sense of depth, making an ordinary shelf feel curated and warm without much effort.
Steps
- Prepare a collection of snowflake cutouts in coordinating sizes and styles.
- Punch small holes near the center of each snowflake and thread twine or thin ribbon through them.
- Space the snowflakes along the length of the string to create a balanced rhythm.
- Secure ends to mantel hooks or nails and adjust spacing as desired.
- Let the garland drape naturally so it catches air and casts moving shadows.
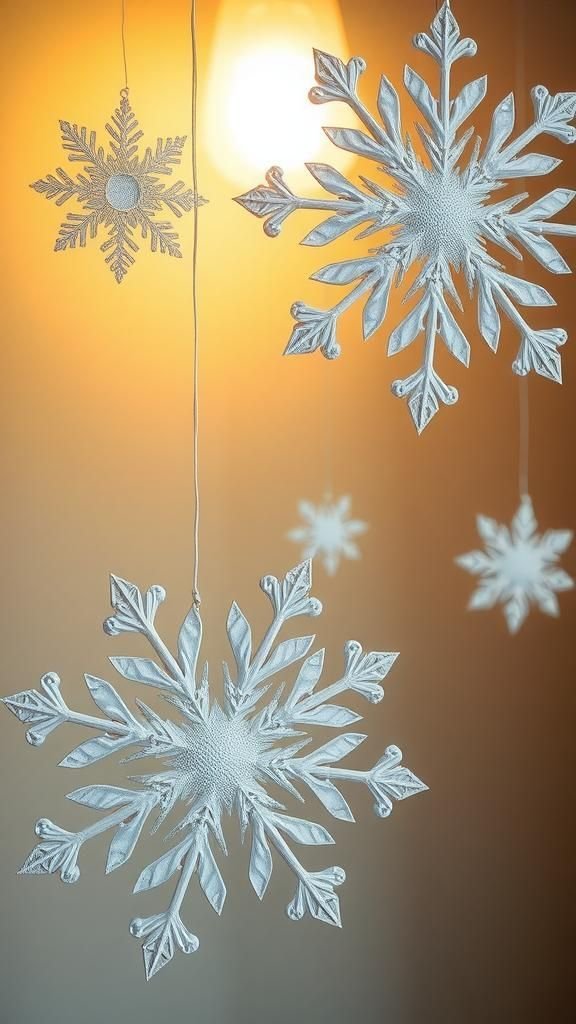
Paper lantern snowflakes that glow from within
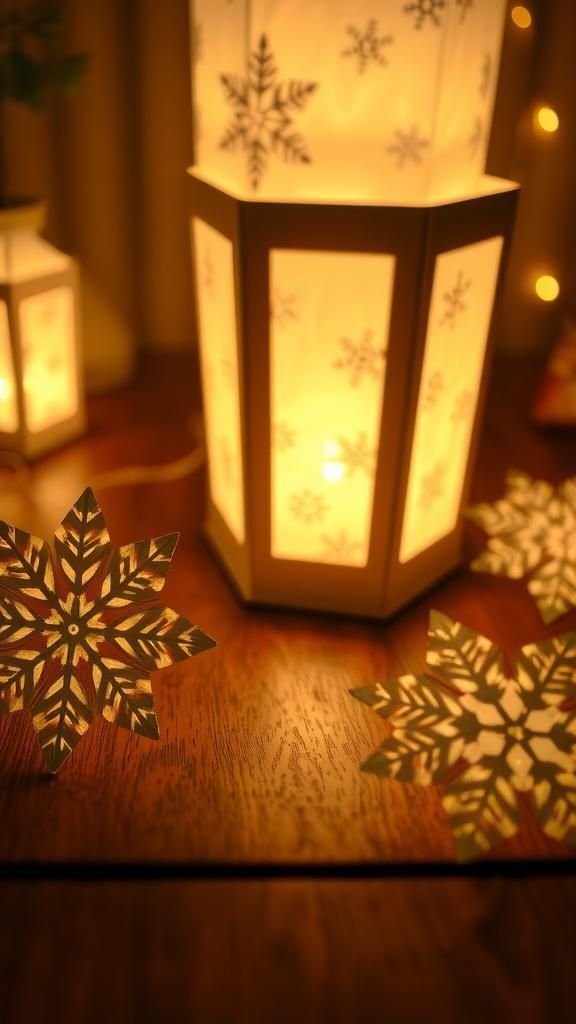
I enjoy transforming flat cutouts into lanterns that inhale ambient light and exhale gentle patterns. The interplay between inner glow and cut openings feels cinematic; each slit becomes a beam.
The interior warmth contrasts with the cool white edges, producing an intimate mood perfect for evenings. There’s a pleasant ritual to arranging them on a table as low light settles, watching the patterns swim across nearby surfaces.
They feel like miniature worlds where light takes center stage.
Steps
- Cut snowflake patterns into squares of thicker paper, leaving solid bands for structure.
- Score and form the paper into cylindrical or faceted lantern shapes, securing overlapping edges.
- Place a battery-powered tea light or LED inside each lantern for safe illumination.
- Position the lanterns on a table or windowsill to allow patterns to project outward.
- Dim surrounding lights to enjoy the full effect of the glowing cut patterns.
Snowflake cards with delicate cutout fronts
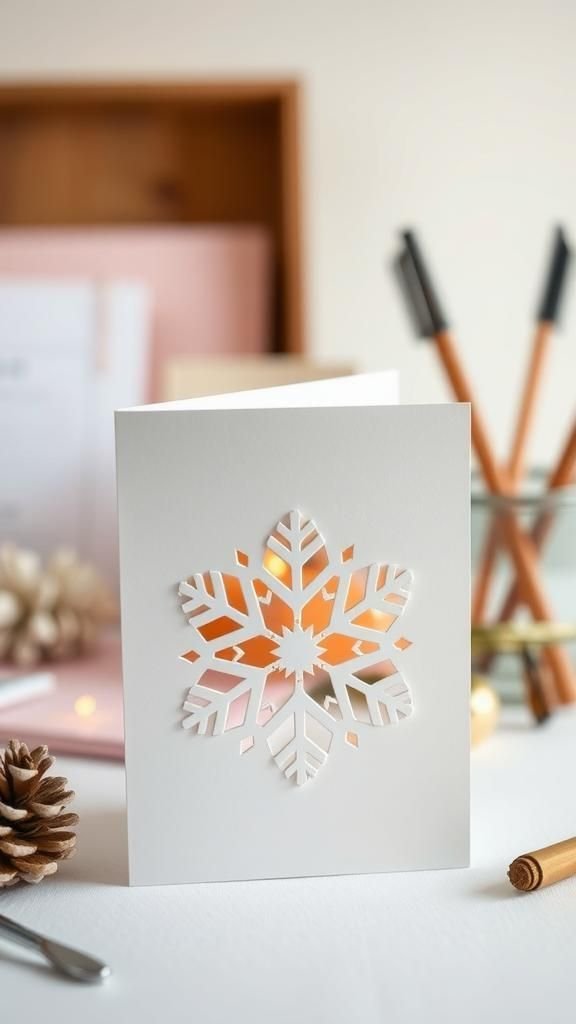
Handmade cards with snowflake cutouts always feel like short letters warmed by a mug of cocoa. The tactile rim where the paper is opened draws fingertips, and the contrast between the cut front and a colored backing creates a subtle surprise.
I like sliding a contrasting paper behind the design so the little holes become jewels of color. Writing a message on the interior becomes part of the exchange, and the recipient often keeps the card as a small keepsake rather than a disposable note.
Steps
- Fold a sturdy card stock in half and plan the snowflake placement on the front panel.
- Lightly sketch the design and carefully cut out the pattern leaving connecting bridges for stability.
- Choose a contrasting paper to glue or adhere behind the cutout for color contrast.
- Allow adhesive to dry fully before writing a personal message inside.
- Tuck the finished card into an envelope for mailing or gifting.
Mini snowflake cupcake toppers for festive baking

Paper snowflake toppers add a playful crown to cupcakes, the way each tiny silhouette catches light feels celebratory. They sit lightly, almost floating above frosting, and the thin shadow across the swirl gives the whole treat a little drama.
I remember arranging a handful on a tray and watching guests pick them up like tiny keepsakes. The tactile crispness contrasts with soft icing, a small pleasure that turns a plain dessert into a moment worth savoring.
Steps
- Cut small snowflake shapes from lightweight paper or cardstock sized for cupcake tops.
- Attach each snowflake to a short toothpick or slender skewer with a small dot of adhesive.
- Allow adhesive to set before inserting toppers into frosted cupcakes.
- Arrange decorated cupcakes on a platter, spacing toppers so each design is visible.
- Remove toppers before serving to keep paper separate from food.
Recycled book page snowflakes with literary flair

There’s something poetic about turning old book pages into ephemeral snowflakes. The faint lines of text peek through the patterns like tiny whispers, and the slightly yellowed paper adds a warm, lived-in tone.
When hung in a window, the letters become part of the texture rather than the message, lending a quiet literary charm. The sound of the pages brushing together has a gentle papery whisper that feels like turning a page of winter itself.
It’s a creative remix that gives old paper second life.
Steps
- Select pages from damaged or repurposed books and trim to workable squares.
- Fold and design snowflake patterns mindful of keeping printed text visible in open areas.
- Make careful cuts to reveal text fragments within the snowflake arms.
- Press finished pieces flat to smooth any curls and hang them for display.
- Consider grouping several book page snowflakes for a themed installation.
Newspaper snowflakes with graphic black-and-white contrast
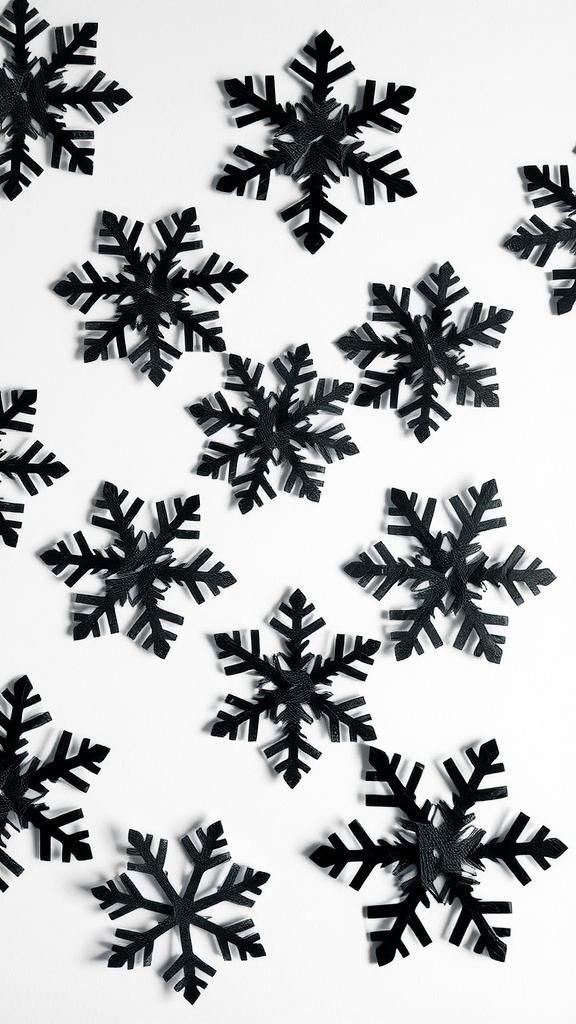
Newspaper lends a bold, graphic feel to snowflakes with its stark black type against grayish paper. The result reads almost like linocut prints, where every opening becomes a strong silhouette.
I enjoy the juxtaposition of ephemeral news and delicate patterning; it feels playful and slightly rebellious. When clustered together, the monochrome shapes form a rhythmic, modern tapestry.
The crinkle of newsprint has its own sound that hints at bustling streets and morning routines, which makes these snowflakes feel lively in a quiet room.
Steps
- Tear or cut squares from newspaper sheets, smoothing edges for folding.
- Fold squares for radial symmetry and mark bold geometric patterns on the outer edges.
- Cut away selected sections to create sharp high-contrast silhouettes.
- Open gently and press flat to reduce wrinkles from the newsprint.
- Arrange the newspaper snowflakes in a grid or garland for a graphic display.
Recycled magazine snowflakes, glossy color surprises

Magazine pages offer shiny pops of color that catch eye and light, and when transformed into snowflakes each cutout becomes a mosaic of hues. The glossy finish gives edges a faint gleam and the layered inks create a patchwork effect where small fragments of imagery peek through.
I like how unexpected colors turn up in the arms, a snippet of a photograph or a splash of neon that reads like happy accident. They’re playful and modern, and they look great clustered as a bold installation.
Steps
- Select vibrant magazine pages and trim to square shapes for folding.
- Fold and plan asymmetrical or geometric patterns that allow colorful fragments to show.
- Cut carefully to preserve structure while exposing glossy image fragments.
- Unfold and flatten the snowflakes to reveal the colorful mosaic effect.
- Cluster several magazine snowflakes for a lively, colorful display.
Lace-inspired snowflakes with intricate filigree patterns
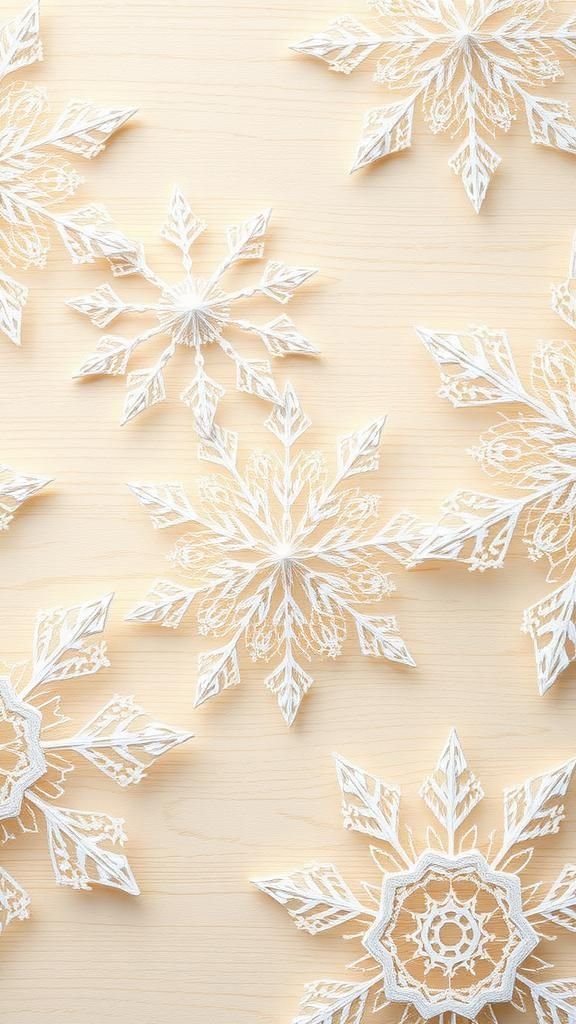
Filigree patterns bring an almost textile quality to paper snowflakes, with tiny holes and tendrils that look spun from lace. Observing these up close feels like peering at antique needlework, and the complexity invites a slow, appreciative gaze.
The thin threads of paper between cut spaces create a fragile web that holds the design together, yielding an elegant silhouette. When grouped, they read as a small gallery of handcrafted lace, and people tend to linger longer, admiring how light travels through the delicate network.
Steps
- Choose a fine, high-quality paper that can hold delicate internal cuts without tearing.
- Sketch a lace-like motif with many small openings concentrated toward the center.
- Use a sharp blade to carefully remove tiny sections, keeping connecting strands intact.
- Gently smooth the piece flat to reveal the full filigree pattern.
- Frame or mount the snowflakes to protect the delicate filigree work.
Stenciled snowflakes for crisp repeating motifs
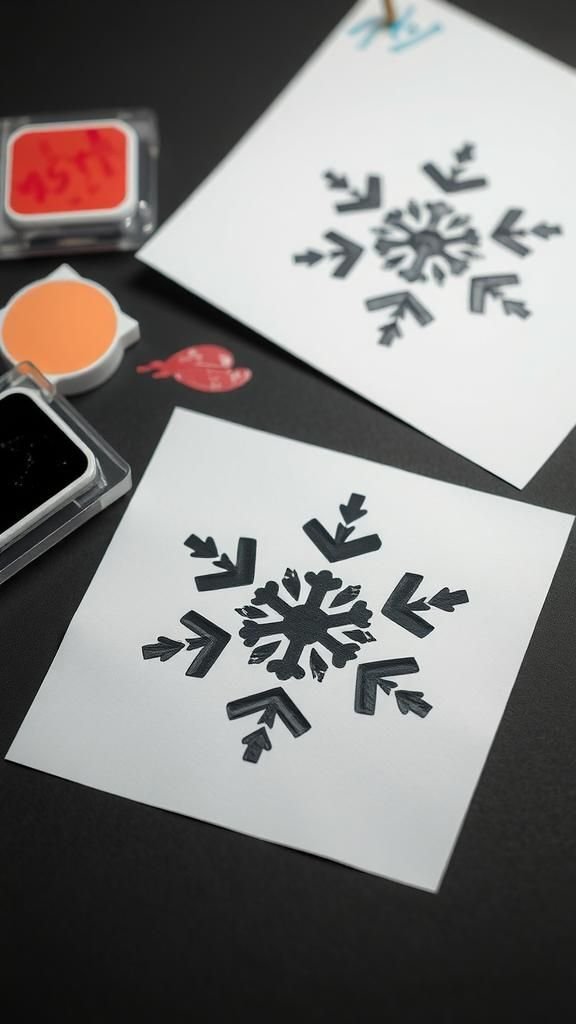
Stencil work yields clean, repeatable shapes that balance handmade charm with graphic clarity. When paper stencils are pressed against another sheet and inked lightly, the edges come out neat and satisfying.
The tactile contrast between inked surfaces and cut-away negative space creates a bold rhythm. I once layered a few stenciled motifs in contrasting inks and loved how each pass accumulated texture.
They feel methodical and playful at once, a nice bridge between spontaneous crafting and deliberate patterning.
Steps
- Cut a sturdy stencil with a snowflake design leaving solid borders for strength.
- Position the stencil over a fresh sheet of paper and secure lightly to prevent slipping.
- Apply ink or paint gently over the stencil with a sponge or brush for even coverage.
- Lift the stencil carefully to reveal the crisp snowflake print.
- Repeat the process to create a series or pattern of stenciled snowflakes.
Shadow-box snowflakes for framed winter displays
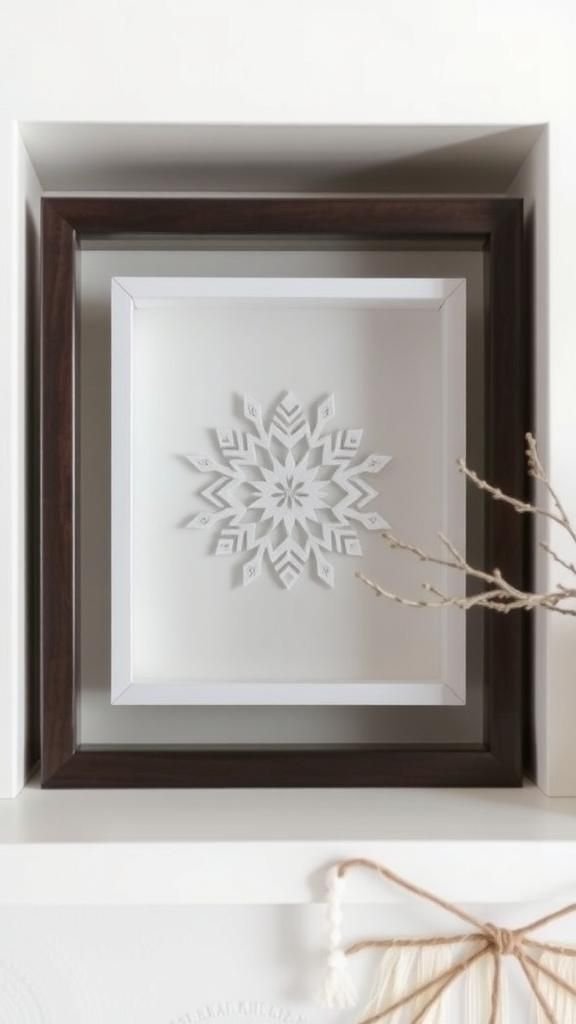
Encasing a snowflake in a shallow frame elevates it from ornament to artwork. The depth of the box provides room for shadows to breathe, and the framed edge gives the piece a quiet formality.
I find the presentation calming; each framed snowflake becomes a tiny window into a cooler season. Sliding the frame onto a shelf alongside books turns the collection into a mini-exhibit.
The paper’s silhouette interacts with the inner backboard and creates a subtle chiaroscuro that rewards close inspection.
Steps
- Choose a shallow shadow box and a snowflake cutout sized to fit within the frame.
- Mount the snowflake on a contrasting backing using small archival dots or tape at the center.
- Place a spacer behind the snowflake if additional depth is desired for shadow effect.
- Close the shadow box and secure it for hanging or tabletop display.
- Position the framed snowflake where directional light can enhance the internal shadow play.
Embroidered-paper snowflakes with thread highlights

Combining tiny stitches with paper adds an unexpected tactile note to snowflakes. The thread traces become like veins of frost, subtle relief that catches light differently than the flat paper.
The slight warmth of thread against cool paper brings a handcrafted intimacy to each piece. When placed on a mantel, these snowflakes have a stitched quality that reads as cozy and slow-made.
Observing the intersections where thread meets cutout feels like reading a small stitched diary of patient handiwork.
Steps
- Reinforce the center of a delicate snowflake cutout with small backing patches to prevent tearing.
- Use a sharp needle to pierce tiny holes where embroidered lines will run.
- Stitch decorative lines or dots with fine thread, securing ends discreetly on the reverse.
- Trim any loose fibers and press the piece gently to lay flat.
- Display the embroidered snowflake flat or mounted to highlight the threadwork.
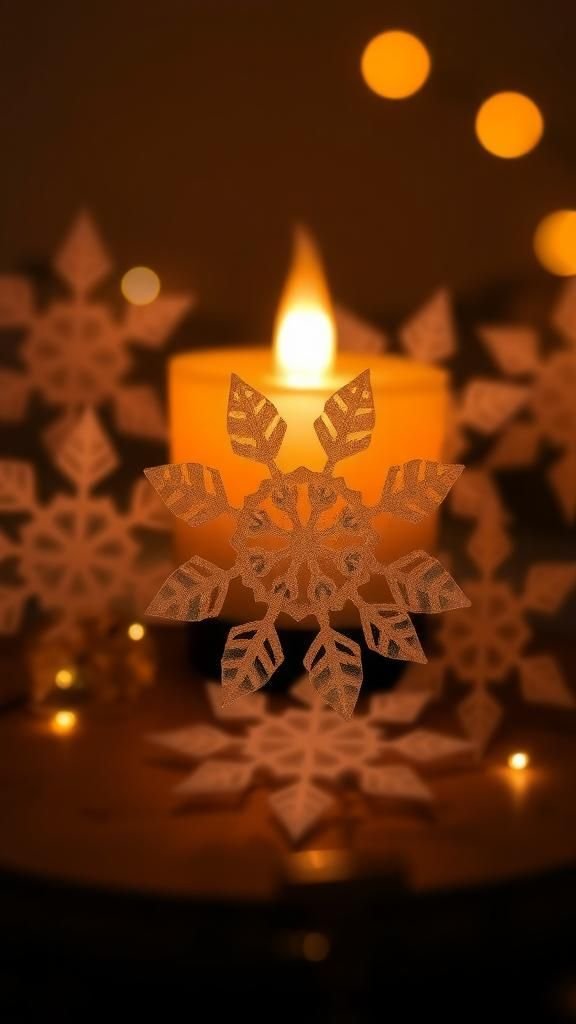
Candlelit silhouette snowflakes for intimate ambiance

Placing delicate cutouts near a flicker creates dramatic silhouettes that feel almost theatrical. The warm pulse of candlelight makes the paper’s edges glow, and the moving flame animates the shadow across nearby surfaces.
I’ve arranged a circle of snowflakes around a tea light and watched the room soften as the patterns traced across the tabletop. The experience is quietly ritualistic, drawing attention to light and shadow in a way that makes conversation feel slower and more present.
Steps
- Create snowflakes with larger open areas to allow candlelight through without risk of flame contact.
- Arrange the snowflakes at a safe distance around battery-operated candles or LED tealights.
- Test placements to ensure shadows fall on desired surfaces like walls or tabletops.
- Dim surrounding lights to amplify the effect of the candlelit silhouettes.
- Monitor the display to maintain safety and reposition lights as needed.
Nature-pressed snowflakes with leaves and petals

Incorporating dried leaves and petals into paper snowflakes adds an organic whisper to geometric designs. The dried material lends subtle texture and earthy tones, while tiny veins of leaves peek through cutouts like delicate tattoos.
Holding one up, I often notice the faint scent of dried greens and the fragile crunch under gentle pressure. The result feels like a hybrid between botanical pressing and paper craft, an invitation to wander outside for materials and then bring those outdoor traces back inside as quiet adornment.
Steps
- Collect and press small leaves and petals until flat and dry for inclusion.
- Arrange pressed botanicals within a planned snowflake cutout layout and secure lightly.
- Make careful cuts around the plant fragments, preserving their shapes within the pattern.
- Seal the composition between two thin sheets or under a clear protective backing.
- Display near natural light to highlight the textures of both paper and pressed botanicals.
Pop-up card snowflakes that unfold with surprise
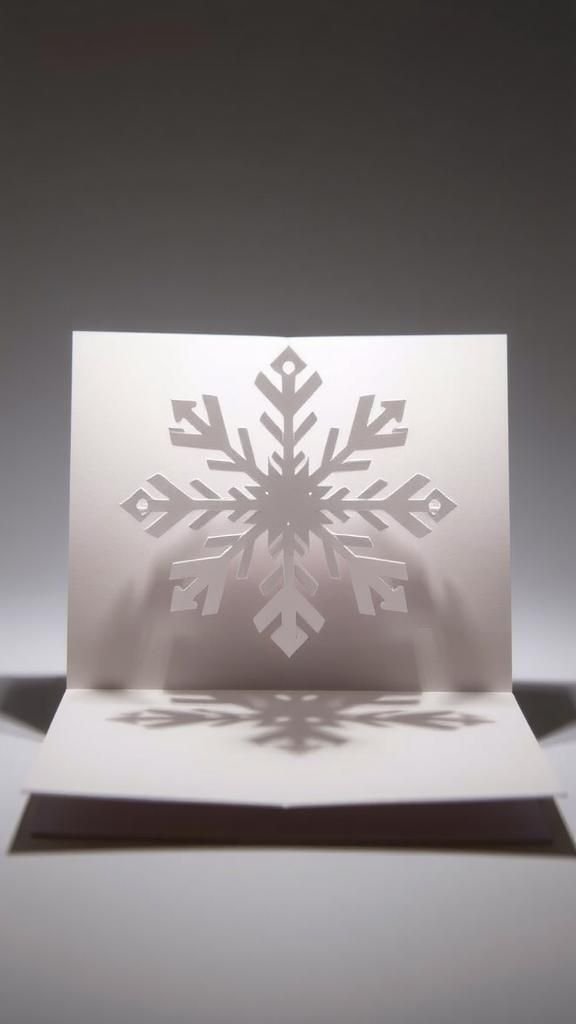
There’s a small gag of delight when a card opens and a snowflake rises into view. The way a folded structure blooms into a suspended form feels playful and slightly theatrical.
The motion adds a performative quality to a simple greeting; friends often laugh when the paper pops up as if it had a mind of its own. Balancing the pop-up structure so it rises smoothly rewards a bit of patience, and the final effect reads like a tiny stage trick performed with paper.
Steps
- Design a pop-up mechanism where a snowflake shape is connected to folded tabs inside a card base.
- Cut the snowflake and tabs carefully, ensuring fold lines are crisp for smooth movement.
- Test the mechanism by closing and opening the card, adjusting tab lengths for balance.
- Secure the tabs to the card interior so the snowflake rises cleanly when opened.
- Decorate the card exterior and include a personal message to complete the presentation.