Disclosure: This post contains affiliate links, which means we may earn a commission if you purchase through our links at no extra cost to you.
Air Dry Clay Incense Holder Designs turn scent time into a small ritual. I began making air-dry clay incense holders after a friend gifted me a tiny clay incense holder that made my desk feel grounded between meetings.
The slow drying and tactile surface invite playful shapes and gentle textures.
These Air Dry Clay Incense Holder Designs range from pebble plates to arch stands and lunar trays, each incense tray catching ash while adding a sculptural accent. Color, texture, and scale shift the mood, from soft terrazzo to inky matte stone.
The ideas below spark projects for gifts, entry tables, and calm nooks.
Table of Contents
Crescent Moon Incense Dish With Soft Speckled Glow

A crescent silhouette brings a dreamy lunar vibe to an incense corner. Gentle curves frame a shallow dish that catches ash without fuss, while a small angled hole at the thickest point supports a stick.
Pigments mixed into the clay create ivory, sand, or midnight hues, and tiny speckles lend a pottery-like feel. A satin sheen complements gold or silver mica accents along the rim.
Styled near crystals, a book stack, or a ceramic bud vase, it reads romantic and serene. Wrapped with a moon-phase card, it becomes a thoughtful new moon or housewarming gesture.
Steps
- Roll clay into a slab and cut a crescent outline.
- Pinch walls to form a shallow dish and smooth edges.
- Skewer a small angled hole near the thick end of the crescent.
- Dry fully, refine with fine sandpaper, and finish with paint or sealant.
Wavy Ripple Tray With Coastal Tones And Flow

Undulating ripples channel a shoreline mood, guiding ash toward the center and adding sculptural rhythm to a shelf. The form reads like wind-brushed sand, flattering seafoam, fog gray, and pale shell pink pigments.
A single stick holder rises from one end, while the rest functions as a catch-all for rings between burns. The palette pairs well with rattan, linen, and sea glass accents.
A matte or eggshell finish keeps it calm and organic. Presented with a bundle of ocean-inspired scents, it suits a bathroom ledge or a breezy window nook.
Steps
- Roll a slab and carve a long oval with gentle undulations.
- Pinch raised ripples and smooth transitions with a damp sponge.
- Form a small cone holder on one end and pierce a hole.
- Dry, sand lightly for soft edges, and apply color and varnish.
Minimal Arch Bridge Stand In Stone Neutrals

An architectural arch gives a modern profile with a quiet presence. The bridge form stabilizes a slim block that features a diagonally drilled hole, while the arch gap underneath keeps the piece airy.
Color suits bone white, stone gray, onyx, or putty, with a smooth matte surface that echoes concrete. It sits neatly on a bookshelf beside art books and a small brass object, lending structure without clutter.
Gift-ready with a monochrome incense set, it suits new apartment vibes and tidy workspaces where sculpture meets purpose.
Steps
- Form a rectangular block and carve an archway through the bottom.
- Refine faces until crisp and even, rounding only the sharpest edges.
- Angle a hole on the top surface for stick support.
- Dry thoroughly, smooth with fine grit, and seal for durability.
Pebble Riverbed Plate With Scatter Stones
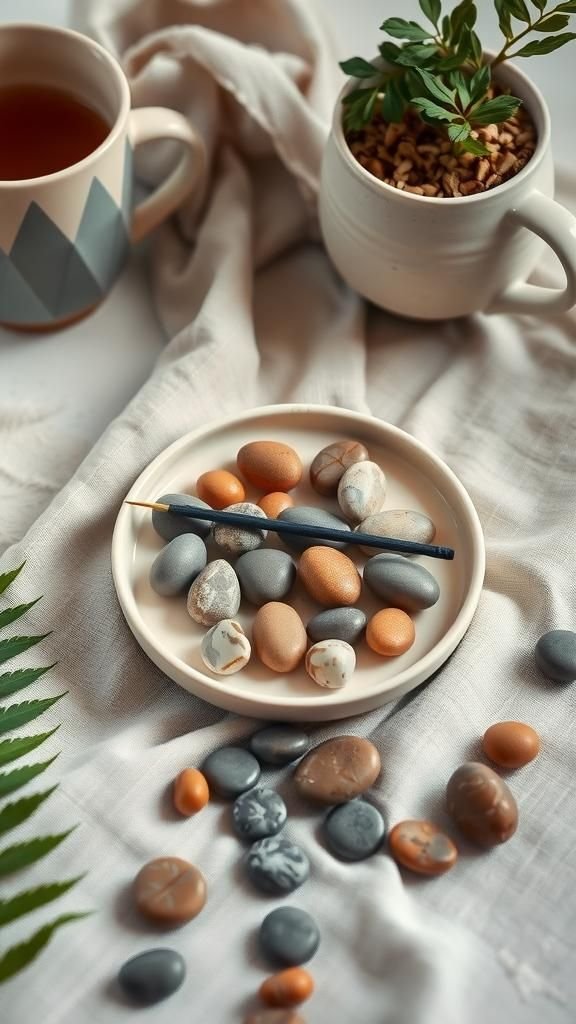
A shallow plate dotted with rounded pebbles evokes a gentle stream. Each pebble, formed from tinted clay, brings charcoal, taupe, and warm sandstone tones, while the base plate stays pale for contrast.
Subtle texture on the pebbles adds a tactile feel that pairs well with linen runners and ceramic mugs. An off-center stick well transforms the scene into a tiny landscape.
Presented with a small pouch of incense cones, it makes a soothing gift for morning journaling spots or bedside rituals, especially when styled with a glass of water and a single fern frond.
Steps
- Create a flat dish with shallow walls from a rolled slab.
- Shape small pebble forms and press them gently into the base.
- Add a shallow well or hole for stick or cone placement.
- Allow to dry, refine surfaces, and apply matte finish or wax.
Terrazzo Confetti Slab With Colorful Chips
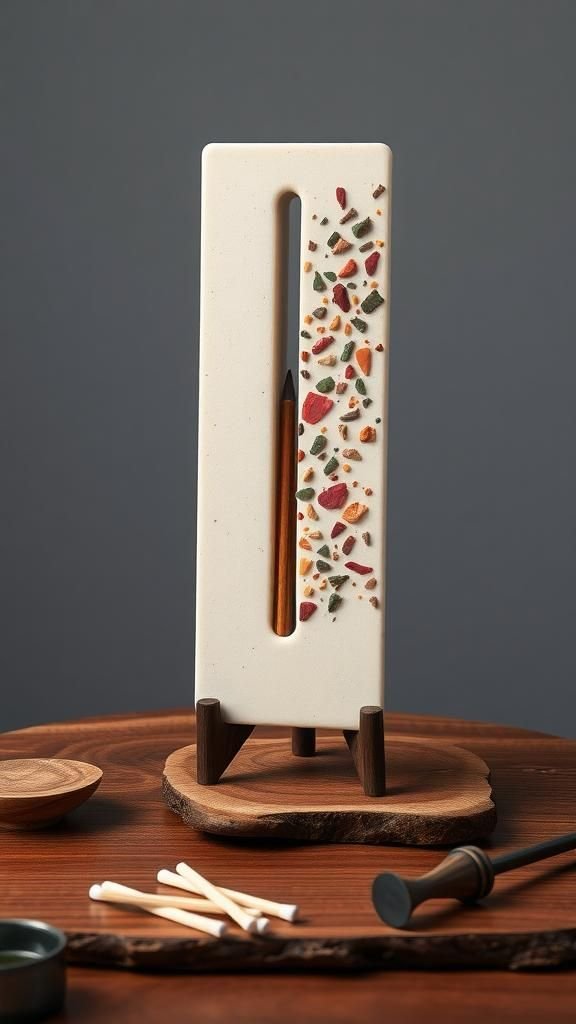
A terrazzo slab adds playful specks that feel modern and cheerful. Small chips in clay colors like blush, moss, mustard, and ink sit within a creamy base, echoing mid-century surfaces.
The rectangular tray features a slim oval recess for ash and a tiny stand for the stick, keeping the silhouette clean. A smooth satin finish enhances the embedded shards without glare.
Styled with a candle snuffer and a small match striker, it feels cohesive on a sideboard. Wrapped in kraft tissue with a color card, it delights design lovers who enjoy pattern and pop.
Steps
- Marble tinted clay scraps into a pale base and roll a slab.
- Cut a rectangle, then carve a slim ash channel.
- Shape a small stand and fix it near one edge with scoring and slip.
- Dry fully, sand the face to reveal chips, and seal with clear coat.
Botanical Leaf Vein Dish In Dewy Greens
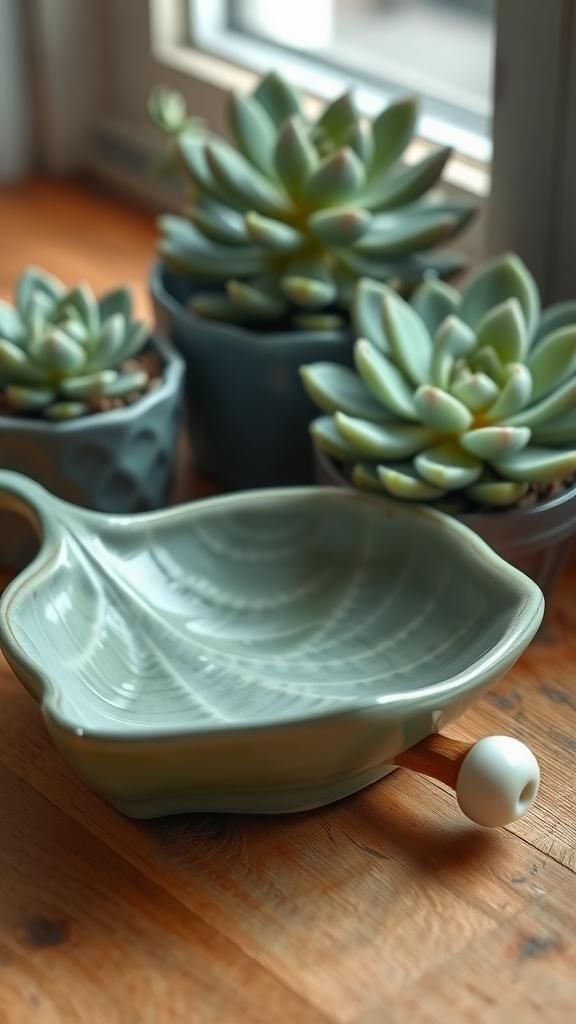
Leafy texture brings nature to the table with veins that catch shadows beautifully. The dish resembles a broad leaf, gently cupped to cradle ash, with a small stem-end holder for a stick.
Pigments range from pale sage to deep forest green, sometimes brushed with pearly highlights along the veins for dimension. It pairs with woven baskets, terracotta pots, and small succulents for a calming vignette.
Tied with twine and a sprig of eucalyptus, it becomes a sweet thank-you present for plant lovers and tea ceremony fans alike.
Steps
- Roll a slab and trace a leaf shape with gentle curves.
- Impress vein patterns with a veining tool or real leaf.
- Form a tiny stem-like cone, pierce a hole, and blend to the dish.
- Dry, refine edges, add green tones, and protect with a clear seal.
Geometric Prism Block With Angled Faces
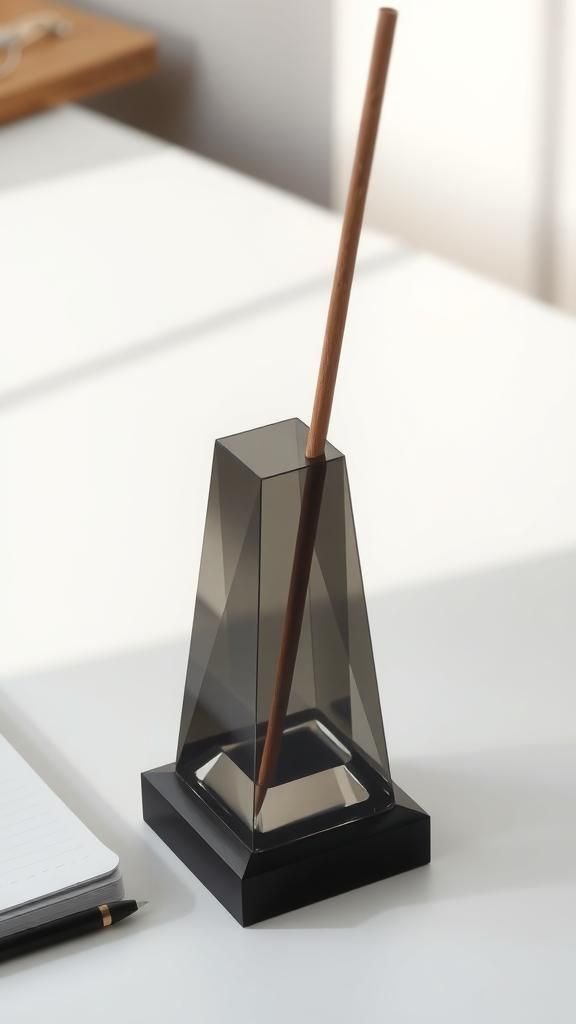
Faceted planes catch light across a compact prism holder that feels like a desk totem. An angled hole on the top facet cants the stick slightly, while a shallow perimeter groove gathers ash.
Colors favor graphite, chalk, or cool clay beige, finished in matte for a stone-like presence. The geometry pairs with metal stationery, clear acrylic trays, and monochrome notebooks.
Packaged in a small black box with tissue, it suits coworkers or studio friends who lean modern and tidy. The small footprint keeps work surfaces neat while adding a crisp sculptural accent.
Steps
- Form a solid block and slice facets to create a prism.
- Drill an angled hole on the top facet for the stick.
- Carve a shallow groove around the base to catch ash.
- Dry thoroughly, smooth planes, and finish with matte varnish.
Scallop Shell Dish With Pearly Highlights
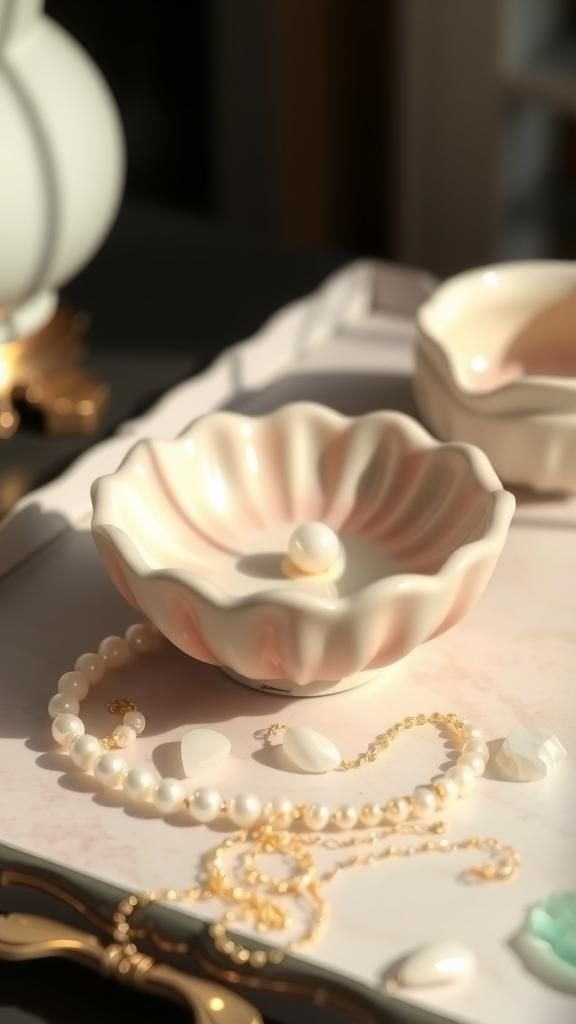
A scalloped shell evokes tide pools and beach finds, with ridges that radiate from a central point. The shallow cup holds cones or catches ash from a stick set in a tiny pearl-like nub.
Creamy ivory, blush, or soft coral pigments pair with a mother-of-pearl shimmer along ridge tips. It sits beautifully on a vanity with pearls, sea glass, and a small mirror, echoing coastal elegance.
Wrapped with a ribbon and a card that hints at seaside calm, it charms anyone who loves ocean themes and gentle, nostalgic color stories.
Steps
- Shape a fan shell outline and press ridge lines from center out.
- Pinch a small pearl-shaped nub near the rim and pierce a hole.
- Curvature the dish slightly to hold ash and refine edges.
- Dry, sand lightly, add pearly accents, and seal to protect.
Lunar Phases Tile With Inlaid Moons
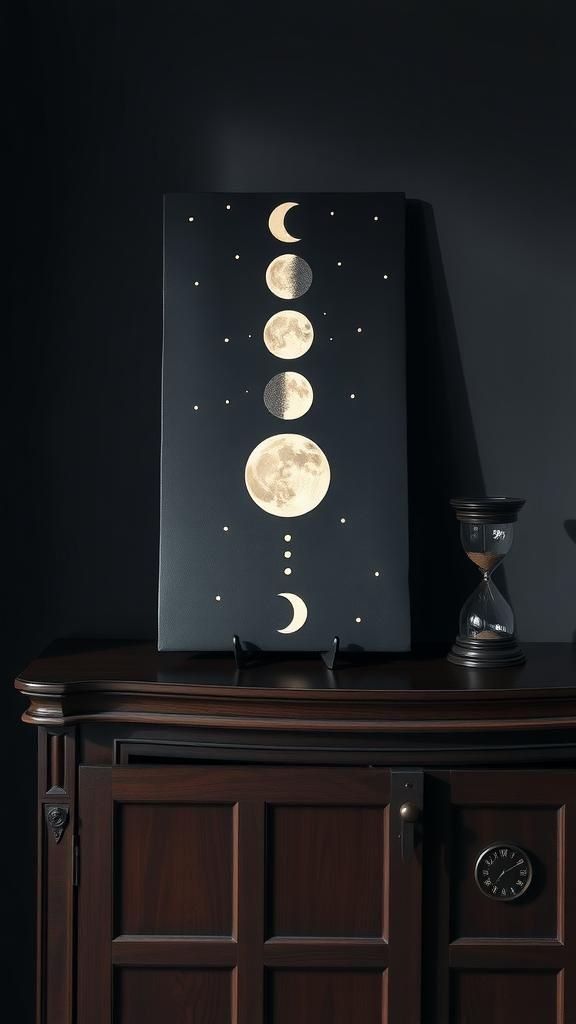
A long tile presents the lunar cycle as graphic dots and crescents, turning incense time into a quiet star-gazing moment. Inlaid moons in ivory or gold sit on a charcoal or indigo field, while a slim stick stand punctuates one end.
A matte finish keeps the graphic crisp without glare. The elongated form suits window sills and console tables, pairing easily with a telescope book or a tiny hourglass.
Gifted with moon-scented sticks, it becomes a poetic token for night owls and slow evenings.
Steps
- Roll a long slab and square the sides cleanly.
- Inlay moon shapes by setting contrasting clay into the surface.
- Add a small cylindrical stand and pierce a hole near one end.
- Dry flat, refine edges, and coat with matte clear finish.
Constellation Pinch Plate With Metallic Stars

A round pinch plate sprinkled with tiny metallic dots suggests a night sky. Constellation lines engraved lightly connect the dots around a central holder for a stick.
Navy, midnight, or inky violet pigments set the stage for gold or silver accents, while a satin glow adds depth. Paired with a glass cloche or a clear dome, the plate feels like a little museum of stars.
It tucks nicely into a reading nook beside a stack of novels and a brass bookmark, making a charming birthday surprise for stargazers.
Steps
- Pinch a shallow round dish from a clay ball and smooth the rim.
- Engrave faint lines for constellations and dot star points.
- Form a small central stand, pierce a hole, and blend carefully.
- Dry, refine, add deep color and metallic accents, seal lightly.
Mountain Range Landscape Tray In Misty Tones
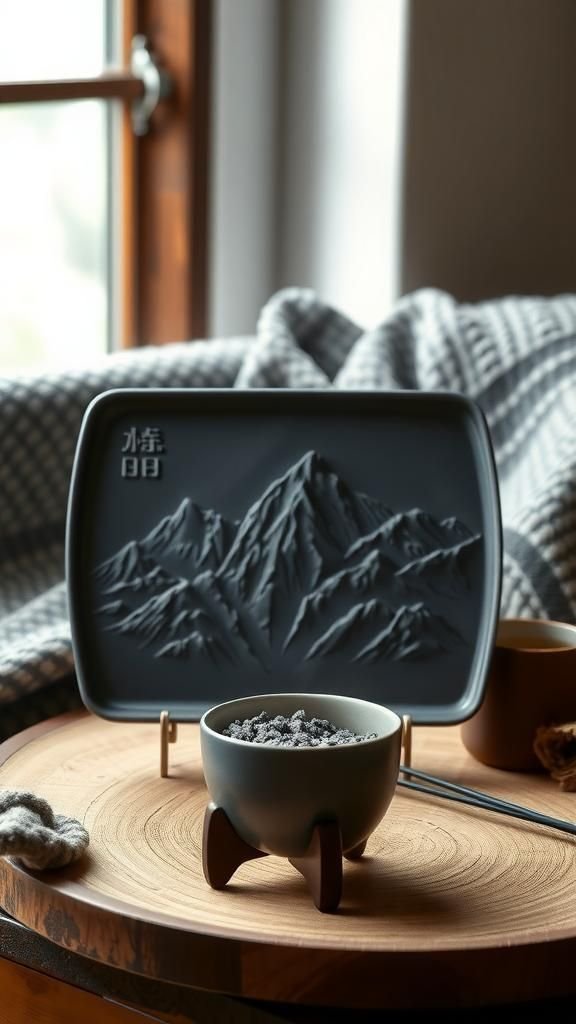
Layered peaks rise across a rectangular tray, with engraved ridgelines and shaded pigment for depth. The stick sits in a tiny campsite-like stand at the foreground, while the rest of the plate collects ash.
Slate, heather, and cloud pigments echo distant ranges, finished with a velvety matte surface. It pairs nicely with wool throws, stone coasters, and a ceramic mug, setting a cabin mood even in city apartments.
Wrapped with pine-scented sticks, it suits winter gifting and evenings by a window overlooking lights.
Steps
- Roll a slab and cut a rectangle with soft rounded corners.
- Engrave mountain silhouettes and add layered ridgelines.
- Create a small foreground stand and pierce a clean hole.
- Dry flat, sand lightly, shade with pigments, and seal matte.
Radiant Sunburst Holder With Grooved Lines

A circular plate with radiating grooves makes a sunburst halo around a central stick well. The grooves catch ash and light, creating a warm focal point on a bedside table.
Pale ochre, terracotta, or marigold pigments highlight the theme, while a touch of mica at the center adds a glow. The piece pairs with woven shades, cork coasters, and a little citrus candle.
Gifted with bright, uplifting scents, it brings cheer to morning routines and lazy weekend afternoons alike.
Steps
- Pinch or slab-build a round plate with a slightly raised rim.
- Score radial lines from center outward with a rib or comb.
- Form a neat center well or cone, piercing a clean hole.
- Dry, smooth edges, tint in warm tones, finish with satin coat.
Checkerboard Tile Plate In Bold Contrasts
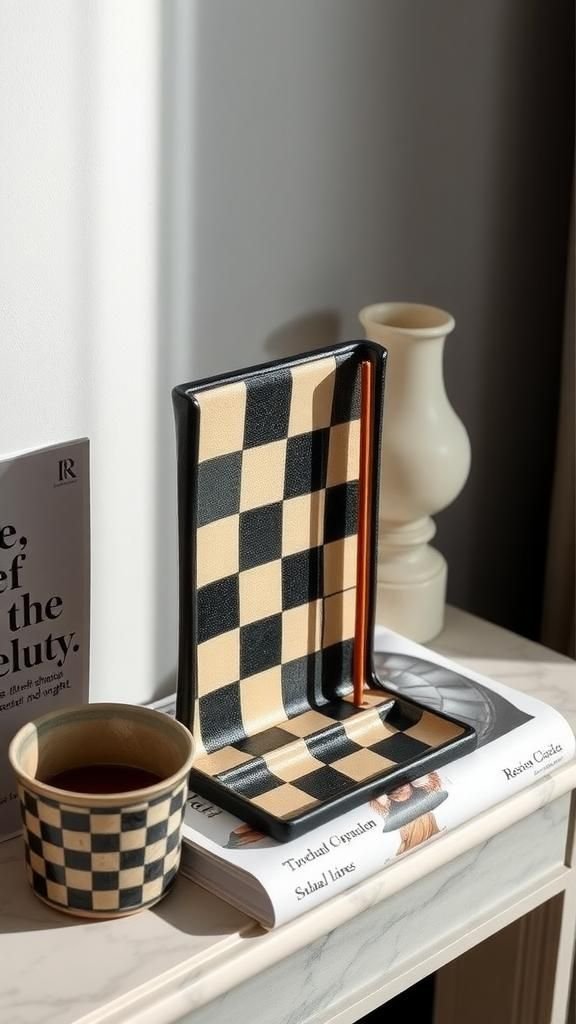
A square plate tiled in alternating light and dark clay squares creates a graphic pop. The grid wraps a shallow recess that gathers ash, while a tiny corner post holds the stick at a jaunty angle.
Black-and-ivory or moss-and-cream pairings feel fresh; a satin finish keeps the surface easy to dust. Styled with chess pieces or a graphic book cover, it turns a mantel into a gallery moment.
Packed with monochrome matches, it makes a sharp gift for design-minded friends who love crisp patterns.
Steps
- Laminate light and dark slabs and cut even squares.
- Assemble a checkerboard and compress into a single sheet.
- Cut a plate, add a shallow recess, and build a corner post.
- Dry flat, refine the surface, and seal with a subtle sheen.
Marbled Oval Tray With Swirling Veins

Soft marbling turns a simple oval into a fluid statement. Ivory blends with smoke gray or pale blush, forming delicate veins across the surface.
A slim ridge edges the tray, keeping ash contained, and a low cylindrical holder keeps attention on the pattern. The finish leans satin to amplify the swirl without glare.
It pairs with glass objects and pale wood, balancing minimal and organic moods. Gifted with a neutral incense set, it suits weddings, thank-yous, or anyone drawn to gentle movement in decor.
Steps
- Twist together two tinted clays and roll into an oval slab.
- Lift a slim ridge around the perimeter and smooth.
- Form a low cylinder holder, pierce an angled hole, and blend.
- Dry, refine the surface, and finish with a satin clear coat.
Desert Cactus Scene With Sand-Tone Base

A tiny desert vignette centers a cactus silhouette rising from a sandy base. The plate carries warm beige and terracotta pigments, while the cactus stands in sage or olive with small scored ribs.
A small pit accommodates cones, and the cactus arm holds a stick at a gentle angle. The scene pairs with sun-bleached textiles, clay pots, and a burnt-orange candle.
Wrapped with palo santo-inspired scents, it becomes a wellness gift for friends who love sun-soaked palettes and road-trip memories.
Steps
- Shape a round plate with a slight lip and smooth the surface.
- Model a small cactus form and score ribs lightly.
- Blend the cactus onto the plate and pierce an angled hole.
- Dry completely, refine details, add desert pigments, and seal.
Wabi-Sabi Stone Form With Organic Edges
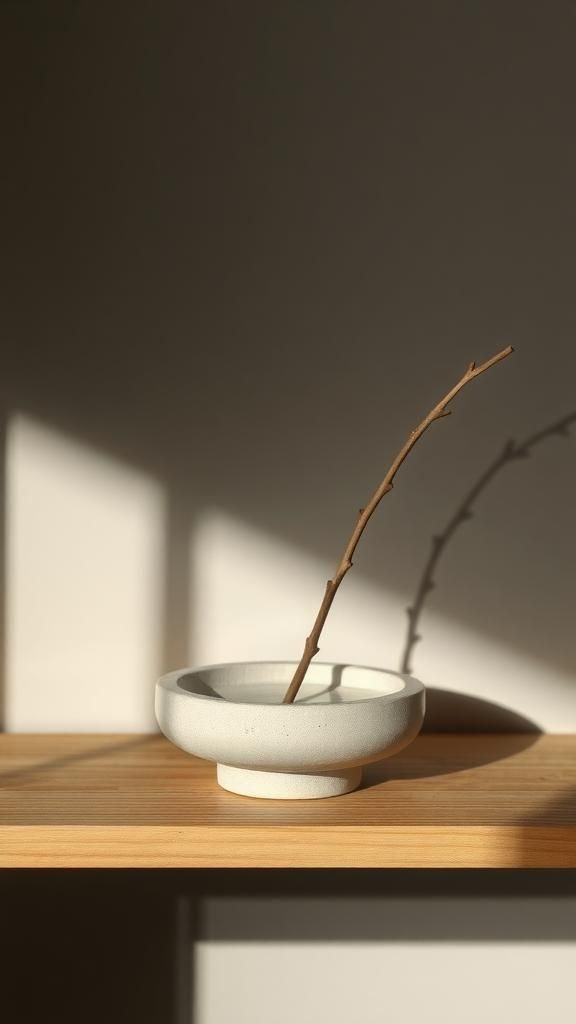
An irregular oval with softened edges feels like a river stone lifted from a path. Subtle dents and asymmetry add soul, while a small off-center holder keeps the line of the stick casual and poetic.
Mineral tones such as pumice, charcoal, and bone suit the mood, with a chalky matte finish that invites touch. It sits quietly on a low shelf beside a single branch in a vase and a stack of linen coasters.
Wrapped in unbleached tissue, it becomes a calming gift for meditation corners.
Steps
- Pinch an irregular oval dish, allowing organic curves and dents.
- Smooth the interior, leaving slight texture on the outer face.
- Form a small off-center holder and pierce a neat hole.
- Dry, buff edges lightly, and finish with a chalky matte coat.
Art Deco Fan Pedestal With Metallic Trim

A layered fan motif rises behind a small pedestal base, echoing theater marquees and vintage mirrors. Radiating steps frame the stick, while a shallow platform collects ash.
Black, emerald, or ink-blue pigments pair beautifully with thin metallic edging along the fan tips. The silhouette suits mirrored trays, cut glass, and a single taper candle for a glamorous vignette.
Presented in a velvet pouch with incense in classic notes, it suits birthdays and dressing tables that lean old Hollywood.
Steps
- Cut a fan silhouette and build stepped layers for dimension.
- Create a shallow platform base and blend to the fan back.
- Add a central holder and pierce a stable hole.
- Dry, refine edges, paint rich color, and add metallic accents.
Rainbow Arc Multi-Slot Stand In Pastels
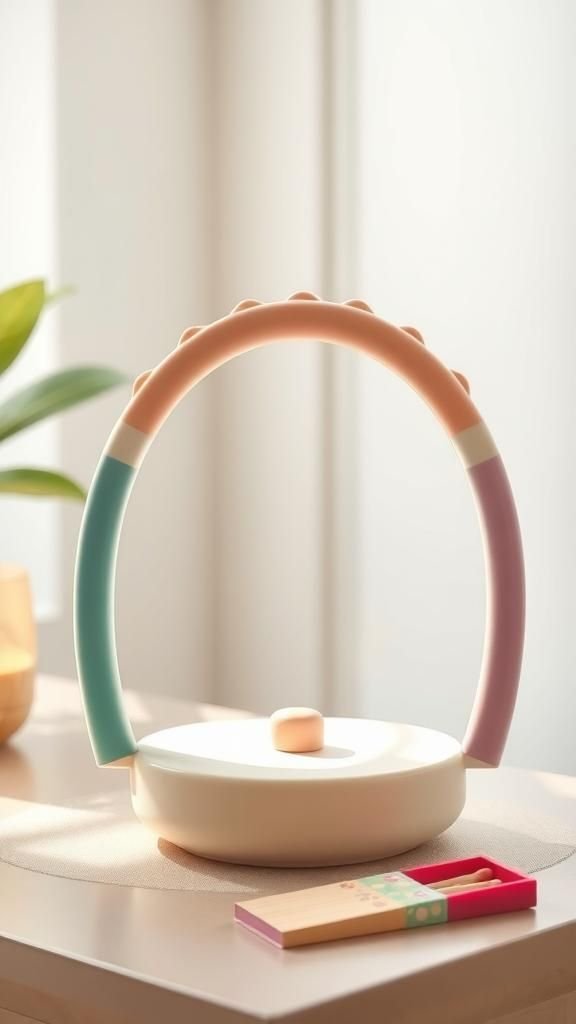
A standing rainbow with gentle arcs offers multiple stick slots along the top ridge, inviting a mix of scents across days. Pastel tones like butter, peach, lilac, and mint create a cheerful gradient on a creamy base.
The footing remains substantial so the piece sits steady on a console, while a satin finish gives a ceramic-like glow. It pairs with illustrated postcards and a colorful match striker.
Packaged with a set of short sticks, it becomes a bright pick-me-up for dorm rooms or studio corners.
Steps
- Form a chunky rainbow arc and flatten the base for stability.
- Score shallow grooves along the top and pierce small holes.
- Smooth transitions between arcs and refine the silhouette.
- Dry thoroughly, add pastel pigments, and finish with satin varnish.
Incense Boat With Sand Well And Keel Lines

A long, shallow boat shape carries a small sand-filled well that anchors cones or catches stray ash. Keel lines scored along the underside and rim suggest a quiet nautical theme.
The palette leans to driftwood gray, cream, and muted navy, with a smooth satin face that wipes clean easily. It looks at home on a windowsill beside a tiny bottle with a pressed flower.
Bundled with a vial of fine pumice sand and coastal scents, it makes a soothing present for ocean-daydreamers.
Steps
- Roll a long oval slab and pinch up gentle walls like a skiff.
- Carve keel lines and smooth the interior surface.
- Create a small recessed well near one end for sand or cones.
- Dry, refine, add muted pigments, and seal for a satin finish.
Knotted Ring Holder With Sculptural Loop
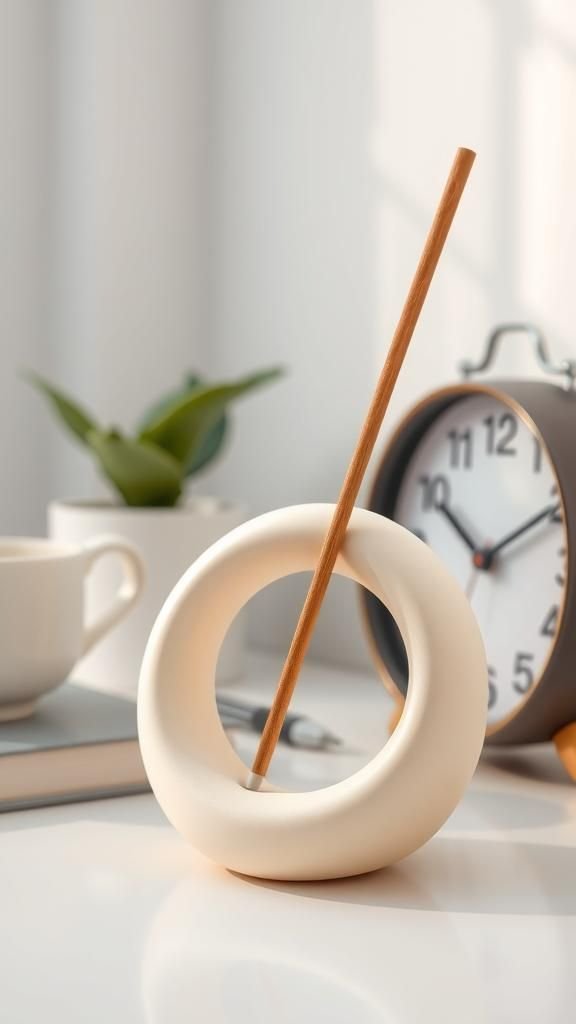
A smooth looped knot forms a compact stand that holds a stick at a jaunty angle through a central aperture. The knot reads like a tiny sculpture on a desk, with a shadow that changes across the day.
Clay tinted in ivory, stone, or coal matches a modern palette, while a soft waxed finish adds a subtle glow. It pairs well with a tray of paper clips, a minimalist clock, and a potted pothos.
Boxed with matchbooks, it becomes an easy, stylish desk gift.
Steps
- Roll a coil and twist into a simple looped knot.
- Blend overlaps for strength and smooth the surface.
- Pierce a precise hole through the top for the incense stick.
- Dry completely, refine, and finish with wax or clear coat.
Mosaic Border Dish With Jewel-Tone Tesserae
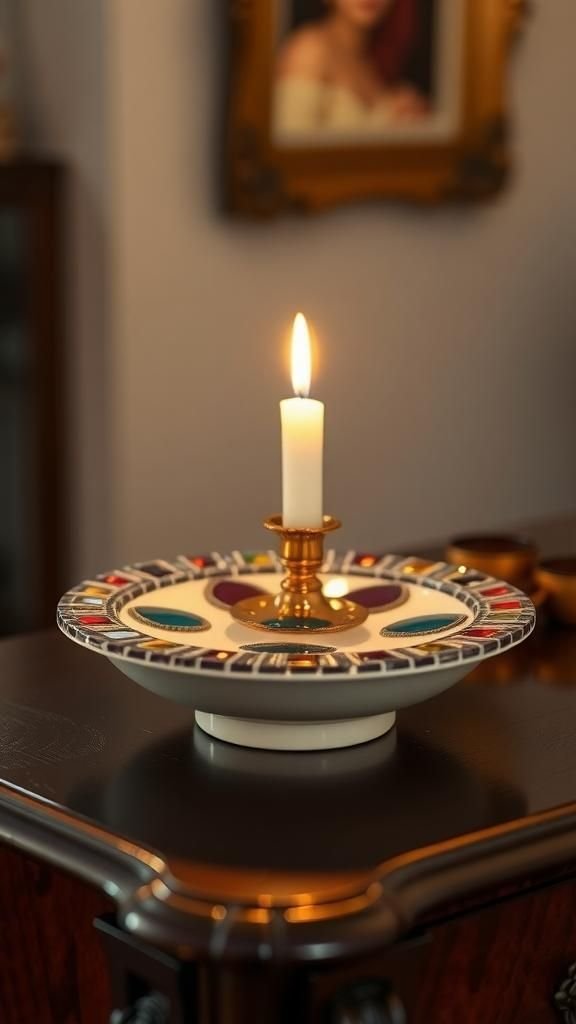
A shallow dish framed by small square insets suggests mosaic art without heaviness. Jewel-tone chips in garnet, sapphire, and jade punctuate a creamy field, while a tiny center post holds the stick.
The border creates a picture-frame effect that suits bookcases and sideboards. A satin glaze effect adds a quiet glow to the colored insets.
Presented with richly scented sticks, it feels celebratory and refined, perfect for holiday gifting or a dinner host surprise.
Steps
- Roll a slab and cut a round or square dish with low walls.
- Inlay small tinted squares around the rim as a mosaic border.
- Add a center post and pierce a clean vertical hole.
- Dry, smooth, highlight colors, and seal with a satin coat.