
Disclosure: This post contains affiliate links, which means we may earn a commission if you purchase through our links at no extra cost to you.
I still remember when I was trying to brighten up my small patio. None of those expensive store-bought pots were quite right. Then I came across some Creative DIY planter ideas and everything changed. With just a few things I already had at home, I made planters from tin cans, old boots and even a broken chair.
These Creative DIY planter ideas not only saved money but also gave my garden a unique charm. Whether you got a tiny balcony or a big backyard, these Creative DIY planter ideas can completely make it feel more personal.
Creative DIY planter ideas is perfect for anyone who wants their garden to look charming and fresh. These DIY garden planter ideas, which are fun and full of personality, shows how easy it is to transform everyday objects into something special.
Your backyard, filled with Creative DIY planter ideas, becomes more than just a green space. It becomes part of you. Try these Creative DIY planter ideas and your plants, it will love their new homes.
Table of Contents
Mason Jar Herb Planters

Mason jar herb planters are a charming way to add greenery to any kitchen. I remember the first time I made them; I was excited to have fresh herbs at my fingertips. Each jar, filled with soil and a small plant, creates an inviting display. The jars are labeled with the names of the herbs, making it easy to identify them. In the image, you can see jars of basil, mint, rosemary, and one with a slight misspelling, which adds a little character to the collection.
Growing herbs in mason jars is simple and fun. First, you select your favorite herbs; basil and mint are usually my top choices. Next, fill each jar with potting soil, leaving enough space for the roots. Then, gently place the herb plants into the soil. Water them lightly, and place the jars in a spot where they can get plenty of sunlight. I made the mistake of placing mine in a corner, forgetting they need light to thrive.
One benefit of these planters is how they can fit anywhere. I have them on a shelf, and they brighten up the kitchen. Not only do they look good, but I also enjoy using fresh herbs while cooking. It brings a sense of satisfaction knowing I grew them myself. However, I found that sometimes I forget to water them, which leads to droopy leaves.
Overall, mason jar herb planters are an enjoyable project for anyone, whether you are experienced or just starting to garden. With just a few supplies, you can have a lovely herb garden inside your home. I encourage you to give it a try, even if it feels overwhelming at first. You might just discover a new hobby that you enjoy.
Painted Tin Can Planters
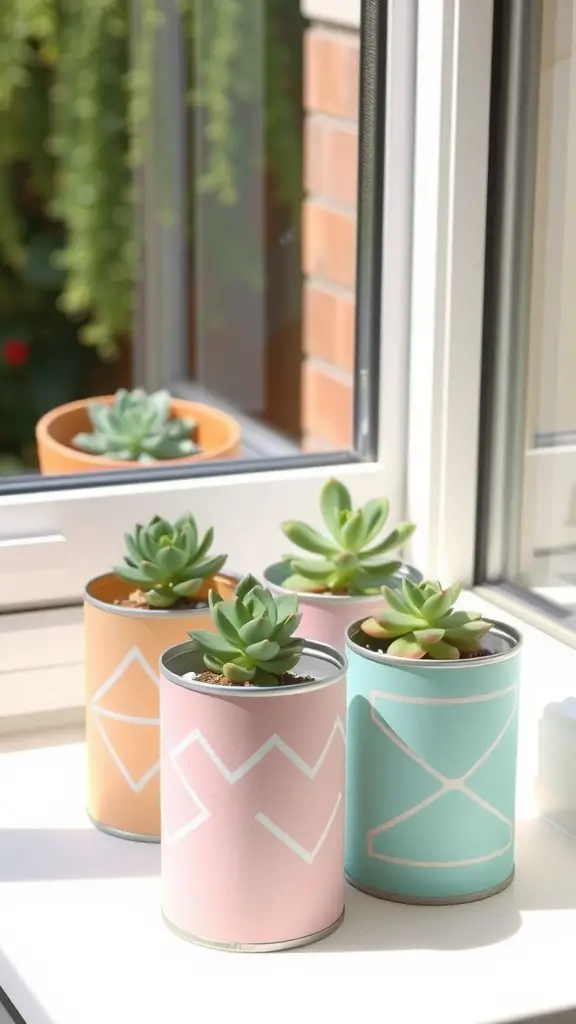
When I think about DIY projects, painted tin can planters come to my mind first. They are not only simple to make, but they also add a splash of color to any space. These charming planters can be made from old cans that you might otherwise throw away. I often find myself collecting cans after a meal, knowing they will serve a new purpose.
In the image, you can see several painted tin cans, each adorned with unique designs. The colors are soft and inviting, creating a delightful display of succulents. I love how the light reflects off the window, adding a warm glow to the scene. Each can has its own character, making them perfect for brightening up a windowsill or any small corner of your home.
To create your own painted tin can planters, you only need a few supplies. Gather some empty tin cans, acrylic paint in your favorite colors, paintbrushes, and soil. After cleaning the cans, I like to paint them in vibrant shades. Let them dry, and then fill with soil and your chosen plants. It is a fun and rewarding task.
One thing I enjoy about these planters is their versatility. They can be customized to fit any decor style. You can choose bold colors for a modern look, or pastel hues for a more delicate feel. Whatever you decide, its sure to add a personal touch to your garden or home.
Hanging Macrame Planters
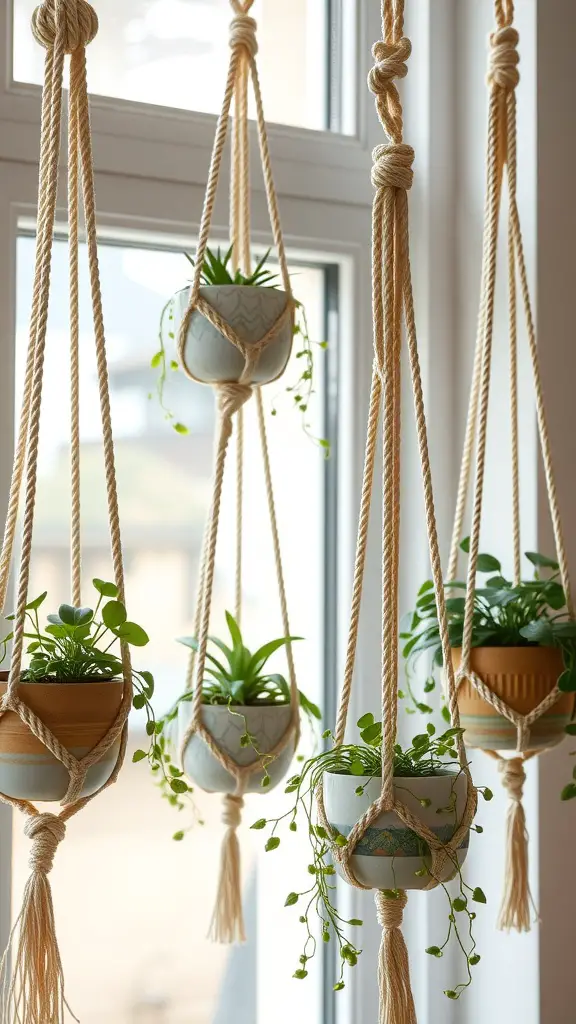
Hanging macrame planters are a beautiful way to bring greenery into our home. I remember when I first discovered them, I was amazed at how simple yet elegant they could look. The way they dangle from the ceiling or a window creates a lovely focal point. Each planter seems to tell a story, especially when paired with vibrant plants.
Creating these planters can be a fun project. We can use different types of pots and ropes to make each one unique. I recently made a few with my kids, and we had such a great time picking out plants and colors. The result was a cheerful display that brightened up our living room. Hanging them at various heights adds depth, which is visually pleasing.
Not only do they add charm, but they also free up space on tables or shelves. It was a pleasant surprise to see how much room we gained after hanging our plants. Plus, they encourage plant growth by exposing them to better light. I have noticed that my plants seem happier when they are hanging. Just ensure the area has enough light, so your plants thrive.
When arranging them, I like to mix different plants. Some trailing vines can really complement the more upright ones. We can create layers of texture that make the plant display more interesting and lively. There is something special about watching the plants grow and fill out their space.
Teacup Succulent Garden
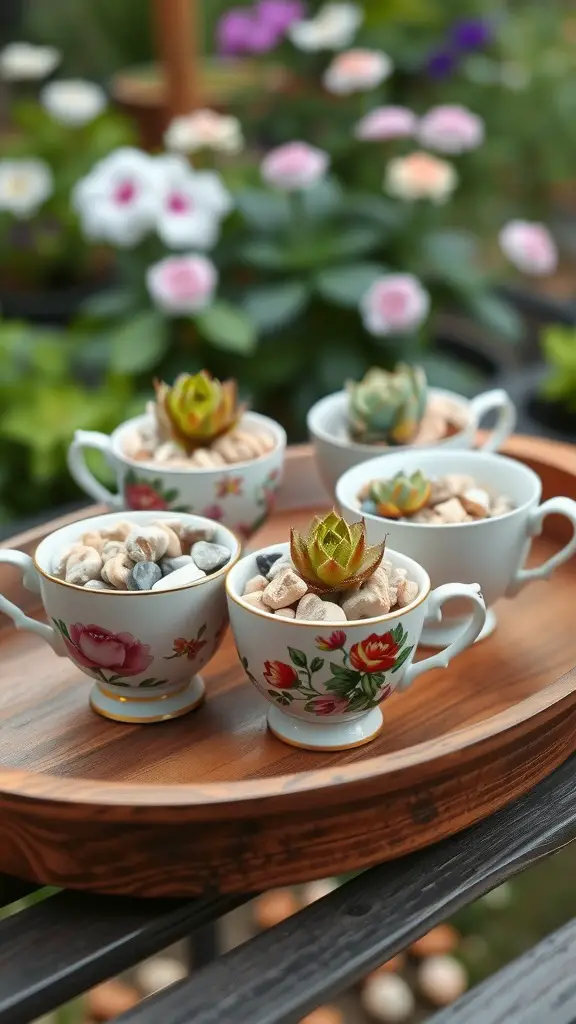
I absolutely love the idea of using teacups as planters for succulents. They’re small and charming, bringing an adorable touch to any space. When I first tried this project, I found the combination of flowers and plants very appealing, it was like bringing a piece of nature indoors.
To create your own teacup succulent garden, you need some cute teacups, potting soil, and of course, your favorite succulents. I started by filling the cups with a layer of small stones for drainage. It was important because succulents can rot if they sit in water. Then, I added potting soil, making sure it was moist but not soggy.
Next, I placed the succulents into the soil, arranging them in a way that they looked balanced and cheerful. I think using different sizes and colors of succulents makes them more visually interesting. After that, I sprinkled some decorative stones on top, which added a nice finishing touch. It looked so delightful that I couldn’t help but take pictures!
These teacup gardens can be placed anywhere, they brighten up my kitchen window sill or even on my office desk. I have found that they require minimal care, just a little watering every now and then. It was really satisfying to see them thrive. Making a teacup succulent garden is not just creative, but it also brings joy when I see them grow.
Wooden Crate Garden
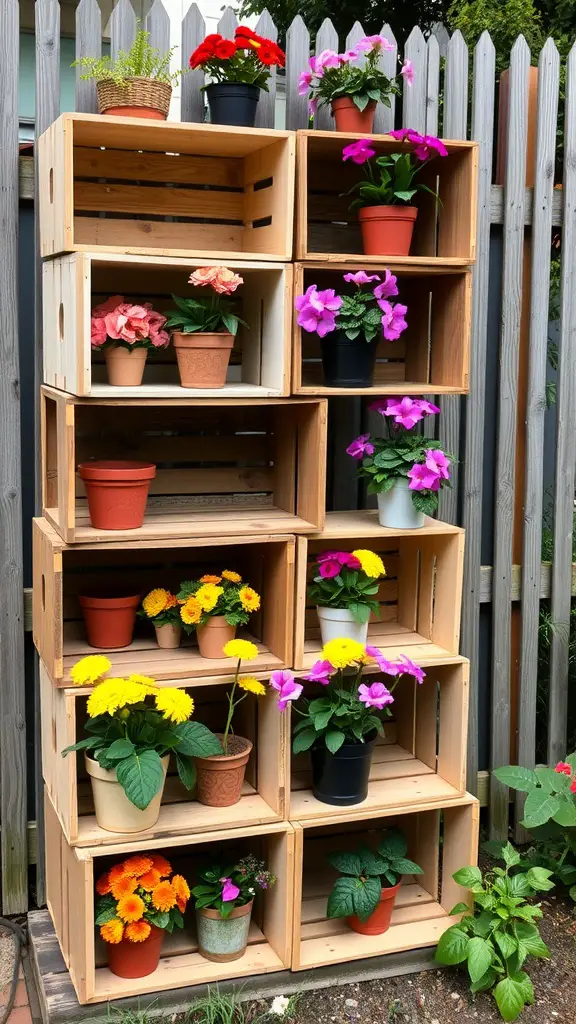
Creating a wooden crate garden is a simple and fun way to add some charm to your outdoor space. I remember the first time I stacked some old crates together. I was amazed how quickly they transformed my garden into a vibrant display. Each crate provides a cozy home for various plants, making it easy to organize them in an appealing way.
The visual appeal of flowers in different colors and sizes, arranged across the crates, really brings joy. In my garden, I have used a mix of pots ranging in shapes and materials, which adds depth and interest. When I saw how the bright yellows and purples stood out against the natural wood, it reminded me of a painter’s palette.
One thing to keep in mind, is that wooden crates need some care. I recommend sealing them to protect against moisture, however, it is important to also ensure that the wood remains ventilated. Also, placing the crates in a spot that gets enough sunlight can make all the difference for the plants inside. If you have space, stacking them in a staggered way like I did creates a unique layered look, which looks well-organized.
Overall, a wooden crate garden gives character to any yard, while also allowing us to showcase our favorite plants. I think the best part about it is how personal this project feels. We can choose what colors and types of flowers we want to display, making it truly ours. Whether you are a seasoned gardener or just starting, you will find joy in this creative gardening project.
Shoe Organizer Planter
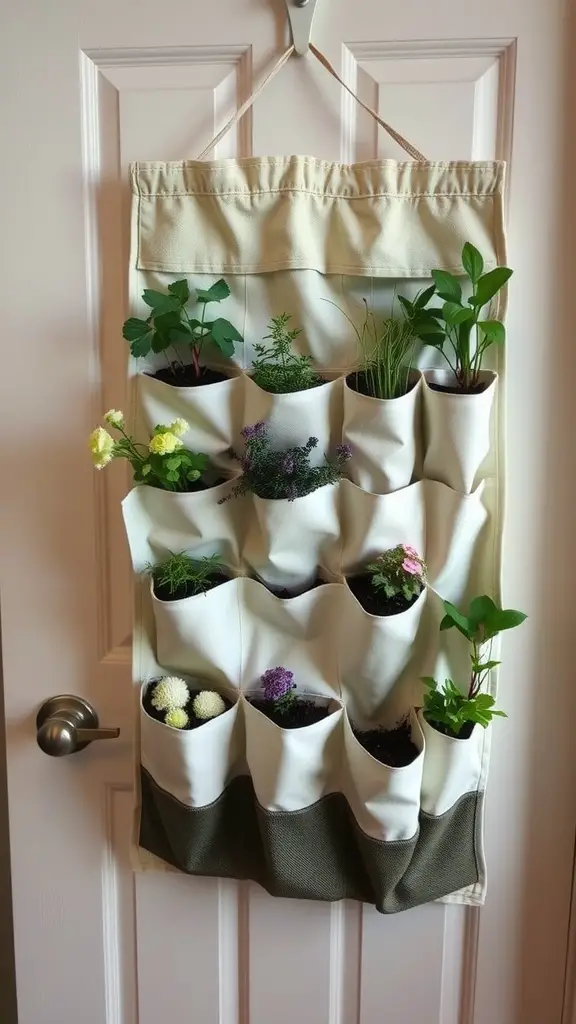
Have you ever thought about using an old shoe organizer as a planter? I recently did this, and it was a fun project that turned out really well. The image shows a hanging shoe organizer that is filled with various plants. Each pocket holds a different type of greenery, and they all seem to thrive in their little spaces.
What I love most about this idea is how it saves space. If you live in an apartment or have a small yard, you can still enjoy gardening without needing a large area. I placed mine on the back of a door, which I think is ideal for easy access. It also makes my space look vibrant and colorful.
When I first hung it up, I wasn’t sure what plants would work best. I ended up choosing a mix of herbs and flowers, which was a great decision. The herbs, like basil and parsley, are not only pretty but also useful for cooking. The flowers add a pop of color, brightening up my kitchen.
One thing to remember is to ensure the shoe organizer has proper drainage. I added some small holes in the bottom of each pocket, this helps prevent water from pooling. It’s important to water them regularly, since they can dry out faster than traditional planters. Every time I walk by, it reminds me of how much I enjoy gardening.
There is something special about watching plants grow in a creative way. Even if you are not a gardening expert, this project is manageable. You can easily customize it to fit your style. I encourage anyone interested in gardening to give the shoe organizer planter a try!
Painted Terracotta Pots
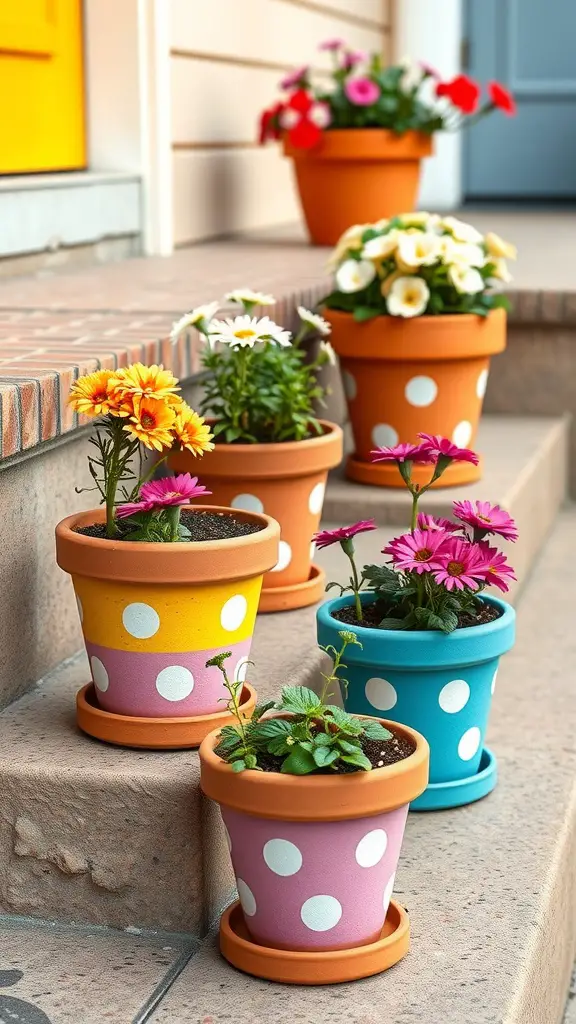
I love adding personal touches to my garden, and painted terracotta pots are one of my favorites. These pots, with their bright colors and playful polka dots, bring a happy vibe to any garden space. I remember when I first painted some pots; it was such a fun afternoon project that turned into a delightful display.
When I look at the pots in my garden, I feel like each one tells its own story. The cheerful yellow and pink pots stand out, creating a wonderful contrast against the earthy tones of the soil. Choosing colors that match or complement your flowers can elevate the look of your outdoor area. It’s like creating little pieces of art scattered around.
While painting, I found it helpful to use acrylic paint, which adheres well to terracotta. I also use a sealant to protect the design from the weather. However, one time I forgot to seal one of the pots, and the paint started to chip away. So, it is important to remember this step to keep the pots vibrant.
Arranging the pots in a quirky way can also make a significant difference. I usually place them on the steps leading to my door. This way, they become a welcoming sight for anyone who visits. Each time, I plant seasonal flowers, which gives me something new to look forward to each season.
Overall, painting terracotta pots is not just about beautifying the garden, it is also about enjoying a creative process. I encourage everyone to grab some paint, pick your favorite colors, and start experimenting. You might find it’s a delightful way to express your personality through your plants.
Colander Hanging Planter
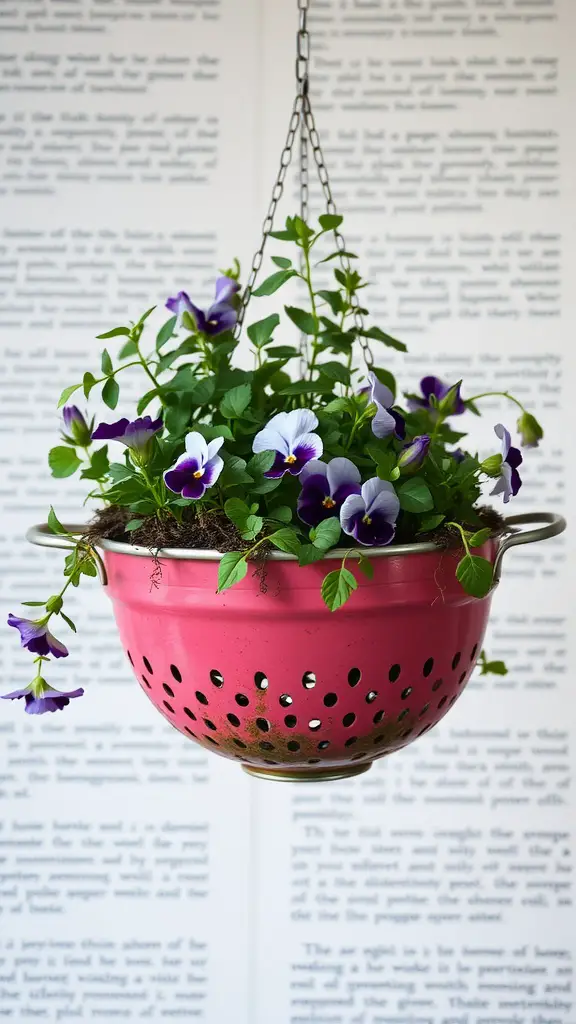
When I first came across the idea of using a colander as a hanging planter, I thought it was a fun and creative twist on traditional gardening. The bright pink color of the colander really makes the vibrant flowers pop, adding a lively touch to any space. Using items that you already have around the house is a great way to express your personal style while also being practical.
To create your own colander hanging planter, you simply need a colander, some potting soil, and your favorite flowers. I personally prefer using pansies because they are colorful and hardy, but you can choose any flowers you like. Make sure the colander has good drainage holes, this is crucial for keeping your plants healthy. I filled the bottom with some soil, then added the plants, and topped it off with more soil to secure them in place.
Once you have your plants arranged, you can hang your colander near a window or in your garden. I found that it adds a charming touch to my patio area. Watching the flowers bloom and grow over time really brings a sense of joy, it is like having a mini garden right in front of me. It’s easy to maintain, just water them regularly and make sure they get enough sunlight.
In conclusion, making a colander hanging planter is not only a creative project, but it also brings life to your space. While it may seem unusual, this approach makes a statement. Plus, it is a fun way to repurpose items, the result is both functional and decorative. Give it a try, and see how much color and personality you can add to your garden!
Concrete Planter Blocks
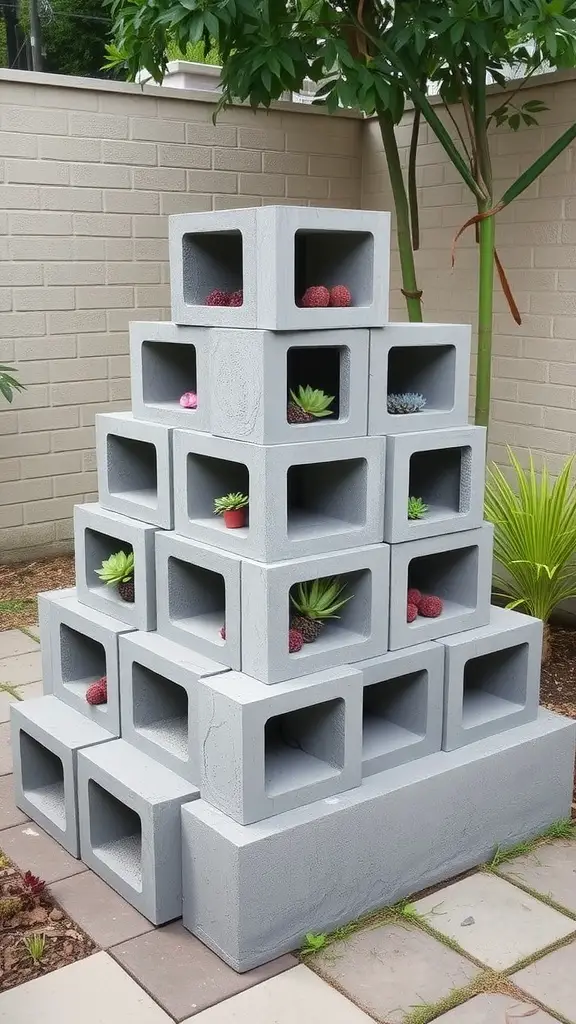
Concrete planter blocks are a fun and stylish way to elevate your garden. I remember when I first saw a similar design in a friend’s backyard, it totally caught my eye. The way the blocks are stacked creates a unique pyramid shape, which adds visual interest to any outdoor space.
Using concrete blocks allows for endless creativity. I have filled them with various plants, from succulents to colorful flowers, and the result always looks fresh. The contrast between the hard texture of concrete and the soft greenery of plants is delightful. Sometimes, I even use them as a way to showcase decorative stones or garden ornaments, making it more personal.
To create your own concrete planter blocks, all you need are some concrete blocks and potting soil. I recommend arranging the blocks in a staggered manner to create different levels. Make sure to choose light-sensitive plants, so they grow well in their new home. I often choose low-maintenance plants, since they are easier for me to care for.
While building your planter, it is important to ensure that the blocks are stable and securely stacked, for safety reasons. I once had a mishap where some blocks shifted, which caused my plants to tumble out. After that, I learned to double-check the stability each time. By the way, don’t forget to add drainage holes in the blocks to avoid water pooling, as this could harm your plants.
Birdcage Flower Display
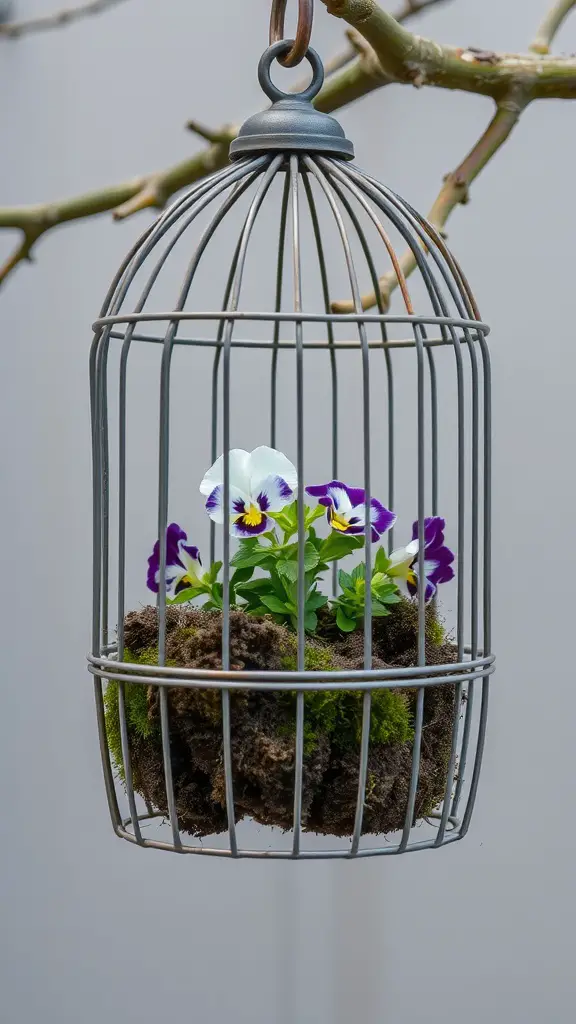
One of my favorite DIY projects is the birdcage flower display. It’s not only easy to create, but it adds a unique touch to any garden. I remember the first time I saw a birdcage used in this way; it was like seeing a hidden treasure in someone’s backyard. The cage is often suspended from a tree branch or a hook, making it visible from various angles.
When I made my own, I used a simple metal birdcage and filled it with colorful pansies. The combination of the rustic metal with the vibrant flowers creates a charming contrast. I found that the flowers thrive well inside the birdcage as long as there is enough sunlight and ventilation. Make sure to water them regularly, but not too much, so the soil doesn’t become overly soggy.
Also, I learned that adding moss at the base not only enhances the look but it helps retain moisture for the flowers. The way the colors peek through the bars of the cage gives the garden a whimsical feel. It’s like having a little piece of art hanging in the yard, and you can easily change out the flowers with the seasons too.
Overall, if you are looking for a way to elevate your garden, try creating a birdcage flower display. I promise you will love the results.
Rain Boot Planters
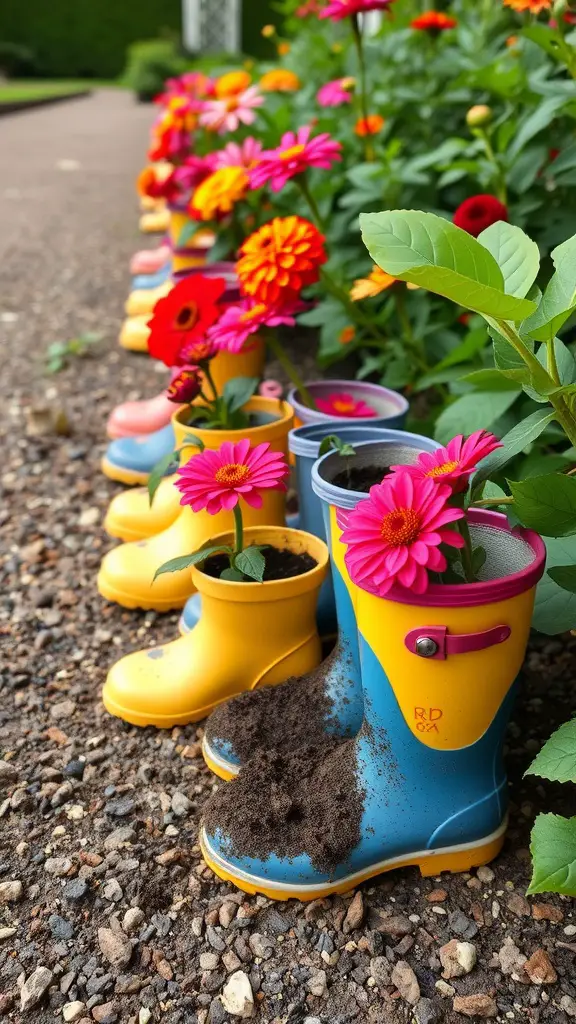
When I first saw the rain boot planters, I was instantly drawn to their playful charm. It’s a fun way to repurpose old boots that may not be wearable anymore. Each planter is unique, vibrant, and brings a dash of color to any garden. You can easily find a mismatched pair or even just one boot to start this project.
To create your own rain boot planters, all you need are some old rubber boots, potting soil, and plants or flowers that you love. I like using cheerful flowers like daisies or petunias, which adds a pop of color. First, I fill the boots with potting soil, making sure to leave a bit of space at the top. Then, I gently press the plants into the soil, ensuring they are secure. It’s a simple task, but it gives me such satisfaction.
One thing that makes this project special is how you can arrange them. I place my rain boots along the pathway to my garden. It creates a welcoming atmosphere while showcasing my personality. I have even painted some of them in bright colors, which makes them stand out even more. Just be aware, if the boots are too bright, they might distract from the flowers.
Don’t forget about drainage too. Although these boots are cute, I have learned the hard way that you must drill holes in the bottom. Otherwise, the soil becomes too soggy, and the plants can die, which is not what we want. If you are like me and enjoy gardening, you’ll find that the rain boot planters not only serve as decoration but also as a fun conversation starter. They definitely bring a smile to everyone who sees them!
Cinder Block Vertical Garden
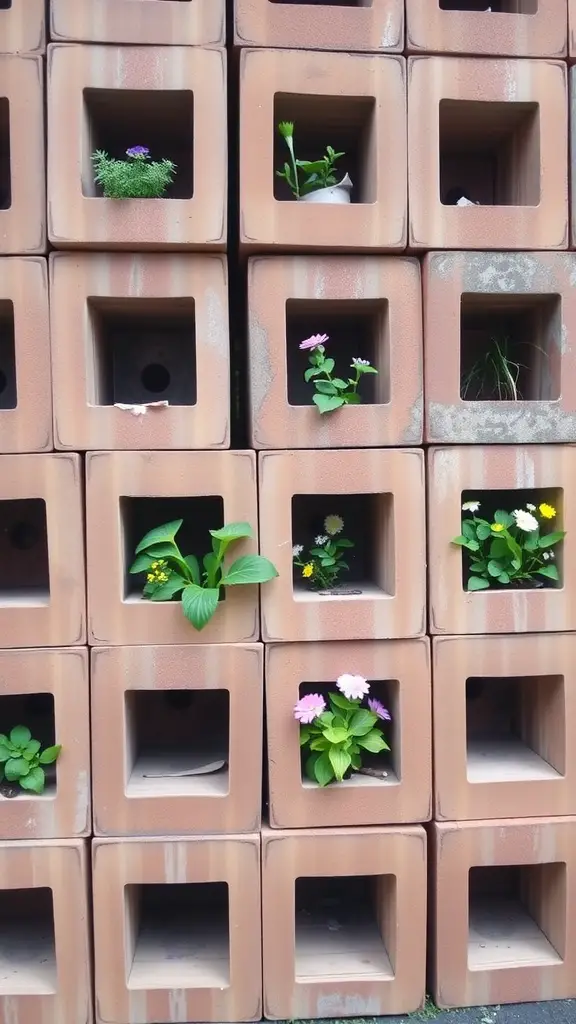
Cinder blocks can be surprisingly versatile when it comes to gardening. I remember the first time I saw a cinder block vertical garden; it was really a simple yet creative way to use space. The blocks create a sturdy structure that allows you to plant flowers and small herbs in their openings, this making them ideal for small yards.
In my own experience, I filled each cavity with a different plant. I used colorful flowers to bring life to the blocks, while herbs like basil and parsley found their home in some of the shaded spots. It was almost like creating a living mosaic. Each time I stepped out to water them, it brought me joy seeing the colors blend together.
Building one is straightforward and doesn’t require advanced tools. Just stack the blocks in a way that suits your space, and make sure to select plants that thrive in your local climate. Some flowers need more sunlight than others, which is something I learned after a couple of trial and error moments.
Another benefit of the cinder block vertical garden is its low maintenance. Once established, these plants do well with minimal attention from what I observed. Just remember to check the soil moisture regularly, especially in hotter months.
Ladder Shelf Planter
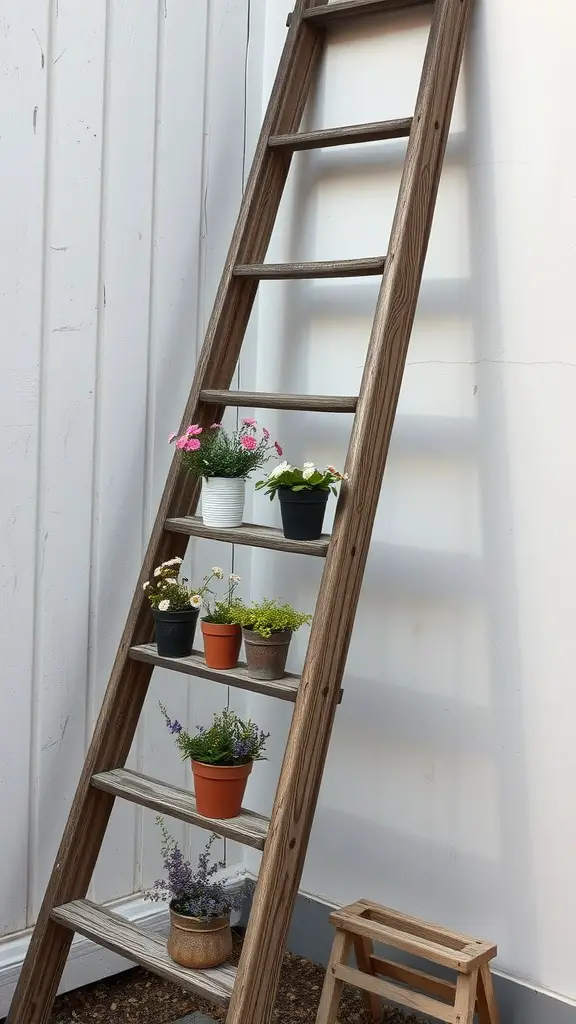
Creating a ladder shelf planter is a delightful way to add some vertical charm to our garden. I remember the first time I saw one; it really caught my eye. The rustic appeal of the wooden ladder, combined with the vibrant pots of flowers, drew me in.
We can easily transform an old ladder into a unique gardening display. It usually takes just a little creativity and some basic tools. I find that placing different plants at varying heights not only promotes healthy growth but also creates visual interest. It is important to choose plants that thrive well together, as this will keep the look cohesive.
When I arranged my own ladder shelf planter, I used a mix of herbs and colorful flowers. This way, they complemented each other, while also being functional. You might want to consider using pots of different sizes to create depth. I remember one time, I used a large pot at the bottom and smaller ones higher up, which added a nice layered effect.
One thing to keep in mind is ensuring that the ladder is stable, as it can easily tip over if not positioned correctly. I found it helpful to place mine against a wall, which added extra support. Overall, a ladder shelf planter can be a fun project that adds personality to any outdoor space.
Recycled Wine Bottle Planters
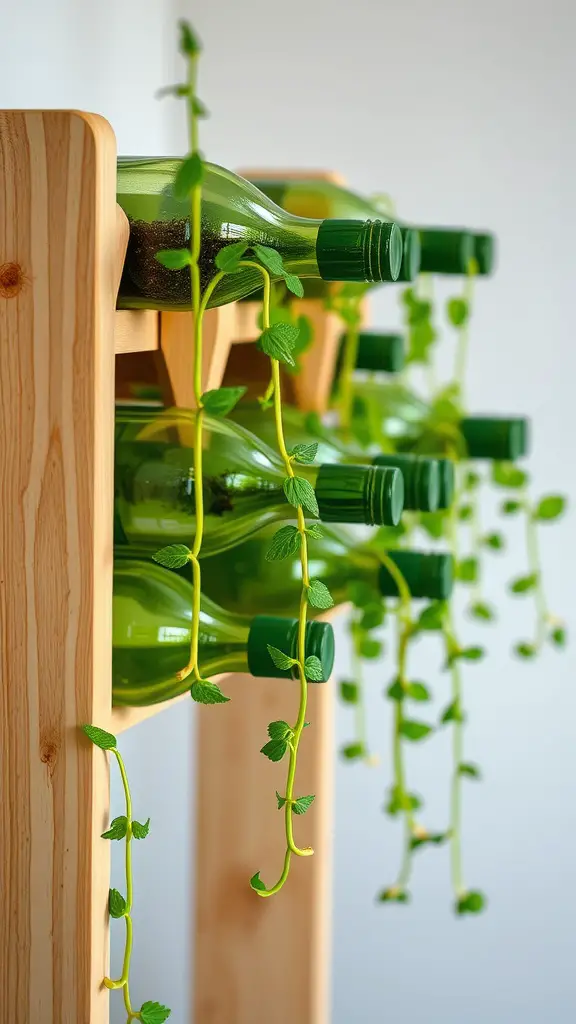
Using recycled wine bottles as planters is a fun way to add some charm to your garden. I remember the first time I tried this idea; I had several empty wine bottles sitting around and thought, why not? The image shows a creative setup where green bottles are arranged neatly, supporting lovely green vines that cascade down. It creates a fresh and lively atmosphere that really brightens up any space.
To begin, all you need are some empty wine bottles, soil, and your favorite plants. You can use herbs like mint or small flowering plants. It is important to cut the bottles carefully, I made a mistake the first time and ended up with jagged edges. Fill each bottle with soil and place your plant inside. Make sure to leave enough room for the roots to grow. Water them regularly and watch as they flourish.
What I love about using recycled wine bottles is not just the uniqueness of the planters, but also how eco-friendly it is. We are giving old bottles a new life, instead of tossing them away. Additionally, it adds a personal touch to your garden, every time I walk by my little setup, I feel proud of my handiwork. It also spark conversations with friends who visit. They often ask how I made them.
Moreover, if you place them in a sunny spot, the plants thrive, and the bottles look stunning against the greenery. I sometimes even paint the bottles for added flair. This DIY project is easy and enjoyable, it’s a perfect weekend activity.
Wicker Basket Planters

Wicker basket planters are a delightful way to bring a touch of charm to your garden. I love using these woven beauties as they add a rustic feel to any space. When I first decorated my balcony with wicker baskets, I was amazed at how much warmth they brought into the area.
These baskets can be used for a variety of plants, from vibrant flowers to lush greenery. I remember filling one with bright pink daisies and white petunias, which made my outdoor space feel so alive. The contrast of colors really stands out against the natural texture of the wicker.
One thing I learned is that it is important you line the inside of the basket to retain moisture, which is essential for the plants. I often use burlap or a plastic liner, but make sure that the drainage holes are intact, otherwise the roots might get waterlogged. This is a step many forget, but it can make a difference.
Wicker basket planters are not just functional; they are also a statement piece in your garden or on your patio. Each basket, I feel, has its own story to tell. Sometimes I like to mix and match different styles and sizes, creating a playful yet cohesive look.
When I sit outside with a cup of coffee, I enjoy admiring the way the sun hits the baskets, highlighting the intricate weaving. If you are considering adding some to your space, I would say go for it! You will find that they bring joy and beauty to your gardening experience.
Drawer Garden Planters
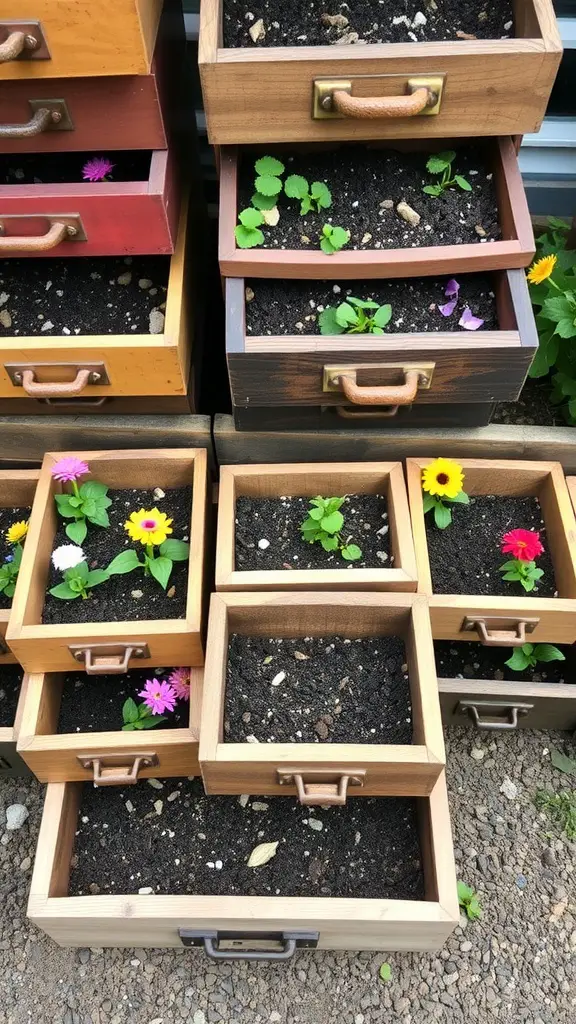
When I first stumbled upon the idea of drawer garden planters, I was instantly captivated. Using old drawers as planters not only adds a unique touch to your garden, but it is also an eco-friendly way to repurpose items that might otherwise go to waste. The image shows an arrangement of colorful drawers, some filled with rich soil, while others are just waiting for seeds or plants.
To create drawer planters, I recommend choosing a variety of sizes to add depth and dimension to your garden space. The colors of the drawers can also bring vibrancy, especially with cheerful blooms peeking out. I have filled my own with herbs and small flowers, which not only look charming but also offer fresh ingredients for cooking.
In terms of materials, it is crucial to ensure that your drawers have proper drainage. I learned this the hard way when I used a drawer without holes once, and my plants drowned. Drill a few small holes in the bottom of each drawer before adding soil. Then, I filled each with a mixture of potting soil and compost to provide nutrients for the plants.
Arranging them in a staggered formation or even stacking them can create a playful and whimsical vibe. This setup also allows for easy access to your plants. I sometimes find myself grabbing fresh herbs right outside my kitchen. One thing to consider is that larger drawers can hold more soil, which is beneficial for bigger plants.
Ultimately, drawer garden planters are not just a creative way to elevate your garden; they also serve as a conversation starter. Friends who visit often compliment the look, and it makes me proud to share my gardening journey. So, if you are looking for a fun and simple project, I suggest giving drawer planters a try. You will likely find joy in watching your plants grow in such a quirky setting.
Toy Truck Planter
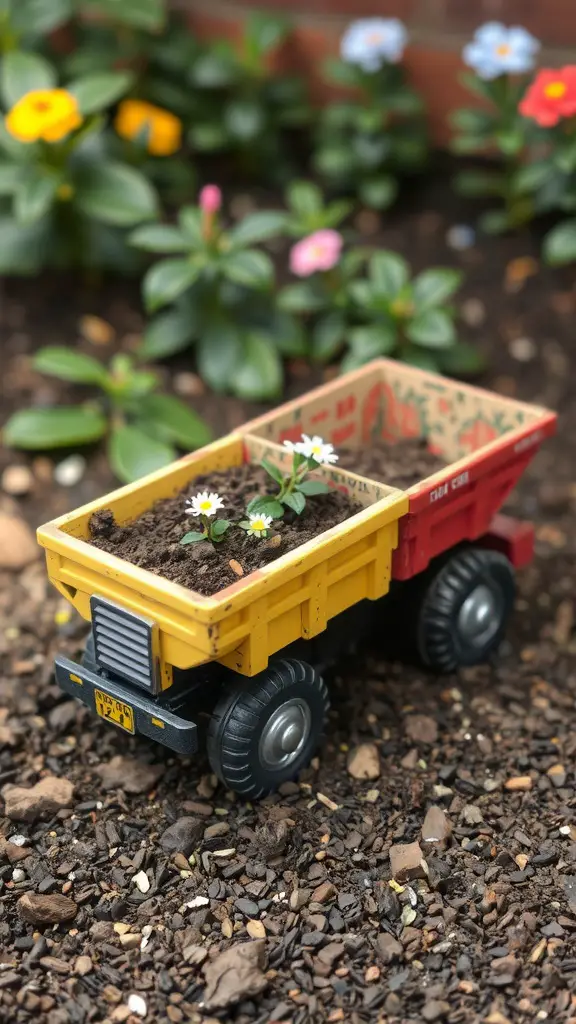
One of the most unique DIY planter ideas I’ve come across is the toy truck planter. It brings a fun touch to any garden. The bright yellow and red colors of the truck stand out beautifully against the green background of flowers. I remember when I first spotted an old toy truck in my garage, I thought it was perfect for planting some small flowers.
To create a toy truck planter, you just need to find an old toy truck, fill it with soil, and add your favorite plants. I chose tiny daisies for mine, and they fit perfectly in the bed of the truck. This project not only recycles a toy but also adds a playful element to the garden, which makes it more inviting.
Seeing the little flowers bloom from the truck brings me joy. It reminds me of childhood days when I played with trucks in the backyard. Placing it among the other plants creates a delightful contrast, and it becomes a conversation starter for visitors. It is always fun to see people smile at the sight of it.
Overall, a toy truck planter is a simple but effective way to add character to your garden. It allows for creativity to shine through and gives a new life to something that might have been forgotten. I encourage everyone to give it a try; you will not regret it!
Hanging Gutter Planter
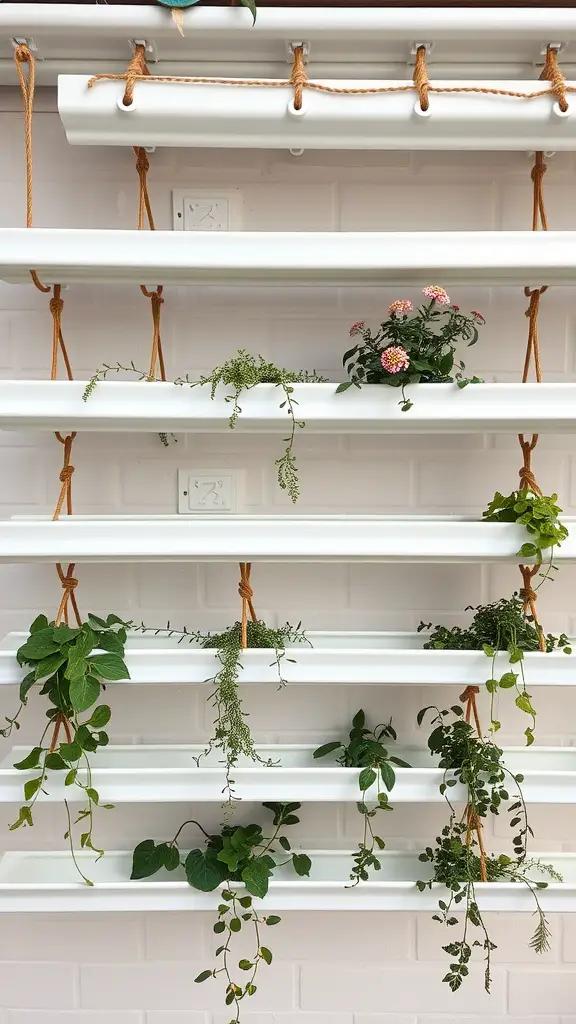
One of my favorite DIY projects has been creating a hanging gutter planter. It is both practical and stylish, bringing life to any space. I remember how I felt when I first hung it on my wall, instantly transforming the area. The image shows a neat arrangement of white gutters, each filled with various plants, dangling beautifully from sturdy rope.
The gutters serve as perfect planters for trailing plants, herbs, or even flowers. I used a mix of greenery and a couple of small blooms, which added a pop of color. It is crucial to select plants that thrive in the light conditions of your space. I learned this the hard way when I placed a sun-loving plant in a shaded spot and it wilted fast.
To make your own, you will need some simple materials: a few sections of vinyl gutters, rope, and some potting soil. First, cut the gutters to your desired length. You can then drill holes for drainage. After that, hang them securely on a wall with the rope. Finally, fill them up with soil and your chosen plants. Watching them grow and cascade down is truly a joy. I have found that this vertical garden not only saves space but also creates a refreshing focal point in my home.
Toolbox Planter
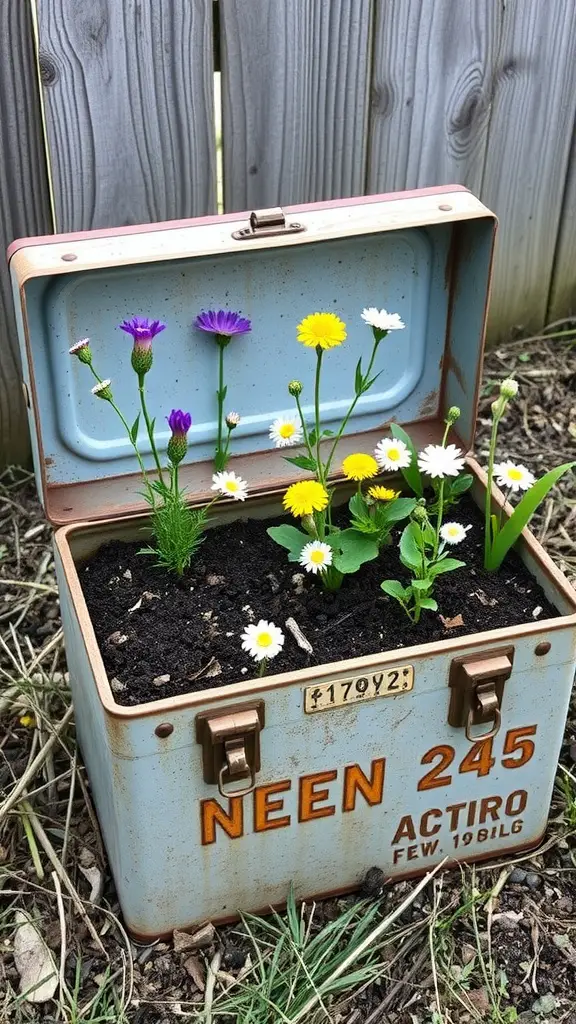
One of my favorite DIY projects has been transforming an old toolbox into a charming planter. It adds a unique touch to my garden, and I love how it stands out among typical planters. The toolbox features bright colors and a rustic vibe, which makes it both functional and decorative.
When I first decided to take on this project, I was looking for a creative way to recycle something I no longer used. The toolbox was just sitting in my shed, collecting dust. I cleaned it up, removed any rusty parts, and filled it with potting soil. Then I chose a variety of flowers like daisies, yellow blooms, and purple asters. These flowers add color and vibrancy to the toolbox.
Additionally, I made sure to drill a few holes in the bottom for drainage. Otherwise, the flowers would not thrive well. Every time I look at my toolbox planter, I feel proud of the effort I put into this project. It is like a little secret garden tucked away, and it reminds me of the joy of gardening.
This planter not only serves as a conversation starter but it also inspires me to create more unique gardening solutions. I think every garden should have a mix of traditional and creative elements. It makes the space feel more personalized, and brings every element together nicely.
Coconut Shell Planters
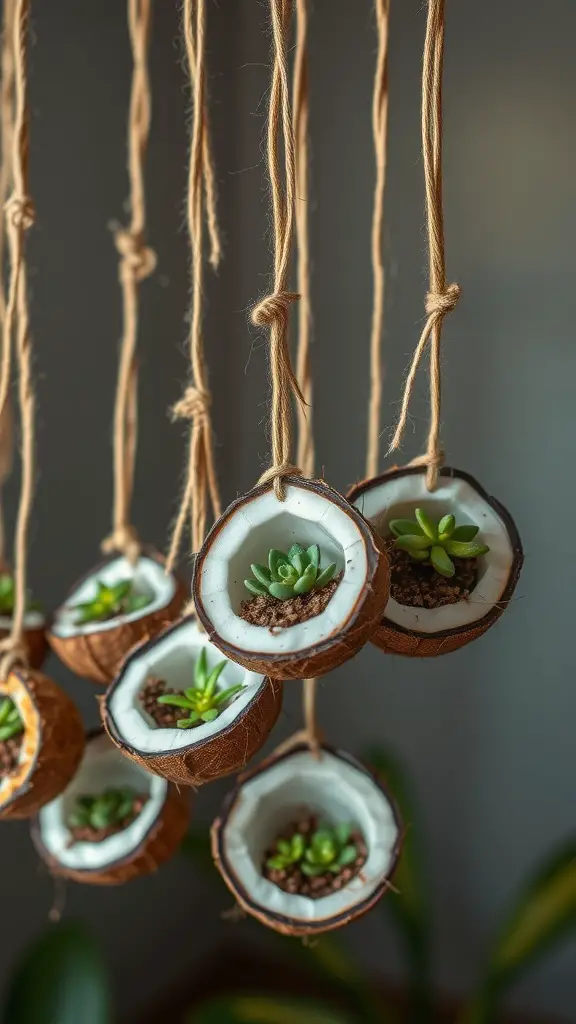
Coconut shell planters are a fun and eco-friendly way to add some greenery to your space. I remember the first time I decided to try this idea; I was amazed at how simple it was to create something unique. The image above shows hanging coconut shells, each cradling a small succulent, which creates a lovely display. These little planters not only look charming but also serve a purpose in recycling materials that might otherwise be discarded.
Starting with a coconut, I carefully cracked it open and saved the shells. I then painted the inside white, which makes the green of the plants really pop. Don’t forget to drill a small hole in the bottom for drainage, it is essential for the health of your plants. I filled the bottom with stones to improve drainage before adding soil and finally the succulents. They are low-maintenance and perfect for someone who may not have a green thumb.
Hanging these coconut shell planters adds an interesting dimension to any room. I found that placing them near a window allows the succulents to thrive while also creating a beautiful visual effect. The strings used to hang them can be anything from twine to colorful yarn. I often swap them out, just to change the vibe a little.
Overall, coconut shell planters not only enhance my garden but they also provide a delightful conversation starter for guests. You can customize them in so many ways, and I often encourage friends to try their hand at this DIY project. It creates a sense of connection with nature, something that we all need more of in our lives.
Wheelbarrow Flower Bed
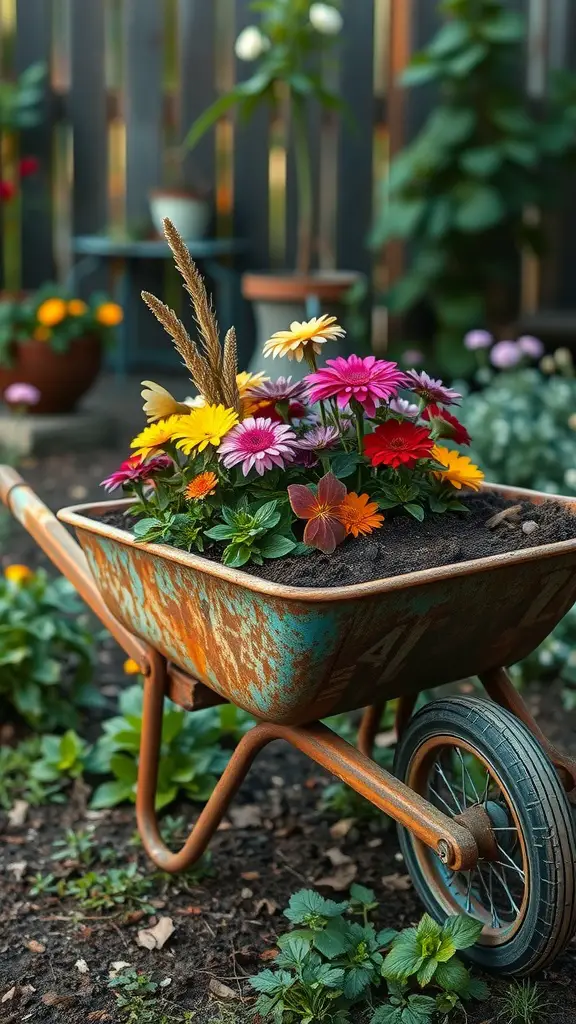
Transforming an old wheelbarrow into a flower bed is one of the simplest ways to add charm to your garden. I remember the first time I decided to try this out. I found a rusty wheelbarrow in my shed, which was no longer functional for its intended purpose. Rather than tossing it away, I thought it would make a unique planter.
After giving the wheelbarrow a good clean, I filled it with potting soil. I used a mix of vibrant flowers, particularly gerberas and pansies, which created a colorful display. The contrast between the rusty metal and the bright blooms is something that always catches my eye. Placing the wheelbarrow in a sunny spot, I watched how it added a touch of whimsy to my outdoor space.
One thing I learned is that drainage is important. I drilled some holes in the bottom to ensure water wouldn’t collect. This made sure the flowers stay healthy, and they thrived beautifully. It was so much fun picking out flowers that complemented each other, and it felt rewarding seeing them grow. I often get compliments from friends who visit, and I enjoy sharing how easy it was to create.
Using a wheelbarrow as a flower bed not only recycles an old tool, but it also introduces a rustic element to my garden. It shows that with a little creativity, common items can be repurposed beautifully. I would highly recommend trying this simple DIY project.
